How To Take Screenshot On Skype With Every Device
 |
| Take Screenshot On Skype - Photo Flickr |
Skype is a messaging app used by people to communicate with others via message chatting, audio calling and video calling. Basically, the importance of taking a screenshot is to show to people exactly what you want others to see on your screen. Additionally, people can also take a screenshot of video calls made through Skype.
Although Skype has a lot of users and subscribers already, most of them are still not sure how to take a screenshot on Skype. Actually, this messaging app does not possess this feature. Instead, users need to use their PC’s function to take screenshot or a third party tool to do so.
How to Screenshot Skype on Windows 7
 |
| Photo wikihow |
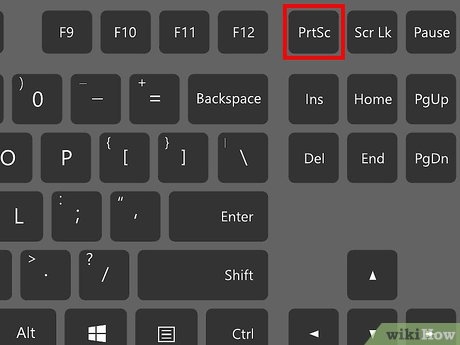
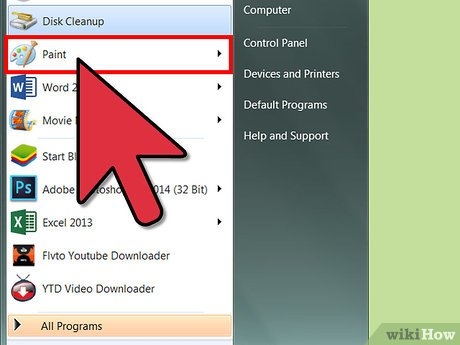
The easiest way to capture Skype on Windows 7 is to press the “Prnt Scr (print screen)” button. When you already clicked on the key, no notification will be given. Simply open “Paint” after clicking on the “Prnt Scr” key and then paste the Skype screenshot on the editing board.
 |
| Photo wikihow |
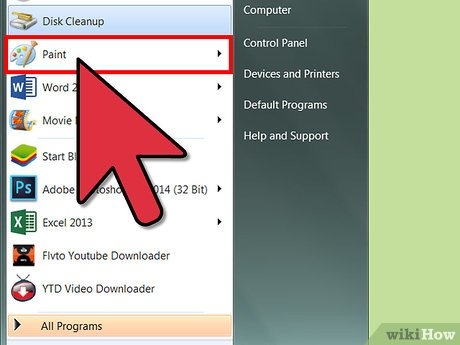
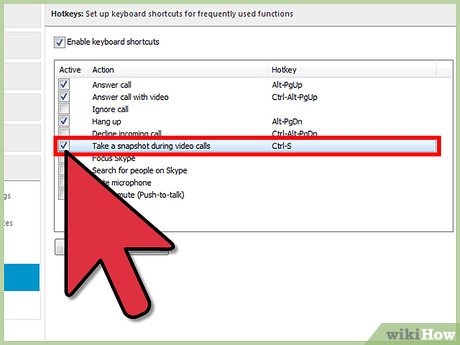
Edit the image if you need to and then click on the disc icon or simply press the combination of “Ctrl + S” shortcut keys to save the screenshot on the computer. Don’t forget to choose the file format and put on the file name. In case more than one window is open, just click on Skype window and then press the combination of “Alt + Prnt Scr” keys to capture a single window. Make sure that is above all the others.
 |
| Photo wikihow |
How to Screenshot Skype on Windows 8
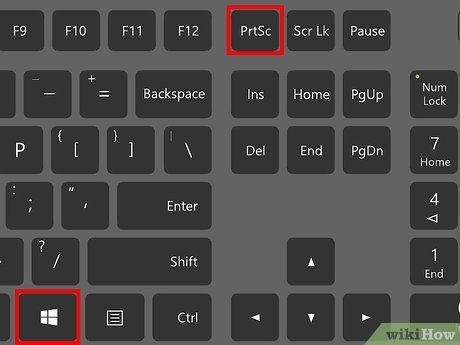
To take a screenshot on Windows 8 is not as tough as we think. If the Skype app is in full screen mode and you want to capture it, simply press “Windows” and “Prnt Scr” keys at the same time. Moreover, just like Windows 7 OS, you can as well take a screenshot of an active window by pressing “Alt+Prnt Scr” keys.
 |
| Photo wikihow |
| How to Quickly Send a Skype Screenshot If you want to share the screenshot that you just captured with the other party, then you won’t have to create a file as it is. As a matter of fact, there is a much more convenient way to send a screenshot without opening any application. All you need to do is capture the screenshot of the Skype conversation, and then switch back to the Skype app. Click the text field, and then press the "CTRL+V" keys to paste the image. Skype will then process the image and will add a timestamp to it automatically. You can now send your screenshot via Skype instantly by pressing the "Enter" key. |
How to Screenshot Skype Call on Mac
Skype is also available on Mac, which also has a way to capture screenshots. The steps are easy and you won’t have any problem as a Mac user. Here are the steps to take a screenshot on your Mac device.
Step 1 Open the Skype Application
 |
| Photo wikihow |
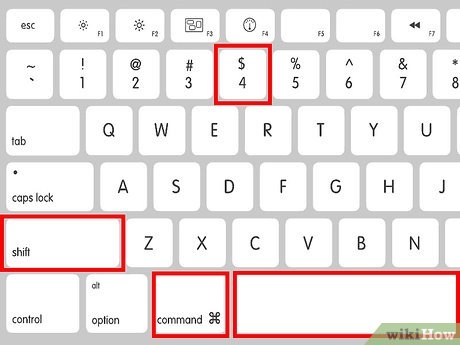
Launch the Skype app on your Mac, and start a video call. To capture a screenshot, press the "Command+Shift+4" keys on your keyboard. The pointer cursor will then change into a screenshot cursor, and you need to click the Skype window to capture it entirely. A shutter sound will be the indication that the screenshot was captured.
Step 2 View the Captured Screenshot
 |
| Photo wikihow |
To view the screenshot, head to your desktop screen. Choose the image that you want and open it using "Preview." The screenshot is saved in PNG format.
How to Screenshot Skype on iPhone and iPad
Next, we have the simple way to take a screenshot in Skype on iOS. This method is not that entirely different from the previous one, since it is also on mobile. However, there is a slight change since its more convenient in-terms of the buttons involved. Follow the steps below to start taking screenshots on Skype iOS.
Step 1 Enable the Assistive Touch Button
First, you need to add the screenshot button on the "Assistive Touch" menu. To do so, go to "Settings," and then tap "General" and then tap "Accessibility." Tap the "Touch" section and enable the "Assistive Touch" button. Next, you need to add the screenshot option to the Assistive Touch menu. Tap the virtual button of Assistive Touch, and then tap the "More" button. Select "Screenshot" from the menu and it will be then added to the menu.
Step 2 Open Skype iOS App
If you don't have a Skype on iOS yet, then install it first from the App Store. After that, launch the app on iOS, and then use it as intended. To start capturing a screenshot, tap the "Assistive Touch" menu and then tap "Screenshot." The image will be then captured and you can tap the "Done" button to save it on your iOS device.
How to Capture Skype Call on Android Devices
Android users can also use Skype using the mobile app. These days, Skype on mobile plays a huge part in bridging the gap between people. This is because you can have a conversation with someone far away anywhere you go. Alongside that, capturing Skype mobile screenshots also became possible. With that being said, here are the steps in taking Skype screenshots on Android.
Step 1 Install the Skype App on Android
First, you have to have a Skype app on your Android device. Get it from the Google Play Store by tapping the "Install" button. After that, launch the app and start up a conversation.
Step 2 Capture Screenshot on Android
When the moment to take a screenshot arrives, you can press the "Volume down" + "Power" button together. The screenshot will be then saved on the Android device gallery. Repeat the step to capture more images. You can open the photo gallery of your Android device after the Skype conversation to check the images.
Best Tools to Use to Screenshot on Skype on All Platforms
Apart from the built-in features of the different operating systems, there are also free online tools which can help to screenshot on Skype.
1. Apowersoft Screen Capture Pro
This is a professional screen cap program which needs to be installed to be able to use. This is a straight forward tool as you can eventually screenshot Skype window or any part of the screen that you want to capture using its 10 capture modes. It also has two sets of editing tool, a simple editor for doing basic editing and an advanced editor for more complex editing. It even has a Task Scheduler which is helpful in capturing screenshot while you’re out. To use this tool, follow the steps below:
a. Download, install and launch Apowersoft Screen Capture Pro.
b. Once installed, start the application and then begin with your Skype conversation.
c. After that, choose a capture mode that you want and an image editor to use.
d. When ready, click the camera icon to trigger the screenshot.
e. Select all-in-one and tick the ‘simple editor’.
f. When you’re finished, you can then save your screenshot by clicking the save button.
Additionally, this tool also has a shortcut key to make it easier to take screenshots. Simply click on “Prnt Scr” key and you can eventually screenshot anything you want to capture.
2. Apowersoft Free Online Screen Recorder
This online tool’s main feature is to record the screen of a computer to produce a high quality video. However, it as well has the function of taking a screenshot, giving users high quality images. To use this tool, simply follow the steps below:
a. Go to Apowersoft Free Online Screen Recorder page.
b. Click on “Start Recording” button and wait for the tool to appear on the screen.
c. Click “Screenshot” tab which is found at the upper part of the tool.
d. Drag a region on the window where Skype window is located to make a screenshot for it and then click on the disc icon to save the file.
 How To Take and Send A Screenshot on WhatsApp Web With Simplest Steps How To Take and Send A Screenshot on WhatsApp Web With Simplest Steps To learn how to send a screenshot on WhatsApp Web with best ways, keep reading the article below. |
 How To Take Screenshot on Snapchat: Top 4 Simplest Methods How To Take Screenshot on Snapchat: Top 4 Simplest Methods To learn how to take screenshots on Snapchat without any notification with best methods, keep reading the article below. |
 How To Read Messages In Facebook Hidden Inbox How To Read Messages In Facebook Hidden Inbox You can not read messages from someone who is not friends with you on Facebook. Facebook has a second inbox for those messages. Read on ... |


