Easy Ways To Take Screenshots On Laptop/PC For Windows, MacOS
 |
| Easy Ways To Take Screenshots On Laptop/PC For Windows, macOS |
A screenshot is probably one of the handiest tools that one can use on both smartphones and PCs. While it's easy to take a screengrab on your phone, you might be wonder how to make it easy on your PC or laptop. Here is the easiest steps to take a screenshot on your PC or laptop for both Windows and macOS systems.
For Windows
1. Take a Screenshot with Print Screen (PrtScn) in Windows
 |
| Photo: Shutterstock |
The Print Screen key on your keyboard can take a screenshot. Depending on the keyboard shortcut you use, you can save the screenshot as a PNG image file or copy it to your clipboard so you can paste it into any application.
The prtscn key is usually found between the F12 key and Scroll Lock key on the top row of your keyboard. It may be labeled something like “PrtScn,” “PrntScrn,” or “Print Scr” instead. On full-size keyboards, look above the Insert key.
On laptop keyboards, the Print Screen key may be combined with another key, but it will be located in that general area of the keyboard. You may have to press your laptop’s “Function” or “Fn” key while using the shortcuts here.
2. Use Snip & Sketch to Take Screenshots on Windows
Windows 10 has a built-in Snip & Sketch tool that provides more powerful screenshot options. You can use it to take a screenshot of a specific region of your screen, capture a screenshot on a delay, or annotate your screenshots.
Note: Windows 10 still contains the classic Snipping Tool, which was introduced in Windows Vista. You can still use the Snipping Tool if you’re familiar with it. However, it’s being phased out in favor of the modern Snip & Sketch tool. Snip & Sketch has all the same options as the Snipping Tool—and more.
Take a Screenshot of Part of Your Screen
To quickly take a screenshot with Snip & Sketch, press Windows+Shift+S. Your screen will appear grayed out and your mouse will transform into a crosshair.
 |
| Photo: Howtogeek |
You will see a bar of several buttons near the top of your screen. Select the function you want. From left to right, here’s what the buttons do:
- Rectangular Snip: You will be able to draw a rectangle over your screen with your cursor. Windows will save a screenshot of the area inside the rectangle.
- Freeform Snip: You can outline an arbitrary shape on your screen with your cursor (or a stylus or finger on a touch screen). Windows will save a screenshot of the area you draw around.
- Window Snip: The cursor will function as a crosshair. You can position it over a window and click to take a screenshot of just that window.
- Fullscreen Snip: This button takes a screenshot of your entire display.
- Close Snipping: Close the overlay without taking a screenshot. (You can also press Esc on your keyboard to do this.)
Snip & Sketch will remember your last used option when you use the keyboard shortcut to open it.
 |
| Photo: Howtogeek |
Annotate or Crop a Screenshot
When you take a screenshot, you will get a notification saying the screenshot was copied to your clipboard. You can paste it into any other application that supports image files. (Use Edit > Paste or Ctrl+V to paste.)
If the notification goes away before you can click it, you will find the notification in Windows 10’s Action Center.
 |
| Photo: Howtogeek |
For more options, click the notification. This will open the Snip & Sketch window with options for writing on, highlighting, erasing, and cropping areas of the image.
There’s also a “Save” button, which will let you save your screenshot as an image file from here.
(The interface will vary according to window size. With a larger Snip & Sketch window, all the options are on the top toolbar. If you resize the window and make it smaller, some of the options will move to a bottom toolbar.)
 |
| Photo: Howtogeek |
Take a Delayed Screenshot
In some cases, taking a screenshot on a delay can help you capture a menu or other interface element that won’t appear unless you’re interacting with it. Snip & Sketch can take a screenshot on a three or ten-second delay.
To find this option, you will need to open the Snip & Sketch application window directly. Click the Start button (or press the Windows Key), search for “Snip,” and launch the “Snip & Sketch” application shortcut.
 |
| Photo: Howtogeek |
To the right of the “New” button in the Snip & Sketch window, click the down arrow and select either “Snip in 3 seconds” or “Snip in 10 seconds.”
 |
| Photo: Howtogeek |
Tip: If you click menu > Options in the Snip & Sketch window, you will find options to open Snip & Sketch when you press Print Screen, choose whether or not Snip & Sketch automatically copies screenshots to your clipboard, and add an outline around your snips (screenshots).
3. Capture a Screenshot (or Video) With the Game Bar on Windows
Windows 10 includes a feature named the Xbox Game Bar. Despite the name, it’s really more of a gaming-focused overlay with a variety of features. It’s particularly useful for taking screenshots of PC games.
By default, Windows+Alt+Print Screen will take a screenshot of the current game or desktop application with the Game Bar. (On some laptops, you may have to press Windows+Alt+Fn+Print Screen.)
You’ll see a “Screenshot saved” notification, and you can click that notification to see your Game Bar screenshots. You can also press Windows+G to open the Game Bar.
 |
| Photo: Howtogeek |
To configure the Game Bar, head to Settings > Gaming > Xbox Game Bar. From here, you can enable or disable the Game Bar feature and customize the keyboard shortcuts that perform these actions. So, if nothing happens when you press these keys, check to see if this feature is enabled in Settings.
 |
| Photo: Howtogeek |
Screenshots you take with this tool are saved to C:UsersNAMEVideosCaptures. (Yes, even screenshots are shared to the Videos folder.)
The Game Bar also lets you record videos of your Windows 10 screen. You can even use it to record videos of your desktop or any other application. You can record much more than just games. The video file will be saved to the C:UsersNAMEVideosCaptures folder in H.264 MP4 format.
 |
| Photo: Howtogeek |
4. Use the Snipping Tool
Snipping Tool remains in Windows 10, though it’s been superseded by Snip & Sketch. If you’re clinging to Windows 7, you won’t have the option to use Snip & Sketch (detailed above), so Snipping Tool is for you. To use this, you'll need to actually run the utility; typing "snipping" in the Windows search box at lower left and tapping Snipping Tool gets you started.
Like Snip & Sketch, Snipping Tool lets you capture free-from or rectangular selections or the full window or full screen. You can time-delay a screenshot, as well, from one to five seconds. It also lets you mark up your image with a pen or highlighter. Snip & Sketch (as noted above) does all that and adds cropping, a ruler, and a pencil.
5. Use Snagit in Windows
Snagit still has at least one major benefit over Windows’ built-in screenshot tools: You can snap away, and all your shots remain in the utility’s repository, available at any time you might need them later. It’s the least disruptive way to shoot screens while continuing your work. After you’re ready to deal with the shots, you can browse the history and save the images you want to the folder of your choice.
Snagit also includes advanced tools like video and scrolling window screenshot tools. It offers handy image-editing and drawing tools, including brightness, arrows, text overlay, and borders. The downside? A Snagit license will set you back $49.95, but for those who need its advanced functionality, it’s worth the money.
Mac screenshots: 4 ways to capture your MacBook's screen
Command-Shift-3
This keyboard shortcut captures a screenshot of your entire screen.
Shift-Command-4
Use this keyboard combo to turn your cursor into a crosshair, which you can drag to select a portion of your screen to capture. Release the mouse button or trackpad to take the shot.
You have a number of other options after hitting Shift-Command-4:
Press and release the space bar: The crosshair turns into a little camera icon, which you can move over any open window. Click on your desired window to take a screenshot of it. A screenshot captured by this method features a white border around the window with a bit of a drop shadow.
Press and hold the space bar (after dragging to highlight an area but before releasing the mouse button or trackpad): This locks in the shape and size of the selection area but lets you reposition it on the screen. It's very handy if your initial selection area is off by a few pixels; just hold down the space bar to reposition it before releasing the mouse button to snap a screenshot.
Hold down the Shift key (after dragging to highlight an area but before releasing the mouse button or trackpad): This locks in each side of the selection area made with the crosshairs save the bottom edge, letting you move your mouse up or down to position the bottom edge.
Without releasing the mouse button, release the Shift key and hit it again to reposition the right edge of your selection area. You can toggle between moving the bottom edge and right edge by keeping the mouse button or touchpad engaged and pressing the Shift key.
Shift-Command-5
A relatively new shortcut command introduced in MacOS Mojave (2018), this combination calls up a small panel at the bottom of your display with your screen capture options. There are three screenshot buttons that let you capture the entire screen, a window or a selection of your screen.
Likewise, the two video-recording buttons let you record your entire screen or a selection of it. On the left is an X button to close the screenshot panel, but you can also just hit the Escape key to exit out.
On the right side is an Options button. It lets you choose where to save your screenshot -- Desktop, Documents, Clipboard, Mail, Messages or Preview -- and set a 5- or 10-second delay so you can line up items that might otherwise disappear when you engage your screenshot tool.
By default, the Show Floating Thumbnail option is enabled, which puts a little preview thumbnail of your just-capture screenshot in the lower-right corner of your screen, similar to the screenshot procedure with iOS. Unlike your iPhone ($899 at Amazon), you can turn off this preview thumbnail on your Mac. Lastly, you can choose to show your mouse pointer in a screenshot or video.
If the screenshot panel is in your way, you can grab its left edge and drag it to a new spot on your screen.
Bonus for Touch Bar MacBooks: Command-Shift-6
If you've got the 16-inch MacBook Pro or another model with the Touch Bar, did you know you can take a screenshot of what's currently showing on the Touch Bar? Just hit Command-Shift-6 to take a very wide and skinny screenshot of your Touch Bar.
Easy annotation
If you embrace the Floating Thumbnail, then you'll gain quick access to Markup tools to annotate your screenshot. You can swipe the Floating Thumbnail away or just let it slip away on its own and it'll be saved to the spot you last saved a screenshot. Click the Floating Thumbnail and it'll open in a Markup View preview window (but not Preview) with all of the markup tools you get in Preview.
You can right-click the Floating Thumbnail to:
- Save the screenshot to your desktop, Documents folder or clipboard
- Open it in Mail, Messages, Preview or Photos
- Show in Finder
- Delete
- Open in in the Markup preview window described above
- Close (and save)
Longtime Mac screenshotters may be slow to adopt the new Command-Shift-5 shortcut, but I find myself using it more for the ability to annotate screenshots without needing to open Preview and quickly delete screenshots that I know immediately I messed up. The 5- and 10-second delay options are also useful and appreciated additions.
 How To Take Screenshot on Windows or Laptop: Best Methods How To Take Screenshot on Windows or Laptop: Best Methods Check out the article below as a detailed guide on how to take screenshot on Windows or laptop with different methods. |
 How to Take Screenshot on Samsung Galaxy S3: Check out the Simplest Methods How to Take Screenshot on Samsung Galaxy S3: Check out the Simplest Methods Capturing the screen is a great way to save something for posterity and show it off to your friends. Check out the simplest methods to ... |
 How to Set a Screenshot Timer on Your Mac How to Set a Screenshot Timer on Your Mac Apple MacBook provides us with tools and apps that help taking screenshot process much easier. Here is how you can set a screenshot timer and ... |
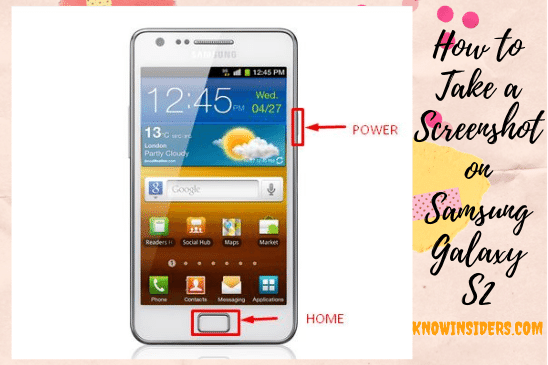 How to Take Screenshot on Samsung Galaxy S2 How to Take Screenshot on Samsung Galaxy S2 Taking a screenshot using the Samsung Galaxy S2 works the same way as you do with an iPhone, very simple and quick. Check out the ... |