The Newest and Simplest Ways To Screenshot Any Dell Laptop or Computer
 |
| Photo Business Insider |
Whether you have a Dell laptop or desktop computer, it's easy to take and save a screenshot.
The process is the same no matter what kind of PC you own, so once you learn the process you can repeat it on any computer.
Method 1: Take Screenshot In Dell Laptop Using The Print Screen key
Almost all the Dell Laptops have the Print Screen key which makes taking screenshots on Dell’s laptop very easy.
Whenever you press the Print Screen key of your Dell Laptop or Desktop, your computer takes a photo of your entire screen and saves it to the system clipboard. Then from the system’s clipboard, we can save it on our computer using Microsoft Paint or Paint 3D application.
Use the following steps to take a screenshot in Dell Laptop using the Print Screen key.
1) Navigate to a page on which you wish to take a screenshot.
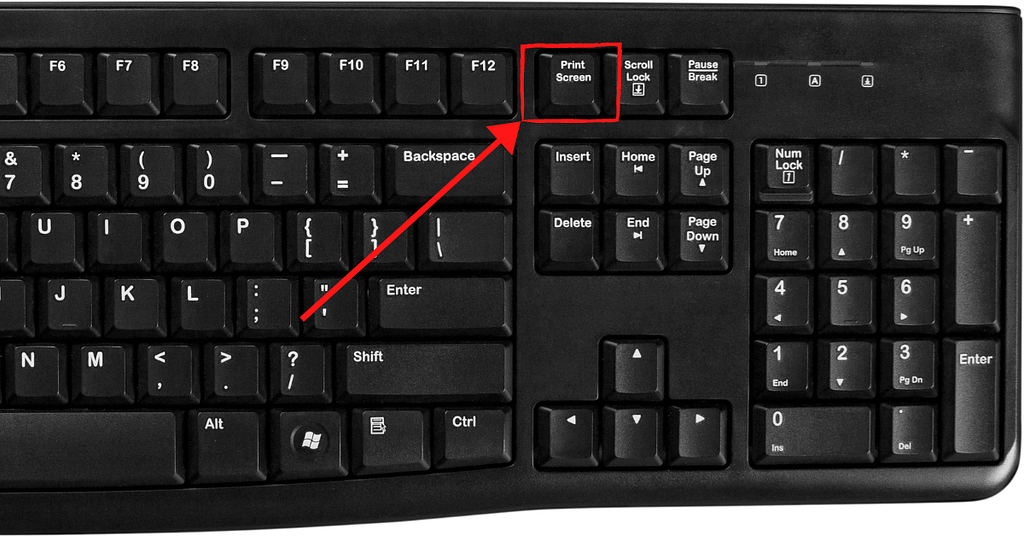
2) Press the Print Screen key.
 |
| Photo techtvindia |
By pressing the Print Screen key everything present on the screen excluding the mouse cursor will be captured.
3) Load a Paint program such as Microsoft Paint or Paint 3D.
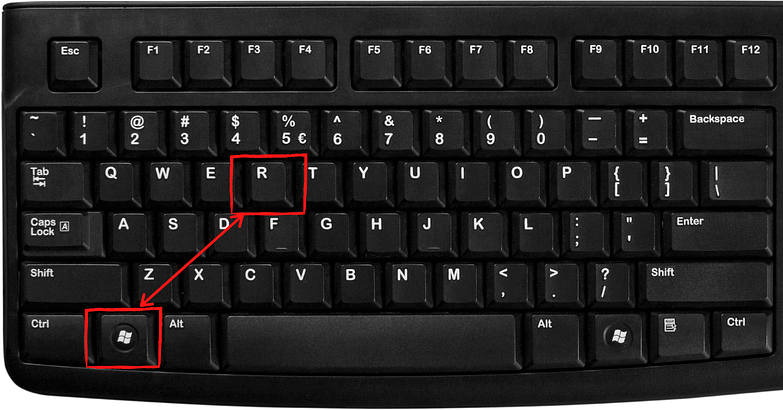
To load the Paint Program, press the Windows logo key + R key at the same time, which will open the Run window. Type “mspaint” and hit enter to open the Paint Program.
 |
| Photo techtvindia |
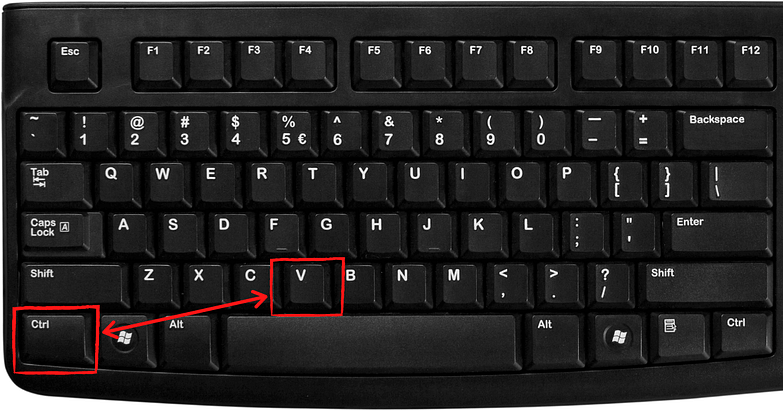
4) Press Ctrl + V to paste the screenshot in the Paint Program.
 |
| Photo techtvindia |
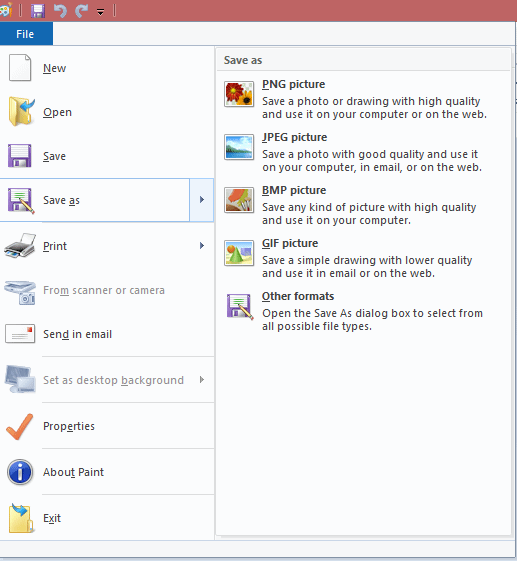
5) Click on the File button (present at the top left corner of the screen) and then select “Save as”
 |
| Photo techtvindia |
6) From here you can save your screenshot in multiple image formats as per your requirement. Available image formats are png, jpeg, bmp, gif, and other formats.
| What to Know Dell labels the Print Screen key in different ways on different models of Dell laptops. Press the dedicated Print Screen key located on the top upper-right row of the keyboard. Use Ctrl + V to paste the captured screenshot in any application, chat windows, or social media message. |
READ MORE: Top 11 Best Ways to save your laptop's battery life
Method 2: Take Screenshot In Dell Laptop Using The Combination Of Print Screen key and Windows Logo Key
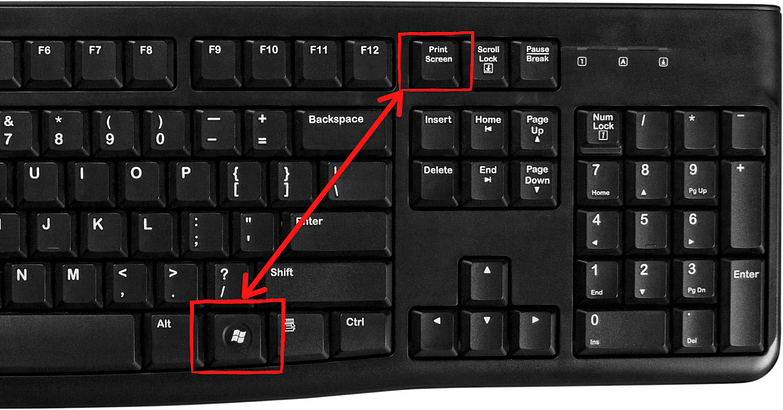
Method 1 is the most common way of taking screenshot. But the smartest way to take screenshots in Dell laptop using the Print Screen key is by pressing the Windows logo key and Print Screen key simultaneously. It will save the screenshot directly into the Pictures directory of the currently logged in user.
1) Navigate to a page on which you wish to take a screenshot.
2) Press the Windows Logo key and the Print Screen key at the same time to take a screenshot.
 |
| Photo techtvindia |
Captured screenshot will be saved to the Picture folder. The Pictures folder is generally located at C:UsersusernamePicturesScreenshots.
| Note Some systems may require pressing the Fn key before pressing the Print Screen key. The Print Screen key is usually located in the upper right-hand corner of the keyboard. Some keyboard models label the Print Screen key differently, such as PrintScreen, PrntScrn, PrntScr, PrtScn, PrtScr, PrtSc, or a similar abbreviation. Other keyboards may not have a separate Print Screen key. In this case, you can perform the Print Screen function by pressing and holding down the Fn + Insert keys together. |
Method 3: Screenshot with Snipping Tool on Dell Laptop
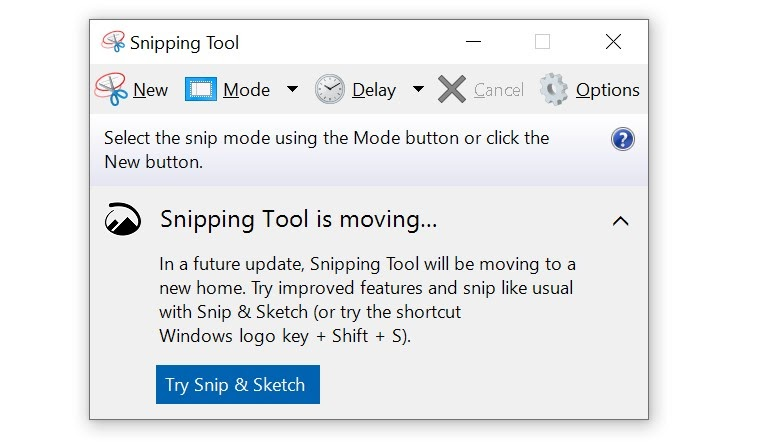
If you want to opt for a different option, you can use the Snipping Tool instead. This is a built-in Windows feature that allows you to capture your screen in different shapes. To go to the Snipping Tool, click on the Start Menu and type ‘Snipping Tool’ in the search section. The application will appear with a variety of options at your disposal.
 |
| Photo markuphero |
1) Select ‘New’ or press ‘Ctrl + N’ together. Choose the shape in which you want to capture your screenshot. The rectangular snip is the default option. Three other forms include:
The Free Form Snip: This feature facilitates capturing your screen in any shape you want to.
The Window Snip: The Window Snip lets you capture your active windows with one simple click.
The Full-Screen Snip: The Full-screen Snip captures the entire screen at once. This feature will be particularly handy if you’re using multiple monitors.
2) Once you’ve taken your snapshot, press ‘Ctrl + S’ to save the image in your desired location.
READ MORE: LastPass password Tool: Changes, How Useful, Available on Phones or Laptop?
Method 4: Capture a scrolling screenshot on Dell Laptop
Use the following steps to take a screenshot in Dell Laptop using the Snagit Tool.
1) Download Snagit
2) How To Take Screenshot In Dell Laptop
Once downloaded, open the Snagit application.
3) At the top of your screen, press the red circle button to access the screenshot camera.
Select the camera icon for a screenshotted image or the recorder icon for a screenshotted video.
Select the portion of the screen you wish to snap.
Your desktop image will appear in the Snagit application. You can edit, annotate, resize, copy, and save the clipped image from there.
| BONUS: How to check Dell laptop model name or number There are many ways to find the model number of the Dell laptops, here we mentioned two of them. Look for the product label on your computer. For Laptops and Tablets The label may be on or near the: Bottom cover, base, or back of the product Battery compartment Screen, keyboard trim, or palm rest For Desktops and all-in-ones The label may be on the: Back, top, or side of the tower case Lower back of the all-in-one case or stand Access your computer’s BIOS. BIOS stands for “basic input/output system.” When you turn on your computer, this software runs first to check that your hardware is working and then allows Windows to start. You can access the BIOS to find information about your computer and its hardware without using Windows. To find your product model using the BIOS. Turn on your computer. As soon as you see the Dell logo screen, press the F2 key once per second to access the BIOS. If Windows starts, then you must restart your computer after the startup completes and try again. On the BIOS menu, find the product model in the menu title or listed under System Name. |
 How to Take A Screenshot on Samsung Devices With Simple Tips How to Take A Screenshot on Samsung Devices With Simple Tips Useful tips to take a screenshot on a Samsung Galaxy S or Note phone. Don't forget to save them! |
 How to Screenshot Netflix - Three Ways to Capture How to Screenshot Netflix - Three Ways to Capture There are many tools that could help you get a screenshot on Netflix. Check out the tips how to take a screenshot of Netflix ... |
 How to Take a Screenshot on Every iPad Device? How to Take a Screenshot on Every iPad Device? Three simple ways to take a screenshot on iPads of any generation. Check it out! |


