4 Simple Ways To Take Screenshot On iPhone 14: Siri, Assistive Touch, Back Tap, Physical Buttons
 |
| 4 Simple Ways To Take Screenshot On iPhone 14: Siri, Assistive Touch, Back Tap, Physical Buttons. Photo KnowInsiders |
| Contents |
Upgrading to a newer iPhone is always exciting, however it can come with some unexpected changes. For example, the way you take screenshots will change if you go from an iPhone SE to an iPhone 14.
However, the leap isn't as drastic as you may think. Here's what you need to know to take screenshots if you're upgrading to iPhone 14.
Physical Buttons: most common way to take a screenshot on iPhone
Of course, it is applicable for iPhone 14.
 |
| Photo pocket lint |
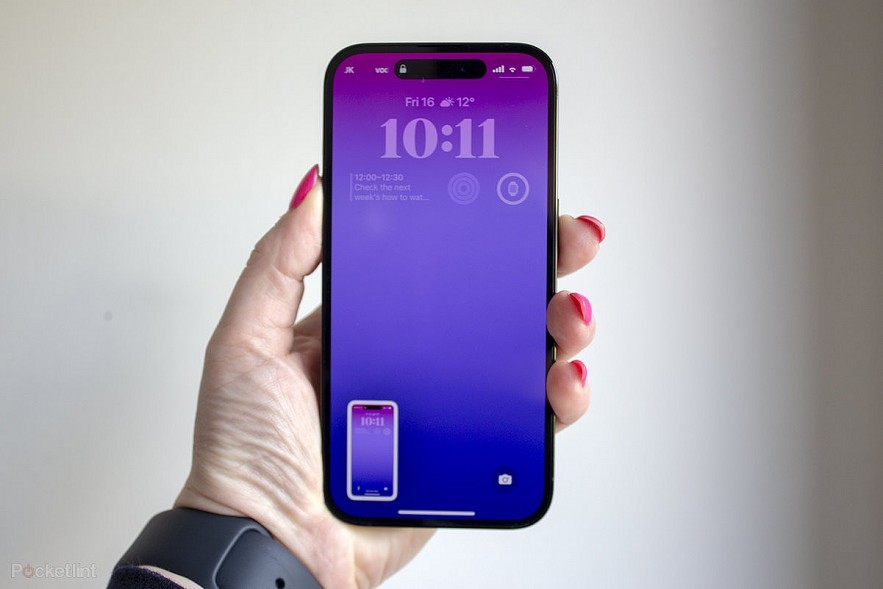
If you are new to the iPhone, all you need to do is press the Side button (on the right side) and the Volume Up button (on the left side) together. Pressing both the buttons together will result in a screenshot as well as an audible camera shutter sound effect. The sound effect will not be heard when your device is on silent.
A preview of the screenshot will appear at the bottom left of your screen. Swiping the preview to the left will remove the screenshot from your screen. If you tap on the image, you will get options to edit your screenshot. There will also be an option to share the screenshot directly from this screen. Screenshots captured on an iPhone are saved in the Photos app under the album Screenshots.
Take a screenshot on iPhone 14 with tapping
On iOS 14 or later, you can quickly take screenshots by tapping the back of your iPhone. This is possible using ‘Back Tap‘, an accessibility feature that lets you initiate a back tap using either a double-tap or triple-tap gesture. Although it’s a handy feature, you may accidentally take a lot of screenshots if you aren’t careful while handling your iPhone.
To screenshot on your iPhone 14 using double tap:
Go to Settings > Accessibility.
Under Physical and Motor, tap on ‘Touch’.
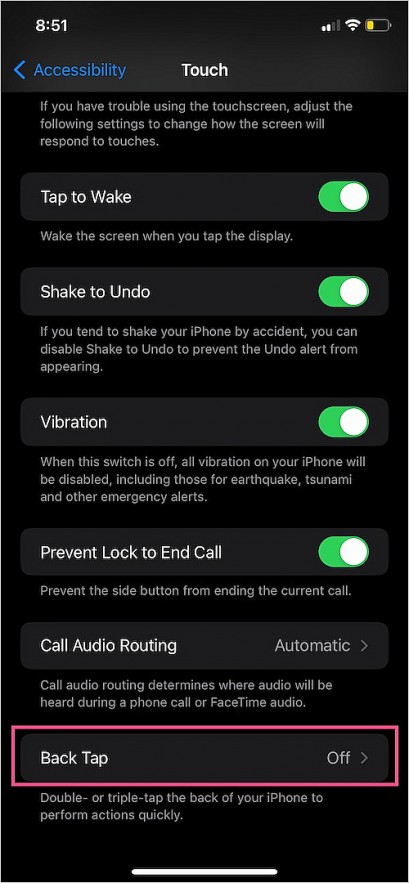
Scroll down to the bottom and select “Back Tap”.
 |
| Photo webtrickz |
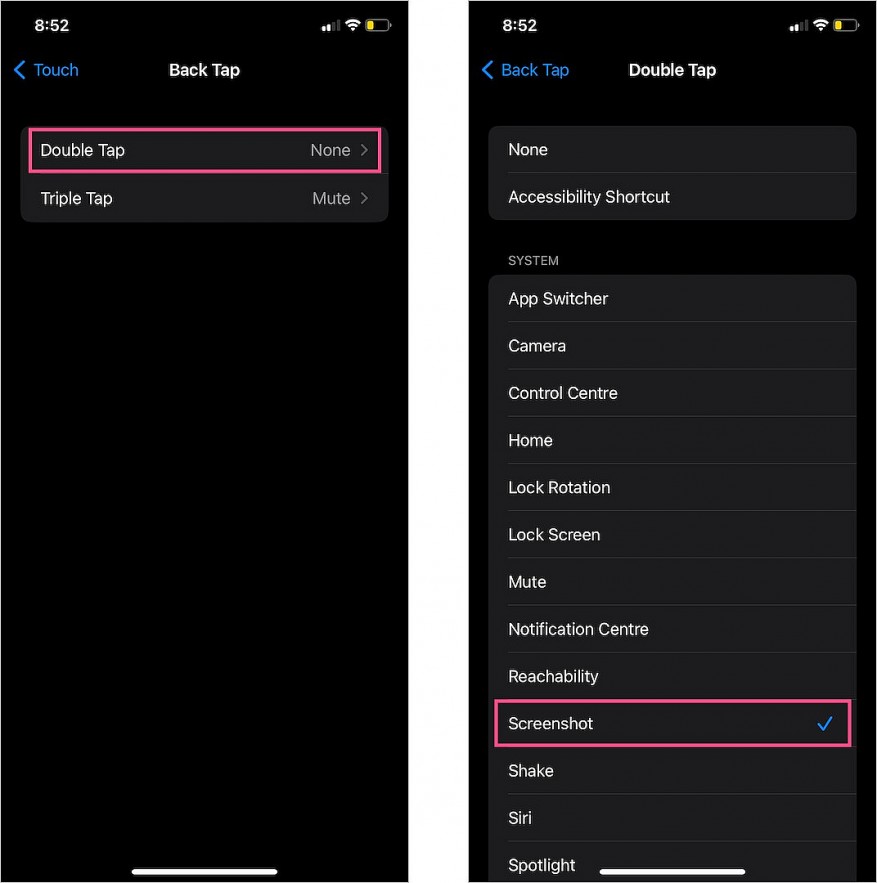
Tap on ‘Double Tap’ and select Screenshot. Optionally, you can use Triple Tap action as well.
 |
| Photo webtrickz |
That’s it. Now double-tap (or triple-tap) firmly on the back of your iPhone to take the screenshot.
Take a screenshot on iPhone 14 with Assistive Touch
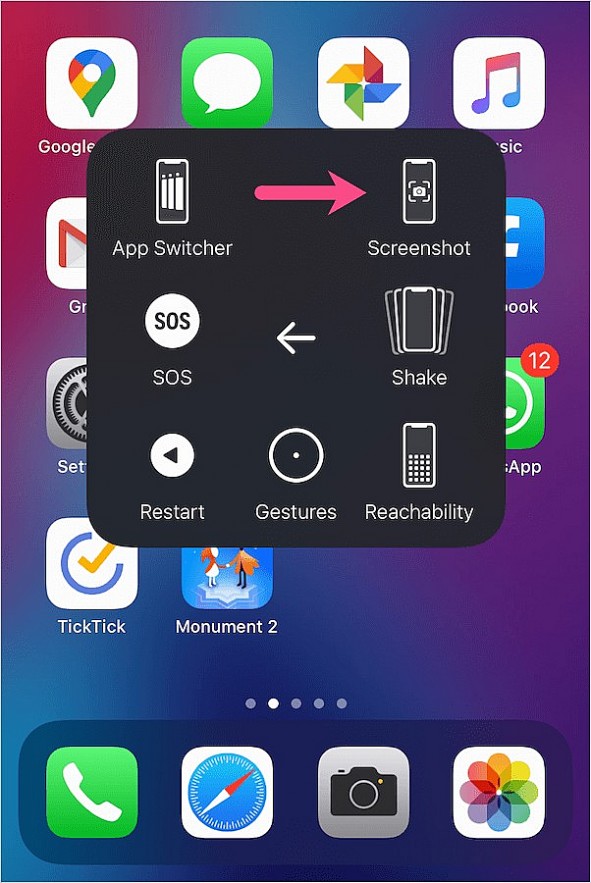
You can also use Assistive Touch to screenshot on an iPhone 14 without buttons. This is a fairly easy way and is useful for people who capture their screen frequently and want to take a screenshot without the volume button.
For this, you first need to enable AssistiveTouch on your iPhone if it isn’t enabled already. Here’s how you can do it.
 |
| Photo webtrickz |
 |
| Photo webtrickz |
Go to Settings > Accessibility > Touch.
Tap on ‘AssistiveTouch’ at the top and turn it on.assistive touch settings in ios
Once AssistiveTouch is enabled, you will see a translucent button on the screen that you can drag and move.
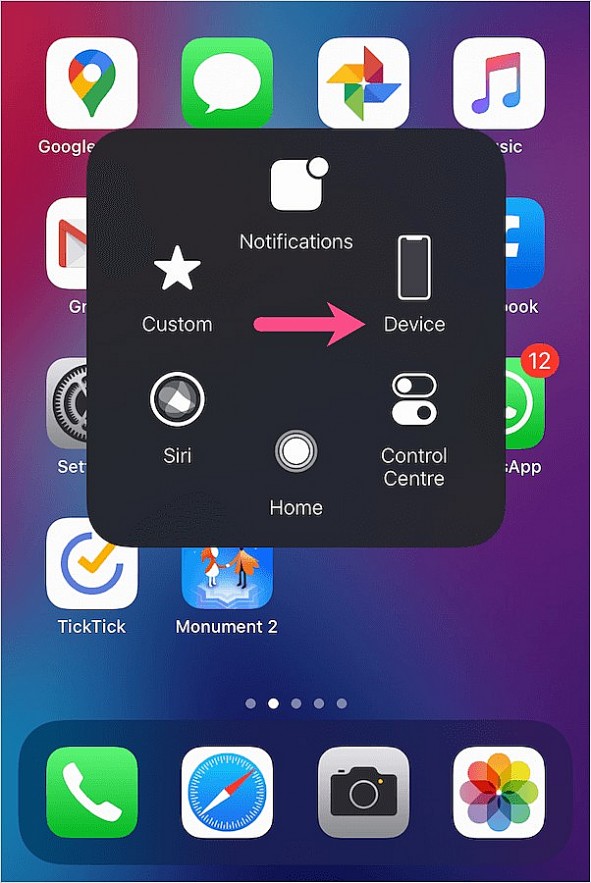
| TIP: You can also ask Siri to “Turn on AssistiveTouch.” To take a screenshot using Assistive Touch, tap the floating button. Then navigate to Device > More and tap the ‘Screenshot’ option from the menu. |
Take a screenshot on iPhone 14 with Back Tap
On your iPhone 14, you can also assign the Back Tap gesture as a shortcut to take a screenshot.
First, head to the Settings app, either from the home screen or the app library.
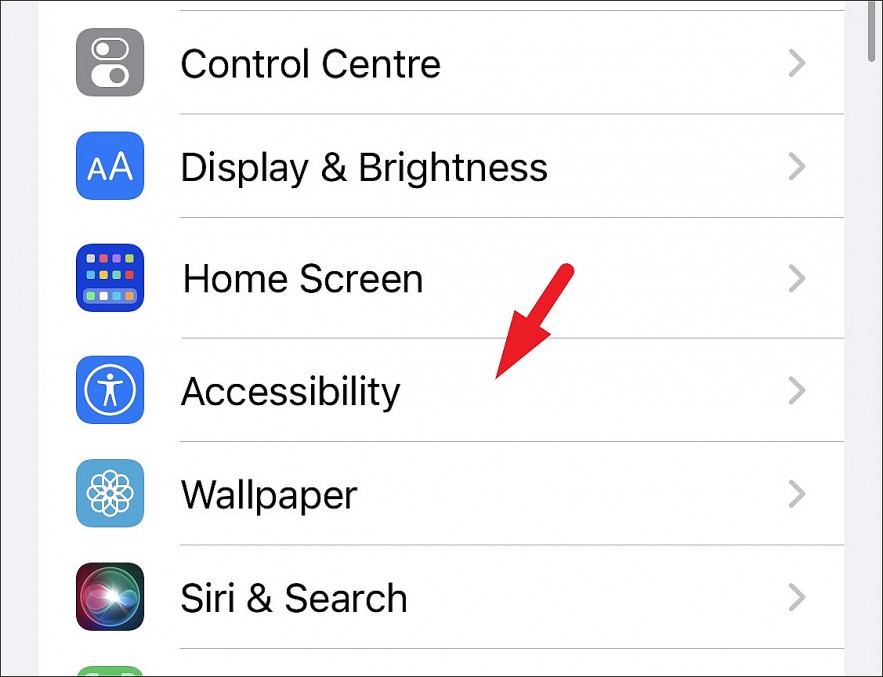
Next, tap on the ‘Accessibility’ tab from the list to continue.
 |
| Photo Allthings |
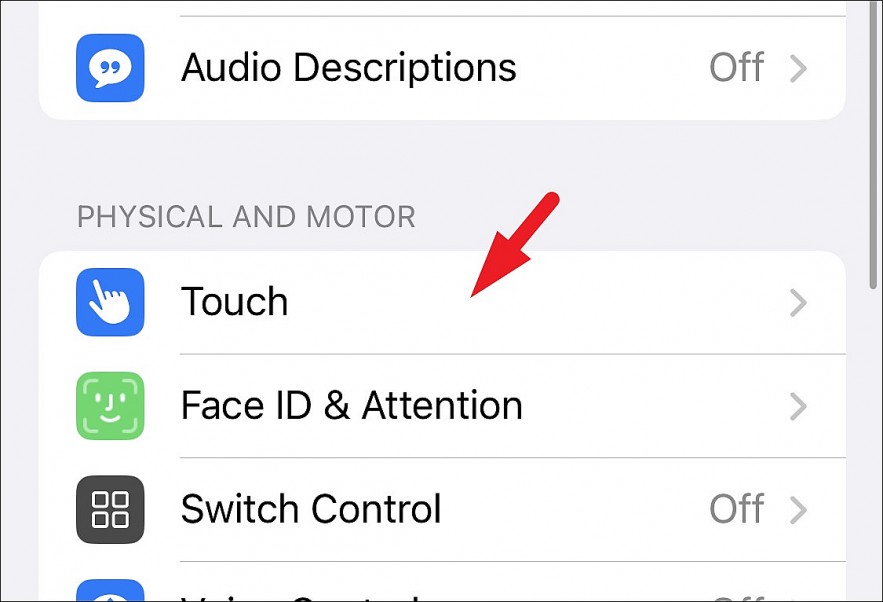
After that, tap on the ‘Touch’ option.
 |
| Photo Allthings |
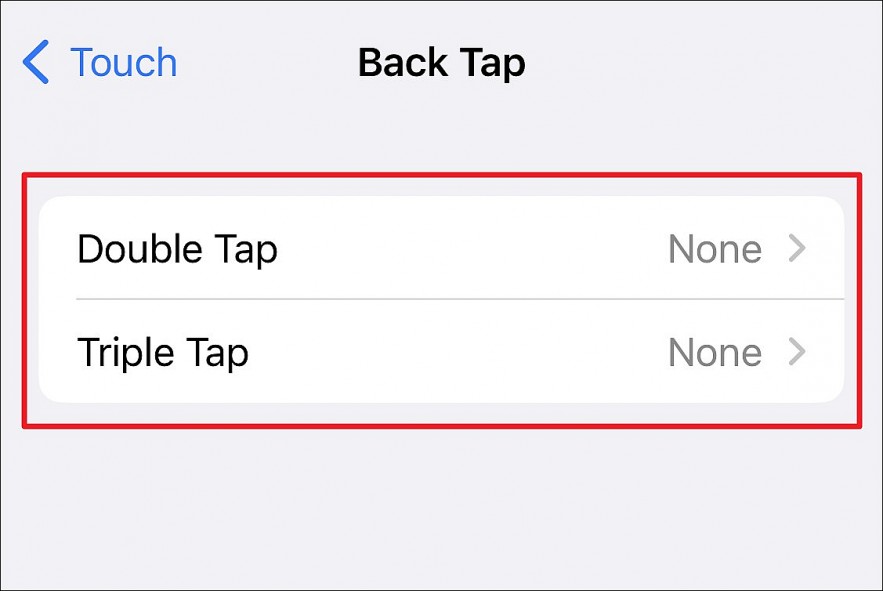
Then, locate and tap on the ‘Back Tap’ option to continue.
 |
| Photo Allthings |
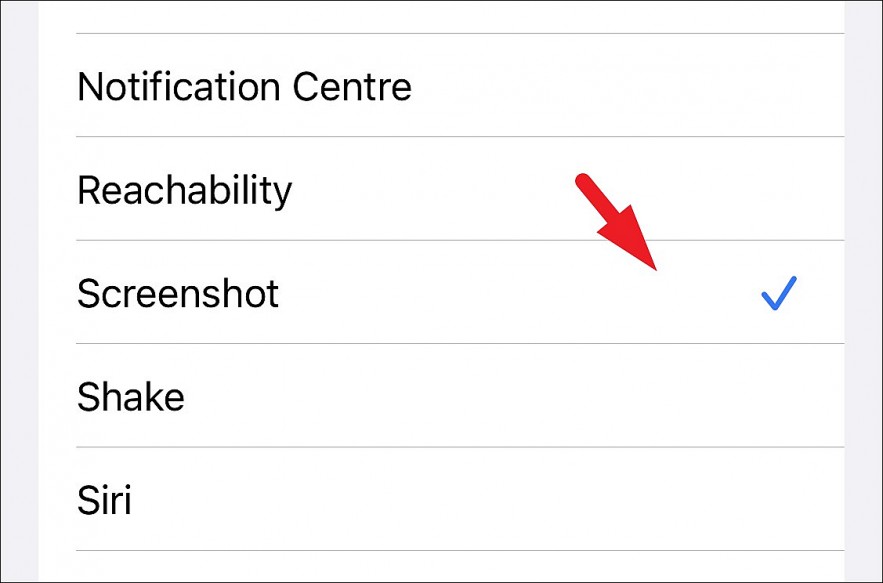
Now, you can either assign the ‘Double Tap’ gesture or use the ‘Triple Tap’ gesture as per your convenience.
 |
| Photo Allthings |
Finally, locate and tap to select the ‘Screenshot’ option for the selected gesture.
Now, whenever you wish to take a screenshot, just tap twice or thrice on the back of your device (depending on the option you chose) and your device will click a screenshot of the screen.
Where are screenshots saved on iPhone 14?All the screenshots you take are automatically saved to the Photos app in PNG format. To view them, go to the Photos app > Albums. Then scroll down and open the ‘Screenshots‘ album under Media Types. Alternatively, you can access them under ‘All Photos’ in the Library tab. |
Take a screenshot on iPhone 14 with Siri
Siri is Apple’s voice assistant and it is quite good. You can also take screenshots by summoning Siri to do the same. All you need to do is press the side button on your iPhone to bring up Siri and then say Take a Screenshot. Siri will now take a screenshot and as you would expect, it will be saved in the Photos app under the screenshots album. You can also type ‘take a screenshot’ to capture screenshots.
How to edit the iPhone screenshot after taking it
So, in this step, we assume that you see the thumbnail that shows in the corner of the device’s screen once you took a screenshot. After that, you can tap it and you will see an editing mode. This way will let you crop, rotate, and do other editing ways before saving the image.
Another thing that you can do is delete the screenshot if you do not like the result. To do so, simply tap the trash icon located in the upper-right corner of your device’s screen. When you have done in the edit mode, you need to see the corner of the screen and then tap “Done”. To continue, you can select “Save to Photos”. Here, you will have your edited screenshot automatically saved to the Photos app on your device.
How to take a scrolling screenshot on iPhone 14
With the native iOS option, taking a scrolling screenshot or “Full Page” screenshot will give you the PDF of everything on a document, webpage, email, or note.
→ Take a screenshot by pressing the side + volume up button simultaneously
→ Tap the preview option in the bottom left corner before it disappears
→ Choose the Full Page option located in the top right corner
→ The Full Page option only appears in instances where there is more than a page’s worth of content on the screen
→ You’ll be able to preview all the pages, use markup, and more before you save
→ You can even tap the crop icon to edit which part of the Full Page you would like to save
→ Then either tap on Done in the top-left corner to save or the share button located in the top right corner.
Apps for taking scrolling screenshotsAnother option for taking scrolling screenshots of content inside third-party apps or for more manual control (saving as PNG, etc.) is using an app like Picsew or Tailor. You can try both for free before buying the full versions via in-app purchase. Thanks for reading our guide about taking screenshots on iPhone 14! |
Regular screenshots and new copy and delete option
1.Press the side button and volume up button at the same time to grab a screenshot (you can also press one immediately after the other)
2.For 5 seconds you can tap the screenshot thumbnail in the bottom left corner for more options – if you do nothing it will save to the Photos app
3.If you tap the screenshot thumbnail, you can use mark-up tools – tap the share button in the top right corner (square with up arrow) for quick options
4.Tap Done in the top left corner for the handy new Copy and Delete option
Scrolling screenshot on iPhone 14
With this native iOS option, taking a scrolling screenshot or long screenshot gives you a PDF of everything on (or selection of) a document, webpage, note, or email in Apple’s apps.
1.Take a screenshot (press the side button and volume up button at the same time)
2.Tap the thumbnail in the bottom left corner before it disappears
3.Choose the Full Page option in the top right corner: The Full Page option will only appear in instances where there is more than one page worth of content on-screen
4.You can preview all the pages, use markup, and more before saving
5.You can also tap the crop icon (square-ish icon next to “Done”) to edit what part of the Full Page you’d like to save
6.Tap either Done in the top-left corner to save or the share button in the top right – you’ll get the new Copy and Delete option with these too
 iPhone 15: Design, Date & Time Release, Leaked Images and More iPhone 15: Design, Date & Time Release, Leaked Images and More With the new rumors about iPhone 15 being released and what we expect to see, here are everything we need to know about this upcoming ... |
 Top 5 iPhones With the Longest Battery Life (Updated) Top 5 iPhones With the Longest Battery Life (Updated) Battery life is one of the most important factors for smartphones these days. In the past, the iPhone was often criticized for its low battery ... |
 iPhone 14 Pro's 6 New Features Have Been Used by Android iPhone 14 Pro's 6 New Features Have Been Used by Android iPhone 14 praises itself with many groundbreaking technologies. However, users have just discovered that there are many new features of iPhone Pro that have been ... |


