How to Edit Screenshots on Any Device
 |
| Photo: KnowInsiders |
There are going to be times when a simple screenshot isn’t enough, and you’ll need the help of text, labels, scribbles, and other annotations. Your phone and laptop come with the tools to do this built right in, and you’ve got plenty of third-party alternatives you can switch to as well.
For a refresher on how to capture grabs in the first place, check out our full guide to taking a screenshot on any device.
How to Edit a Screenshot on Windows
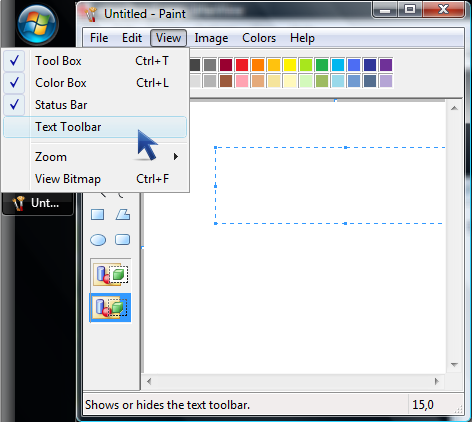
Microsoft Paint is a convenient screenshot utility that comes with all Windows operating system. It’s simple to use, particularly if you know a few tricks. After taking screenshots on your computer, just go to the “Start” menu on the lower left of the screen. Then click on “Paint” from the “Accessories” folder and press “Ctrl+V” to paste the screenshot in this editor. Now you can annotate your screenshot as you desire.
 |
| Photo: Mohan's Blog |
-
Crop – Choose the crop tool from the drop-down list of “Image” and select the area you want to crop.
-
Add special effects – Access to “Filter” menu and add special effects like blur and others.
-
Resize – Change the resolution of the screenshot to a desired one by selecting “Resize” or “Resize Canvas” from the “Image” menu.
Aside from using the built-in MS Paint to make quick edits to screenshots, you can also make use of a third-party tool to achieve this goal. Free Screenshot Capture is highly recommended for its simplicity and rich functionality.
How to Edit a Screenshot on Mac
After taking screenshots whole screen or part of it on Mac by depressing “Shift+Control+Command+3/4” keyboard combinations, the screenshot will be saved directly to the clipboard rather than keeping it to the desktop as a PNG file.
 |
| Photo: How to Geek |
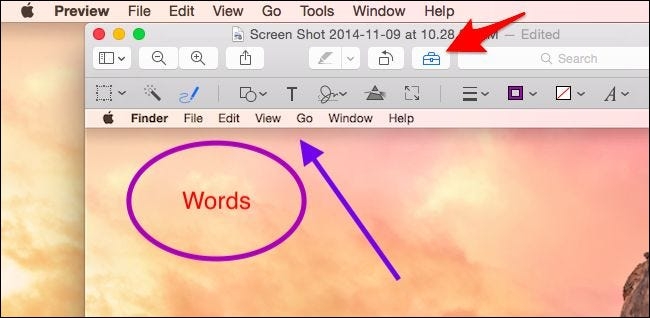
With the image in the clipboard, open Mac’s built-in Preview program and then press “Command+N” to create a new image from the clipboard in Preview. After that, you can make use of the editing options on its toolbar and annotate the screenshot by adding shapes, text, special effects and more.
After editing, just press “Control”+”S” to replace the original screenshot with this newly edit picture, while if you want to keep both of them, then press “Shift-Control-S” to save the new image.
Best Screen Capture Software Tool in 2021
#1) Snagit
#2) Wondershare DemoCreator
#3) FonePaw Screen Recorder
#4) PassFab Screen Recorder
#5) iSpring Cam Pro
#6) VideoProc
#7) Camtasia
#8) Aiseesoft Screen Recorder
#9) Screen Recorder
#10) Snipping Tool
How to Edit a Screenshot on Android
The power button and the volume down is the widely acknowledged shortcut for taking a screenshot on most Android devices, including Google Pixel and Samsung phones. Once that’s done, you’ll see a small thumbnail down in the lower left-hand corner—tap the Edit button next to the thumbnail before it disappears to start tweaking and annotating your picture.
 |
| Photo: Gizbot |
Your first option is to crop the screenshot, which you can do just by dragging the corner handles in from the edges. The app lets you zoom in on the image as well—just put two fingers on the screen and move them apart. You’ve also got four tools down at the bottom of the screen: From the left, a pen tool (which writes on top of the image), a highlighter tool (which highlights parts of the image while leaving them visible underneath), an undo tool for taking one step back, and a redo tool for taking one step forward.
Tap the pen or the highlighter and you get a gallery of colors you can pick from. Once you’ve chosen a color, you’re able to scribble away on the image itself. When you’re happy with your screenshot annotations, tap Done and Save. You can do more edits, like adding text layers, through the main Google Photos app—tap on the image you want to work with, then choose Edit.
Android being Android, you might notice some differences in the process depending on your particular handset. In the case of Samsung phones, for example, you don’t see the Edit button, just an icon showing a pen next to a square. Tap it to draw on or crop the screenshot you’ve just captured.
Six Android apps to edit your screenshots and images
- Screenshot snap free
- Snap Markup
- Photo Ink
- PicsArt
- Screen Master
- Screenshot utility
How to Edit a Screenshot on iOS and iPadOS
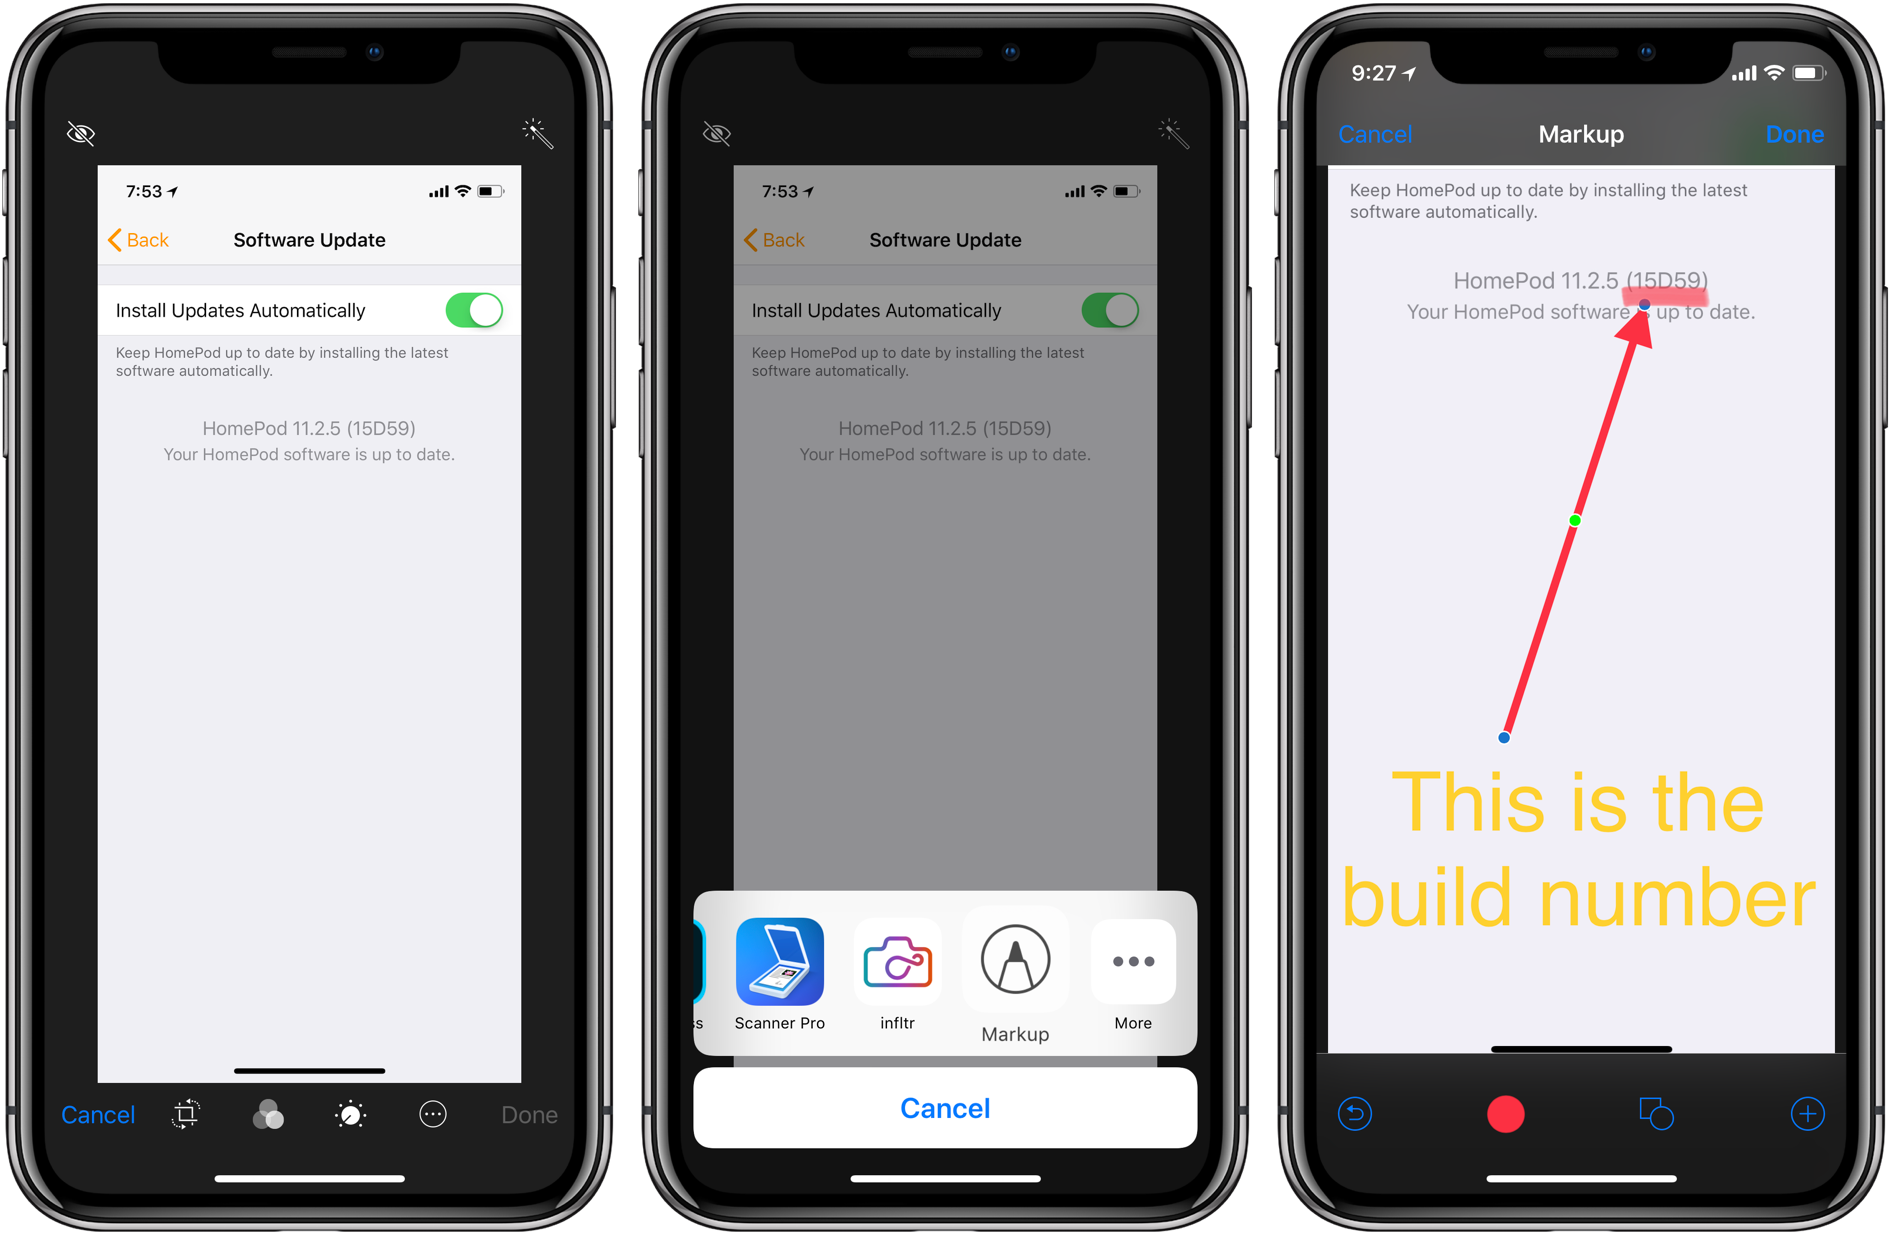
Taking a screenshot on iOS and iPadOS is easy—tap the home button and sleep/wake button together if your device uses Touch ID, or the volume up button and sleep/wake button together if it uses Face ID. A thumbnail of the screenshot appears in the lower-left corner, which you need to tap to start editing.
 |
| Photo: iDownloadBlog |
Drag in the handles at the corners or the sides of the screengrab to crop the captured image, or place two fingers on the picture and move them apart to zoom in. Up at the top of the screen, tap the small pen icon to bring up several different drawing tools. Tap on an icon once to choose it, then again to set the line thickness and opacity. On the right, there’s a palette icon for picking colors.
You’ll also find an eraser option for removing pixels or objects (tap the eraser once it’s selected to switch between the two modes), and a lasso tool (to the right of the eraser) for selecting objects you’ve added and moving them around. Up at the top to the left of the pen icon you’ve got undo and redo buttons for taking a step forward or backward.
Tap the + icon in the lower right corner to bring up even more tools—you can add a text layer, change the opacity of the image, drop in a speech bubble shape, or add a signature. When you’ve finished, tap Done and Save to Photos. Further edits can be applied in the Photos app by tapping an image and then choosing Edit.
| Edit a Screenshot with Markup on iPhone and iPad 1) Capture what’s on the screen of your iOS device.
2) Access your Instant Markup tools by tapping a thumbnail that appears for a few seconds in the lower-left corner of the screen right after taking a screenshot. TIP: If you took multiple screenshots, tap on their preview bundle in the lower-left corner to open them all in Instant Markup. From there, you can swipe between the individual images to make changes to a particular screenshot. 3) Use Markup’s built-in tools to sketch, create text, crop, zoom in, add a signature and more.
4) Tap Done in the upper-left corner to save or delete your screenshot. TIP: If you’d like to annotate a screenshot after it’s been saved to Photos, launch the Photos app and open the image you’d like to annotate. Tap Edit, then tap “…” and finally choose Markup from the popup menu. |
 Where Are Screenshots Saved and How to Find Screenshots on PC Where Are Screenshots Saved and How to Find Screenshots on PC There are times that we need to take screenshots on PC for working purposes or simply just for saving the moment but don't know where ... |
 How To Take A Full-Page Screenshot In Chrome With Simplest Ways How To Take A Full-Page Screenshot In Chrome With Simplest Ways Want to take a full-page screenshot on Google Chrome? Check out our simplest ways below. |
 The Newest and Simplest Ways To Screenshot Any Dell Laptop or Computer The Newest and Simplest Ways To Screenshot Any Dell Laptop or Computer If you own a Dell laptop or PC and wonder how to screenshot the screen. This article is for you. |


