How to Set a Screenshot Timer on Your Mac
 |
| How to set a screenshot timer and take a timed screenshot on Mac |
You don’t always want to take a snap of your Mac’s screen immediately after you hit the screenshot shortcut key—sometimes you might want to give yourself a few seconds to set things up just right before capturing your screenshot. Fortunately, your Mac allows you to do that, and we’ll show you how.
Grab (software)
 |
| Photo: Apple ToolBox |
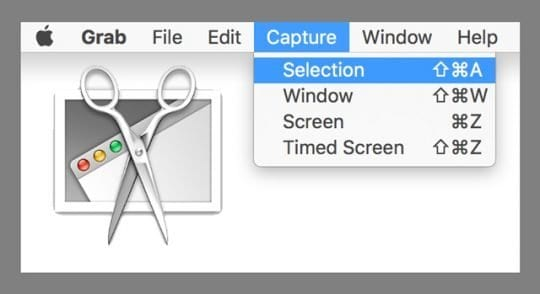
Grab is a utility program in macOS for taking screenshots. It supports capturing a marquee selection, a whole window, and the whole screen, as well as timed screenshots.
The program originated in OPENSTEP and NeXTSTEP, and continued to be preinstalled by Apple on macOS until version 10.13 (High Sierra). It was replaced by the utility Screenshot in macOS 10.14 (Mojave).
On macOS versions 10.13 and earlier, Grab is found in the folder Utilities, which is a subdirectory of Applications. It may be quickly opened by using the Spotlight function when entering grab, or by pressing ⌘ Cmd+⇧ Shift+G and typing /Applications/Utilities/Grab.app in Finder. It was previously also found in the Finder menu under Services > Grab. As of Mac OS X v10.4, Preview had a Grab submenu in the File menu, with selection, window, and timed screen. The menu was renamed to Take Screenshot in more recent versions of macOS.
 |
| Photo: Parallels |
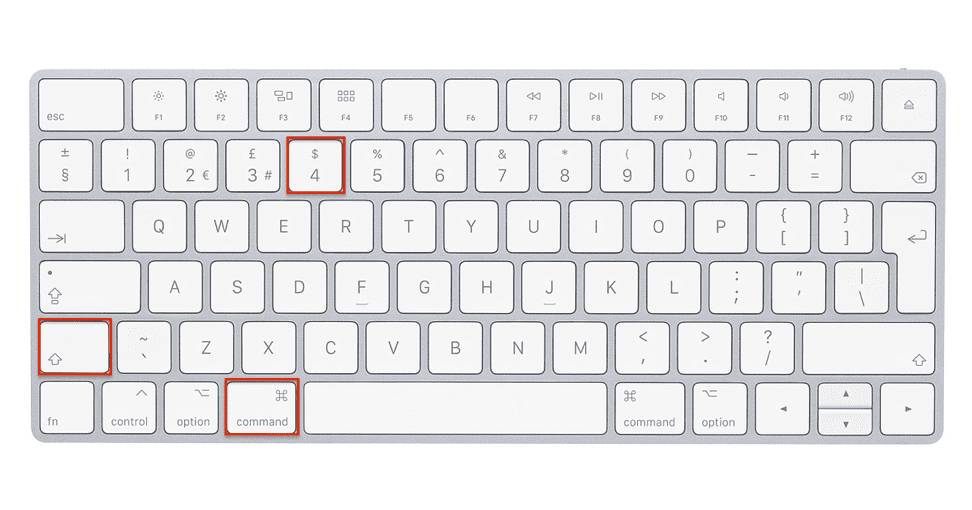
Grab saves screenshots in the Tagged Image File Format (TIFF). In macOS, it is also possible to save screenshots directly to the Desktop in PDF format (earlier versions of macOS) or PNG format (later versions), using keystrokes shown below. For DRM reasons, it is not possible to use this software while DVD Player is open.
Grab helps determine the size of an element on the screen. After using the selection feature and capturing the screen, one can select Inspector from the menu or press ⌘ Cmd+1 (or ⌘ Cmd+I); a dialog box will appear with the dimensions of the selected area.
How to Set a Screenshot Timer on Your Mac
The built-in screenshot capture tool is all you need to do the job, so that’s what we’re going to focus on.
Step 1: The first step involves opening screenshot options on Mac. To do this, use the keyboard shortcut Command + Shift + 5. When you press this key combination, a floating menu with screenshot options will open on your Mac.
Step 2: In the screenshot menu, select one of the three icons next to the close button—Capture Entire Screen, Capture Entire Window, or Capture Selected Portion. It doesn’t matter which one you select, as long as you click one of these three icons. When you’ve done that, you will see an Options button on the right side of the floating screenshot menu.
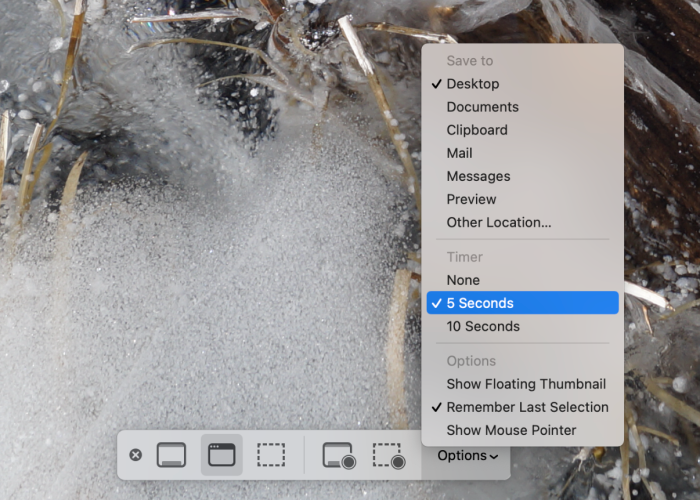
Step 3: Click Options to open up another menu, where we’re going to check out the Timer section. There are three options under Timer: “Off,” “5 Seconds,” and “10 Seconds.” If “Off” is selected, screenshots will be captured immediately on the Mac. To set a screenshot timer on the Mac, select 5 Seconds or 10 Seconds. This will add a delay of five or 10 seconds to each screenshot you capture and you will see the countdown in a small floating menu on the screen.
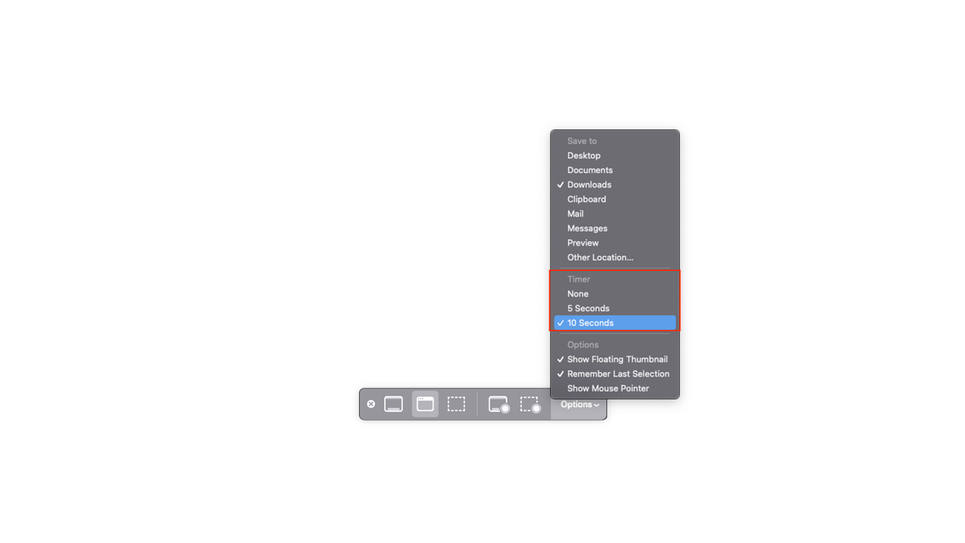 |
| Photo: Lifehacker |
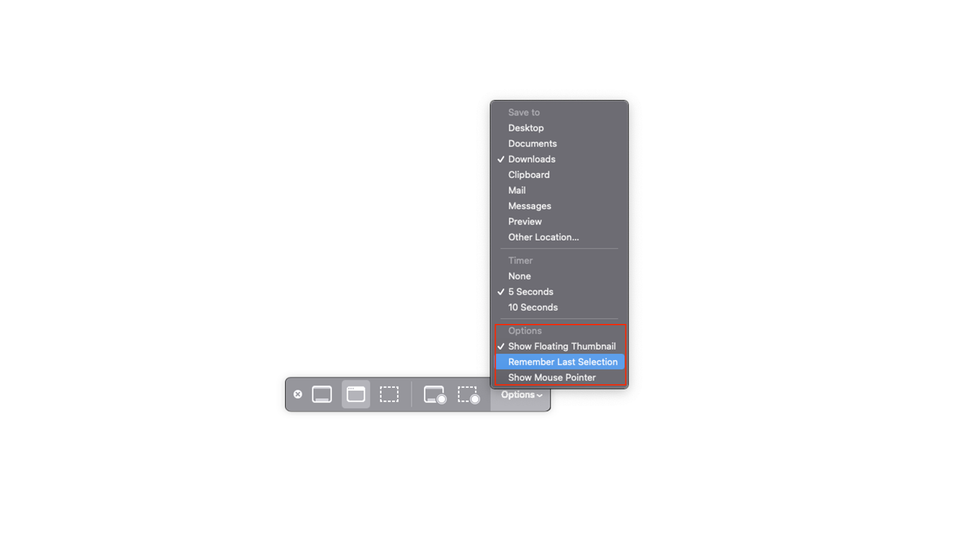
Step 4: Note that this timer remains in place until you choose to disable it. If you want to add a timer just for this one time, you can do that too. Hit Command + Shift + 5 again and select Options. Now uncheck Remember Last Selection under Options. This will ensure that screenshot timers are added only for the next screenshot you capture. After that, screenshots will be captured immediately once again.
 |
| Photo: Lifehacker |
However, Remember Last Selection is an incredibly convenient option to have because it allows your Mac to remember your screenshot preferences. That’s why we highly recommend that you keep it enabled.
While you’re fiddling with screenshot options on your Mac, you might want to consider tweaking a couple more useful settings to change the default location where screenshots are saved and using a nifty trick to add the mouse pointer to your screenshots.
How to take a timed screenshot on Mac
To take a timed screenshot, you have to use a little-known stock utility known as Grab. To use it to take a timed screenshot, you’ll follow these steps:
1) Launch the Grab app from the Applications > Utilities folder on your Mac.
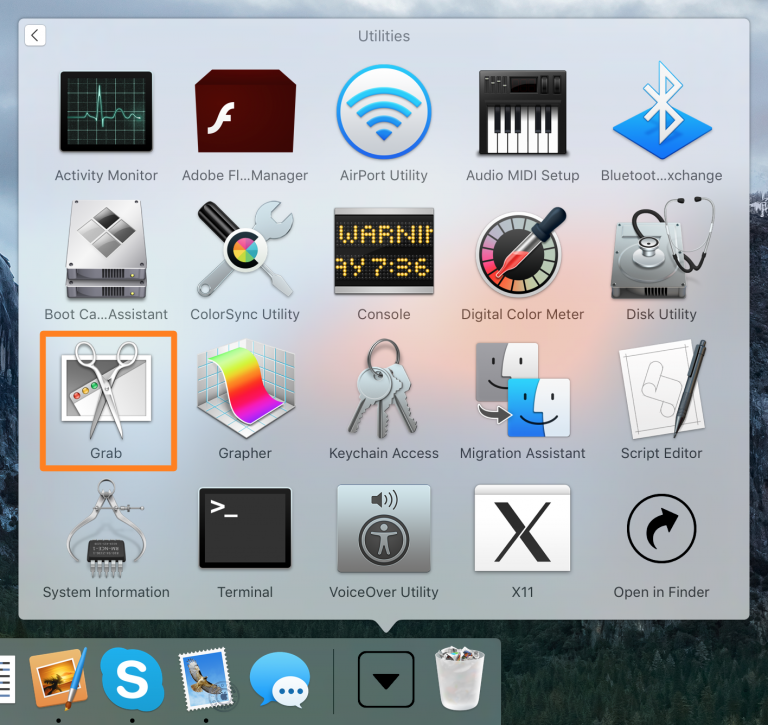 |
| Photo: Screenshot |
2) From the Menu Bar, navigate to Capture > Timed Screen. Alternatively, you can press Shift ⇧ + Command ⌘ + Z on your keyboard.
 |
| Photo: Screenshot |
3) Next, a pop-up window will appear that asks you if you want to take a timed screenshot after 10 seconds. Click on the blue Start Timer button.
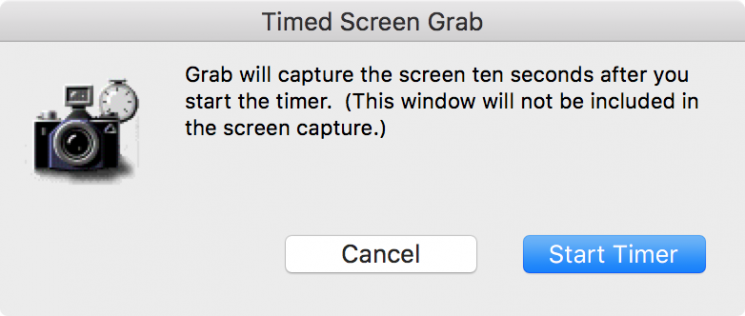 |
| Photo: Screenshot |
4) As you wait, the clock in the window’s icon will fill red slowly. When it becomes fully red, the timer is up.
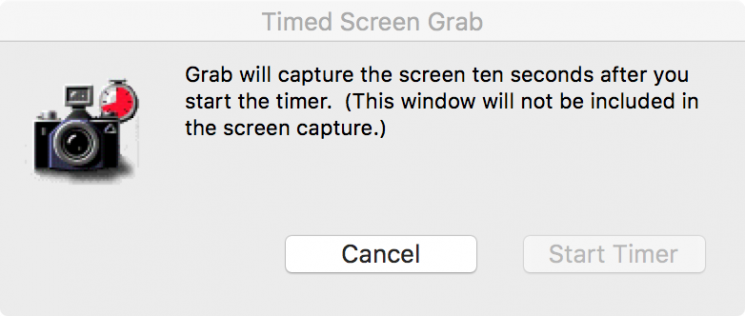 |
| Photo: Screenshot |
Note: During the period of waiting, you are free to do anything you wish, including holding down the Option key to reveal hidden menus.
5) After the timer is up, a screenshot of your entire screen will be taken and you’ll then be able to save it anywhere you’d like.
Congratulations! You’ve just taken a timed screenshot.
How to capture delayed screenshots using the Screenshot app
Want to capture your mouse with your screenshots—or capture a screenshot after a delay? The built-in Screenshot app can do that, and you'll find it in the Other folder in Launchpad or the Applications > Utilities folder in Finder.
 |
| Photo: Zapier |
Open Screenshot, then click Options to set up a delay. You can also use the buttons to choose between the entire screen, a particular window, or a region of the screen.
The buttons with the small circles on them let you record a video of your screen—you can even record commentary using your microphone. You can do your entire screen or a particular section—the result will be saved as a .MOV file to your desktop.
How to take screenshots using the MacBook Pro Touch Bar
 |
| Photo: Zapier |
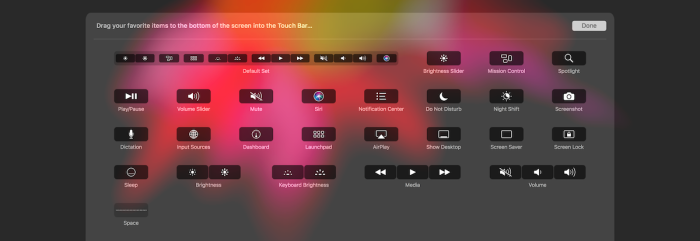
If you have a newer MacBook Pro with a Touch Bar, you won't have to remember keyboard shortcuts each time you take screenshots. Instead, you can add a camera icon to your Touch Bar and save anything as a screenshot with a couple taps.
First, open your Keyboard preferences and click the Customize Control Strip... button in the bottom of the window. That will show all the options you can use on your Touch Bar. Click and drag the camera icon to your Touch Bar, then save the changes to always have a one-tap way to capture anything on your screen.
As soon as you tap the camera button on your Touch Bar, your mouse cursor will switch to crosshairs to select any part of your screen to save as a screenshot. Press the spacebar on your keyboard then click a window to save a full window screenshot. Or, select any of the other screenshot options that show on the Touch Bar while taking a screenshot to take a full-screen screenshot, copy the image instead of saving it as a file, and more.
 How to Calculate and Convert Ounces to Grams: Check The Easiest Ways How to Calculate and Convert Ounces to Grams: Check The Easiest Ways To learn how to convert ounces to grams in weight, and vice versa, keep reading the article below for a detailed guide. |
 How to Calculate and Convert Grams to Milligrams: Check the Simplest Ways How to Calculate and Convert Grams to Milligrams: Check the Simplest Ways To learn more on how to convert grams to milligrams in the best ways, keep reading the article below. |
 How to Calculate and Convert Mph to Kph: Easiest Ways How to Calculate and Convert Mph to Kph: Easiest Ways Check out the guide on how to calculate and convert miles per hour to kilometre per hour in the article below. |
 How to Convert DVD to MP4: Best Methods to Change How to Convert DVD to MP4: Best Methods to Change Since the development of modern technology, DVDs have been a lesser choices in watching movies. Here is a detailed guide on how to convert DVD ... |


