How to Download and Use Russia-based Movavi Free - Legally and Safely
 |
| How to Download and Use Russia-based Movavi Free Legally and Safety |
Enjoy video and music your way! With Movavi, you can prepare your multimedia files for instant playback in any format and on any device. And you don’t need to be a geek to do it: just select the format or device you want from the vast list of supported options and hit one button – your files will be ready in seconds. Plus you get a huge range of exciting extras: enhance video quality, adjust and normalize sound levels, trim, merge, crop, and rotate files before you convert – all through a trademark user-friendly interface that’s so easy to master!
What is Movavi?
Russia-based video, picture, and audio editing software company, Movavi was created in 2004. The company’s primary goal is to produce software that makes dealing with video and picture data simple for even the least tech-savvy of consumers. The United States, Japan, and Europe account for the majority of users in the world.
Children, as well as adults, may benefit from using Movavi’s multimedia software since it is simple to use. Movavi was founded in 2004, and since then they have developed a broad variety of multimedia applications. There is a solution for everything from making movies to generating slideshows, and from recording the screen to editing PDF files. Here’s all the software that the company offers.
Products of Movavi
The company offers more than 20 software as of now. Here are some of them listed:
→ Movavi Video Suite
→ Movavi Video Converter
→ The Movavi Video Editor
→ Movavi Video Editor Plus
→ Movavi Video Editor Business
→ The Movavi 360 Video Editor
→ Movavi Slideshow Maker
→ The Movavi Photo Editor
→ Movavi Photo Focus
→ Movavi Photo DeNoise
→ The Movavi Screen Recorder Studio
→ Movavi Screen Recorder
→ Movavi Screen Capture Pro
→ Gecata by Movavi
→ Movavi PowerPoint to Video Converter
→ Movavi PDF Editor
Is It Safe to Use Movavi?
Yes, it is absolutely safe to use, although there is one feature during the installation process that you should pay attention to. Once the installation is completed, the installer asks to run the program, but it also asks your permission to send anonymous usage statistics to Movavi.
There is no requirement to participate, but it’s a good lesson in the importance of paying close attention to the options during the installation of new programs.
Other than this one minor potential privacy issue, the program is safe to use. The installer file and the installed program files pass security checks from Microsoft Security Essentials and MalwareBytes, and no adware or third-party software is installed.
Movavi Video Editor for Mac, which was tested by JP, also proved to be safe. Apple’s built-in macOS anti-malware protection didn’t find any threats during the app’s installation process. JP also ran Drive Genius for a quick scan and found the program free of any malware issues as well.
Is Movavi Free?
No, it is not free software, but there is a limited free trial available. The free trial lasts for 7 days, watermarks any video output with a ‘Trial’ image, and any audio-only projects are saved at half-length. All of these restrictions can be removed by purchasing a license from Movavi for $39.95 USD for personal use or $79.95 USD for business use.
Interestingly, after you install the trial version of the software, you’re automatically taken to a webpage that has a “special” sale offer featuring a 40% discount that will only be available for the next few days, but the price listed was still $39.95 USD. I’m not a big fan of these sorts of marketing tricks that pretend you’re getting a deal, but at least the price is still fairly reasonable wherever you choose to pay it.
How do I install Movavi?
Installing Movavi is a piece of cake. You can install the tool in just a couple of minutes.
1. First of all, you will need to go to the product page and buy the tool. If you just want to try it out, you can go with Movavi to download the free version.
2. Next, you will have to open the tool and allow Windows to install the software
3. Read the terms and conditions and hit the next button. Your software will be installed.
4. Lastly, if you go for Movavi to download the free trial version, you will have to add the activation key. The activation key can be found on my account page or you can see the email that you received after purchasing.
How to Download Movavi Video Editor Plus for Free
Download Movavi from this link: https://www.movavi.com/.
⇔ You’ll see a banner with different Movavi software on the center of the page. You can either wait for it to scroll through to the Video Editor Plus page or click on the fifth dot to jump right to the Video Editor Plus page.
⇔ Click on the Download for Free button, and the setup file will download to your computer.
⇔ After the setup file download is complete, open it to start the setup wizard.
⇔ Open the License agreement and check the Accept button.
⇔ Click the Install button.
⇔ Movavi Video Editor Plus will automatically install on your computer.
⇔ When the installation is complete, the editor will open, and your free trial will begin.
How to use Movavi to edit videos?
 |
| Photo: techradar |
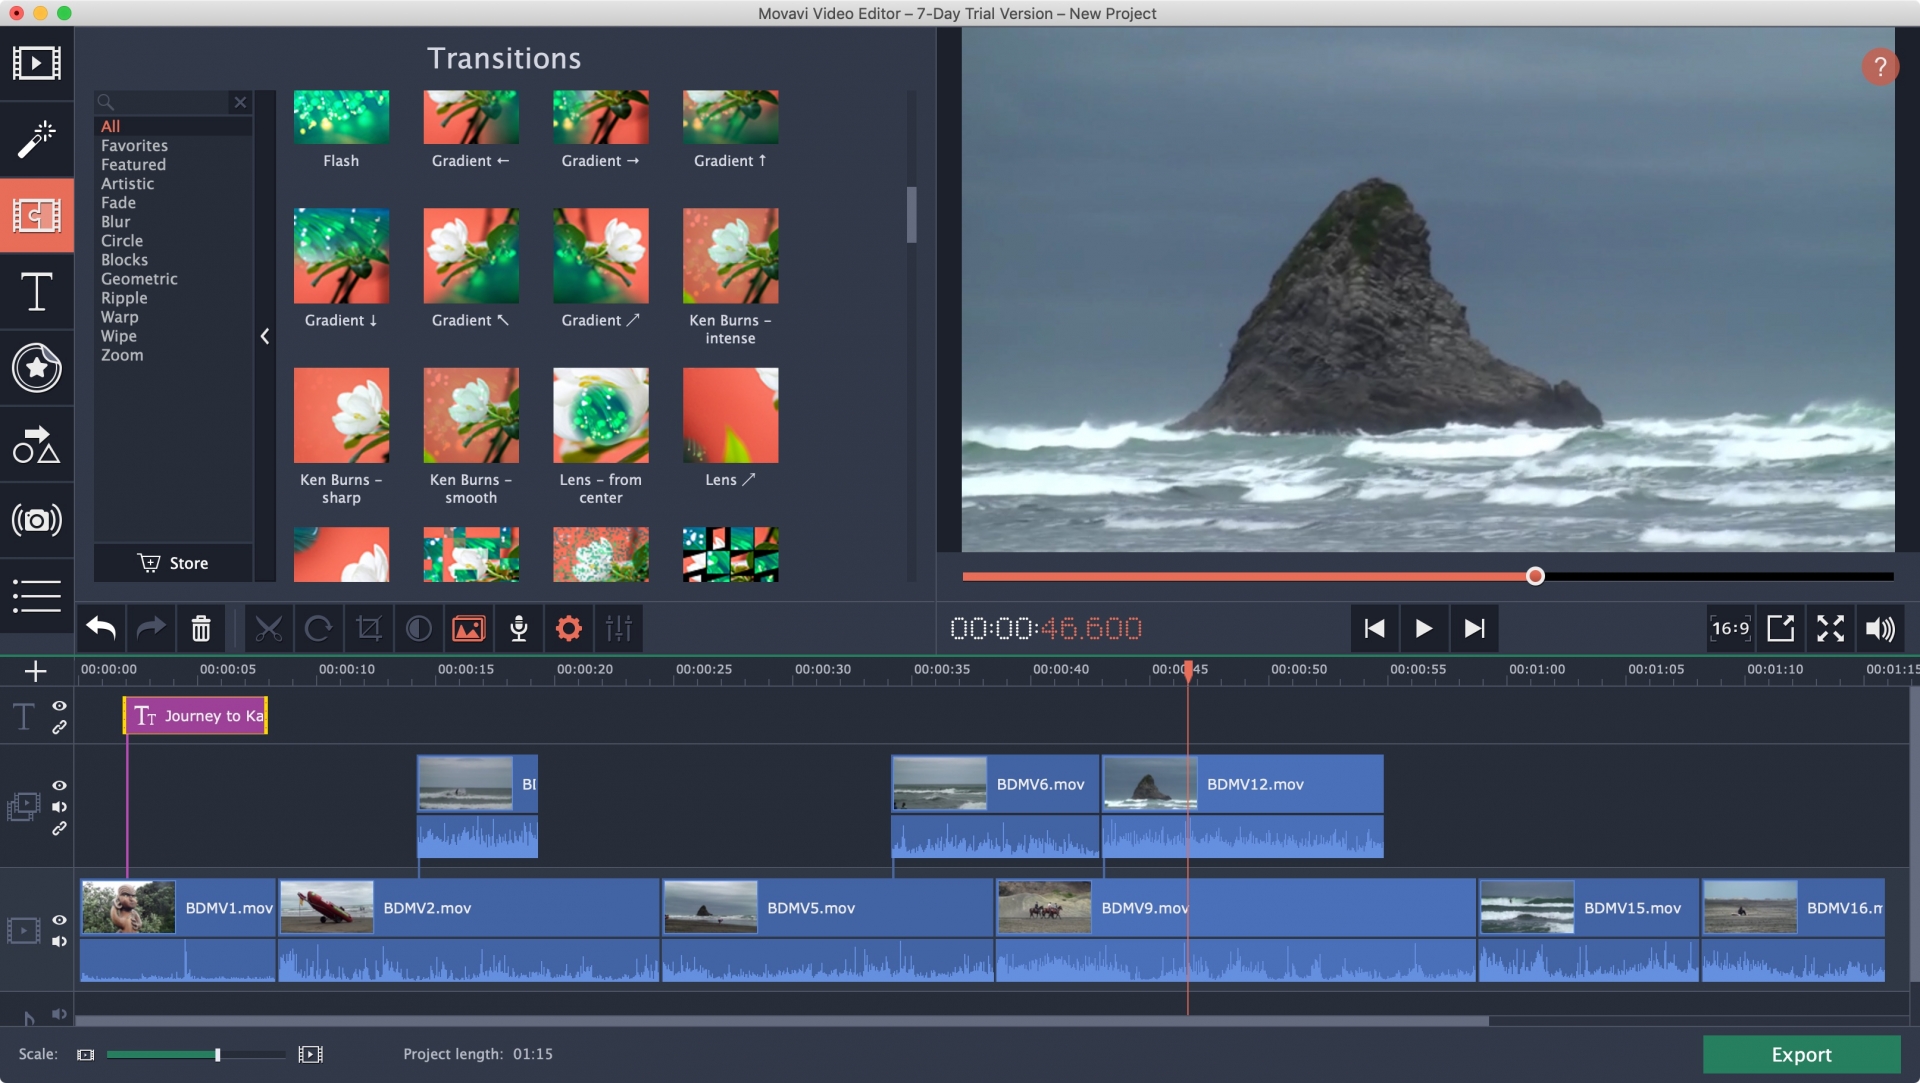
As you know that Movavi video editor free is well-equipped with features and artistic effects. All you need to do is to bring them into use to know more about how they can be utilized enough. Moreover, these special creative features allow you to create a stylish video. You can cut, split, merge, and rearrange clips to keep the required fragments and remove the unnecessary part. Also, enlisted are some other benefits:
- Explore audio effects to enhance audio tracks used in the video.
- Add animated transitions, stylish captions, or watermarks
- Export videos in a supported device format
- Offers output video in web formats for YouTube and Vimeo
A Step-by-Step process to Edit Videos
Here is a quick step guide to help you with editing steps in Movavi video editor online free:
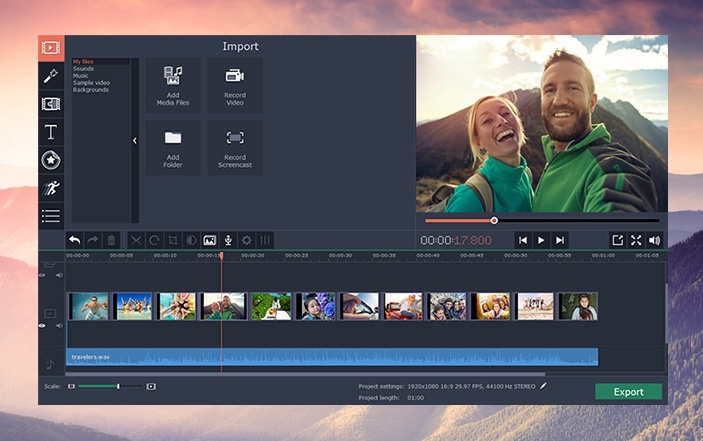
♦ At first, when you open the app, you would see a screen full of options.
♦ To edit the video, you can add the video from the file menu or simply drag it to the editing window. Now, you are allowed to add videos and photos on the timeline to merge.
♦ To remove the unnecessary parts, you can use the split feature. You can even give a new beginning and end to your video by using the left and right markers on the slider.
♦ Apply artistic features like auto saturation, auto contrast, Magic Enhance, etc. This will help in adding a professional-looking appeal to the videos. Also, there are many effects to make your video look like a sci-fi movie or a black and white film. Now, to explore all the effects, you need to click on the "Effects". Just press the Apply button to apply any effect and to remove the applied effect. Now, press the Delete button.
♦ Use Fades features to go through the available transitions list. For applying any transition, simply drag that particular effect that you need on the timeline. Now, go ahead to place the same between the two chosen photos or clips. Now, for adding a title in the very starting of the video or the end, go for the button that says, Titles. Also, you can even opt for overlay titles on the scenes.
♦ For the addition of certain custom sounds, you need to opt for the "Media" option to edit the audio track accordingly and apply fade effects if required.
♦ To save your project, click on the "Save Project As" button that you see in the "file menu". Now, you can even save the file in the folder that you need to in the hard drive of your PC.
♦ After making all the required changes, export your enhanced video in a format that supports the device. Now, opt for the option that says, "Save Movie". Now, get the required option to export it from the given presets' list. Now, click on the Save.
♦ As soon as the conversion finishes, a folder with the final video will get running on itself. Well, that's all. Now, your video is ready and can be shown to your friends and family.
Related: Simple Ways to Convert Video Formats on the Mac Using Movavi - A Complete Guide
How to Use Movavi Video Converter
It is easy to use the program. You just need to follow some simple steps, and the solution will do all the hardest work by itself.
#1 – Downloading & Installing the Program
First of all, you need to go to the official website of Movavi and click the “Free Download” button. Then just run the downloaded file and click the “Install” button to initiate the installation. Once you confirm the user agreement, the program will be installed and launched on your machine.
#2 – Adding Files
After the installation is complete, you can add the files to the movie converter. To do this, you can use the “Add Files” button or simply drag and drop assets from your computer into the program window. To speed up the processing of large sets of files, you can add entire folders to the program. This way, you can get rid of the need to convert each video separately.
#3 – Selecting a Video Format
If you know what format you need to convert a file to, you can pick it from the list. In case you have no idea of the output format, you can always select the target device that you will run a video on. The system will select the most suitable format by itself.
#4 – Configuring Settings
Click on the gear icon in the lower-left corner to configure video and audio settings. In the same way, you can change the video quality, change the aspect ratio, or compress the file.
#5 – Converting Video to Another Format
Before starting the conversion, indicate the folder for saving files, click “Start,” and check the result in the previously specified destination folder once the program is done with the conversion.
Movavi Video Editor Plus Features
 |
| Photo: tonghor |
Much like the other Movavi tools, the Video Editor Plus gives anyone the tools needed to create, edit, and publish beautiful video programs. If you’ve never used video editing software before, or you want a quick refresher, the Video Editor Plus program includes a great tutorial that will walk you through most of the tools, so you can quickly get started.
Video Editor Plus comes with all the tools and resources you need. There is a nice selection of premade video intros, which is helpful when you just need some filler to begin your video. You can also easily add titles, animations, visual effects, and sound effects.
The interface is brilliantly designed, making it easy to access the tools you need without clicking through a tabbed interface or scrolling through hundreds of menu options. Instead, everything is clearly displayed on the main workspace, so all you need to do is get creative.
Movavi Video Editor Plus Features
Capture Audio and Video from your screen
In addition to editing, you can use Video Editor Plus and other Movavi tools to create videos directly from your computer.
♦ Record Video: Turns on your webcam to record your video and audio. You can edit the recording before publishing it.
♦ Capture Screencast: To use this feature, you will need the Movavi Video Suite (which also has a free trial), and it will create a compatible and editable version.
♦ Record Audio: If you want to add a voiceover to your video project, you can use this recording tool and then add it to the project.
♦ Excellent selection of editing tools
Video Editor Pro was designed for anyone, regardless of their background or skill. You can upload video and audio clips to the multi-track editing board, split or cut videos, rotate and crop them, add stickers, text overlay, and add Chroma Key effects, free frames, and adjust the coloring.
♦ Improve the quality of your video
There’s no need to worry if you’re using a video that appears shaky or unstable. Video Editor Plus has tools that can significantly reduce or even completely remove shakiness from videos and improve their accuracy and stability. It also includes tools that can reduce unwanted background noises, synchronize video and audio clips, and ensure that your video will both look and sound great.
♦ Filters, Titles, Transitions, and Stickers
Video Editor Plus has a whole collection of free stickers, title overlays, and transitions that are guaranteed to help make your video pop. If you don’t see what you need, you can check out the Effects store, where there is an even wider selection of extras you can purchase and add to your final production.
♦ Save and Produce with multiple formats
When your video is complete, choose the quality level you want to produce it with, and then choose the format. Video Editor Plus allows you to export the file as an MP4, AVI, MOV, SWF, GIF, MKV, and more. You can also save it, so it’s compatible with Android, iOS devices, SmartTV, game consoles, or upload it directly to YouTube, Vimeo, and Google Drive.
How to Uninstall Movavi Video Editor Plus
When you’re finished editing your videos, you can follow these simple steps to uninstall the software from your computer.
1.Type Add or Remove Programs from the Windows search bar.
2.Locate Movavi Video Editor Plus in the installed programs section and click the Uninstall button.
3.Confirm that you want to uninstall it, and the setup wizard will completely delete the program from your computer.
Additional Editing Software From Movavi
If you like Video Editor Plus, then you’ll love some of the tools from Movavi. These programs all integrate with one another, making it easy to create the perfect media to incorporate into your videos. Best of all, just like Video Editor Plus, you can get a free trial without leaving any payment information:
♦ Slideshow Maker: Turn your pictures into a classic slideshow with the Movavi Slideshow Maker. Add as many pictures as you want, and spice things up with stickers, transitions, fun typography options, music, and animations. There are beautiful slideshow templates to choose from or design your own, and then publish your slideshow to share with friends, family, or colleagues.
♦ Video Suite: This is the ultimate video editing software from Movavi. It includes some features not found in the Video Editor Plus, such as screencasts, a video converter, and a media player. It also comes with all the video editing tools you need, plus it gives you the freedom to merge videos, remove unnecessary clips, and add digital effects, voiceovers, and texts.
♦ Picverse: The Movavi image editing software allows you to fix imperfections in digital images, like removing red-eye, unwanted background noise, fixing out of focus shots, and comes with hundreds of filters and stickers.
How to get the Movavi Premium Version?Now, these were all about the features and the restrictions. For the people who like the tool and want to use the premium version also. Here are the steps you can follow in order to get the premium version. First of all, you need to select the product that you want to buy. You can either click on the buy now button and download the full version. Whereas, if you already have the trial version, you just need to buy the premium version. You will get the activation key when you buy it. You can see the activation key in your email too. Now, all you need to do is enter the activation key in your software. You don’t need to do reinstall the software. Just enter the activation key and you will get whatever you need. |
 Top 20+ Best Free Sites for Video Editors Online Top 20+ Best Free Sites for Video Editors Online If you’re looking to edit your promotional videos on a website, check out our list of free video editing online you can use to edit ... |
 Top 20+ Best Free Sites for Photo Editors Online Top 20+ Best Free Sites for Photo Editors Online Check out this list of the best free photo editors' websites online as well as other resources for creating beautiful DIY product photos that shine ... |
 How to Edit Screenshots on Any Device How to Edit Screenshots on Any Device Every device allows you to take screenshots, but what do you do if you want to edit them after you take one? Check out how ... |


