How to Change your Windows Username in Windows 7, 8, 10
 |
| Photo: KnowInsiders |
When you set up a new Windows PC, the part where you choose your username may catch you off guard. If that’s the case, you may choose the first thing that pops into your head or something random and temporary that you intend to change later. But surprisingly enough, changing your account name in Windows isn’t exactly a straightforward process. It can be done, but there are a few important things to consider as you go about it. Read on for the details.
How to Change or Convert your Windows Username in Windows 7 or 8
Method 1: Rename the Administrator account through the Computer Management Console
-
In Windows 8, from the Start Screen type Computer and when the icon appears right-click on it. You should now see some options appear at the bottom of the screen. Left-click on the Manage option and skip to step 2.
For other versions of Windows, right-click on My Computer, if in Windows XP, or Computer, if in Windows 7 or Windows Vista, and select Manage as shown in the image below.
-
If prompted by a User Account Control screen, click on the Yes button.
-
The Computer Management screen will now open. Expand the System Tools folder, then the Local Users and Groups folder, and finally single-click on the Users folder so it becomes highlighted. In the right-hand pane, you will now see a list of the accounts on your computer, including the Administrator account.
-
Right-click on the Administrator account and select Rename as shown in the image below.
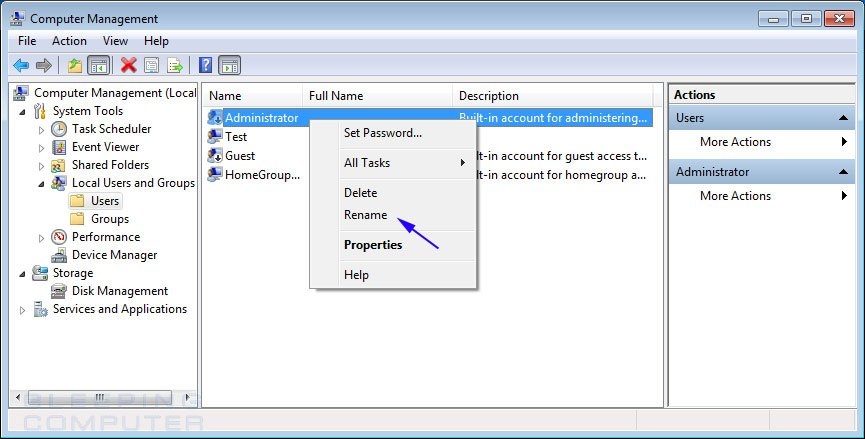
Photo: Bleeping Computer Once you click on the Rename option, you will be able to edit the Administrator name. Simply type in the name that you would like to rename the Administrator account to and press Enter on your keyboard.
Your Administrator account has now been renamed to the one you entered.
Method 2: Rename the Administrator account through the Local Policy Editor
-
In Windows Vista or Windows 7 click on the Start button and type Local Security Policy and press Enter on your keyboard. In Windows XP, click on the Start button and then Control Panel. When the Control Panel opens, double-click on the Administrative Tools group and double-click on the Local Security Policy icon. Please skip to step 2.
In Windows 8, from the Start Screen type Run and then press Enter on your keyboard. When the Run dialog box opens, type secpol.msc and then press Enter on your your keyboard. Please continue to step 2.
-
If prompted by a User Account Control screen, click on the Yes button.
-
When the Local Security Policy screen opens, expand the Security Settings folder, then the Local Policies folder, and then click on the Security Options folder so it is highlighted. You will now be at a screen showing the local security options for Windows as shown below.
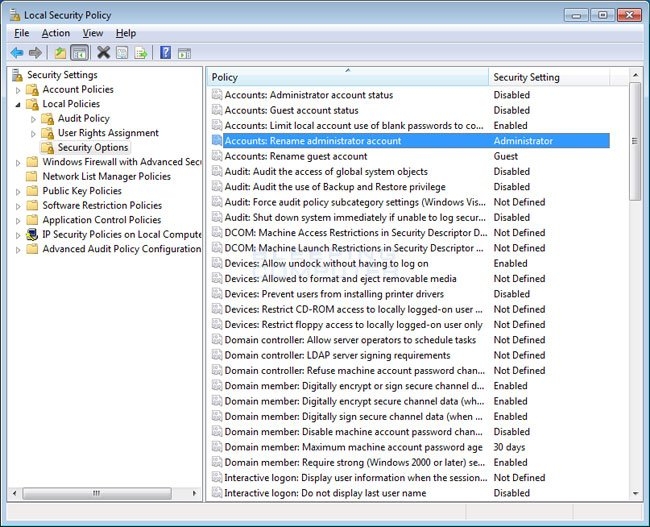
Local Security Policy screen. Photo: Bleeping Computer Scroll through the list and double-click on the policy named Accounts: Rename administrator account as shown in the image above.
-
The Accounts: Rename administrator account Properties screen will now open as shown below.
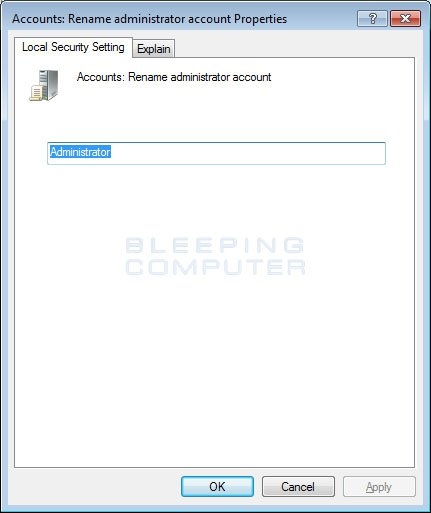
Accounts: Rename administrator account Properties screen. Photo: Bleeping Computer -
In the field type in the new name for the Administrator account and then press Enter on your keyboard.
Your Administrator account has now been renamed to the one you entered.
Method 3: Rename the Administrator account using the UserPasswords2 Control Panel
This method will work on all versions of Windows XP, including the Home versions.
-
Click on the Start Button (
 ) and then select the Run menu option.
 -
In the Open: field enter control userpasswords2 and then press the OK button. Please note that there is a space between the words control and userpasswords2.
-
The User Accounts control panel screen should now open that looks similar to the image below.
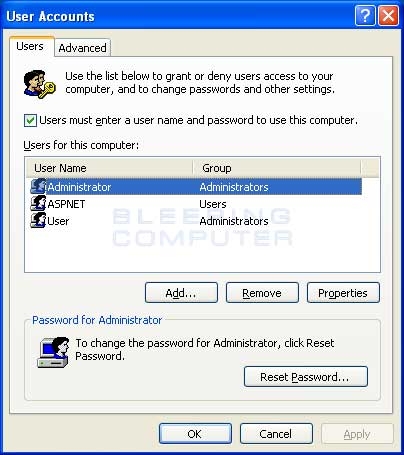
Windows XP User Accounts Control Panel. Photo: Bleeping Computer This control panel lists all of the users on your computer, including the Administrator account, and allows you to manage them. Select the Administrator account by single left-clicking on it so that it becomes highlighted and then click on the Properties button.
-
The properties screen for the Administrator account should now be open as shown in the image below. In the User name: field, change the user name from Administrator to something of your choice. When done, click on the Apply button and then the OK button.
-
You can now close the User Accounts screen as your Administrator account is now renamed.
Method 4: Rename the Administrator account using Renameuser.exe
This method will work on all versions of Windows Vista, Windows 7, and Windows 8, including the Home versions.
-
First you need to download SystemTool's RenameUser from the following location:
SystemTools RenameUser Download Link
-
Once it is downloaded, extract the zip file and copy the renameuser.exe into the C:WindowsSystem32 folder.
-
Now we need to get the name of your PC. To do this, click on the Start button and then right-click on the Computer option and select Properties as shown in the image below.
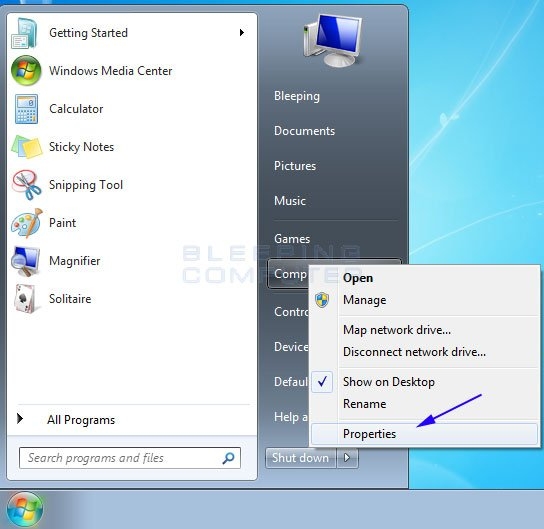
Select Computer Properties. Photo: Bleeping Computer -
A screen will now open showing information on your computer. Under the Computer name, domain, and workgroup settings category look for the information called Computer Name. An example is shown below.
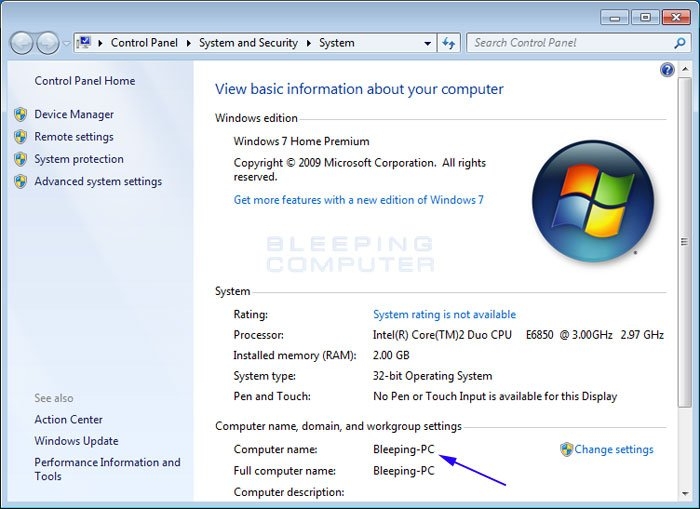
Basic information about your computer screen. Photo: Bleeping Computer Write down your computer name as you will need it in a future step.
-
Now open an Elevated Command Prompt.
-
When at the elevated command prompt, to rename your Administrator account enter the following commands:
renameuser.exe Administrator
When issuing the command replace with the name of your computer and with the new name for the administrator account.
For example, if we are using the computer name from the screen above and wanted to change the Administrator account to Super-Admin, we would type the following and press Enter on the keyboard.
renameuser.exe Bleeping-PC Administrator Super-Admin
An image of what this should look like is:
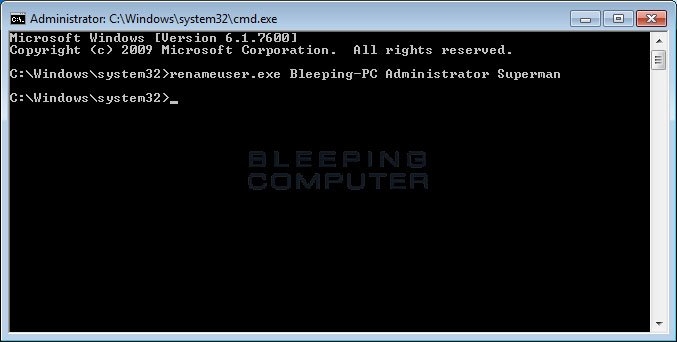
Using the renameuser.exe comman. Photo: Bleeping Computer -
Once you renamed your Administrator account, you should type Exit to exit the command prompt.
Your Administrator account has now been renamed to the one you entered.
How to Change your Windows Username in Windows 10
Method 1: Classic Control Panel
Find and open the classic Control Panel. One way to do this is to press Windows + R and then type Control, then hit Enter.
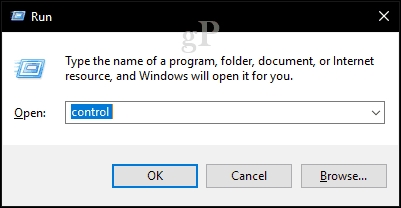 |
| Photo: Groovy Post |
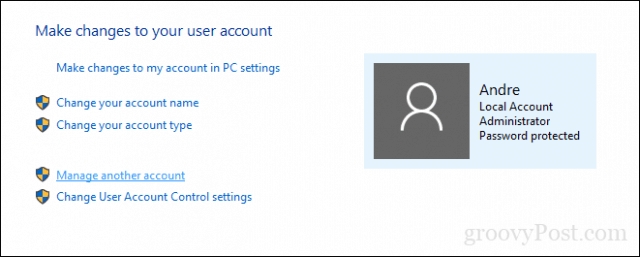
Open the User Accounts control panel, then click Manage another account.
 |
| Photo: Groovy Post |
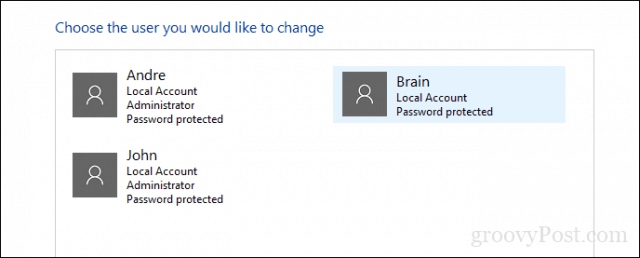
Click the account you want to edit.
 |
| Photo: Groovy Post |
Click Change the account name.
 |
| Photo: Groovy Post |
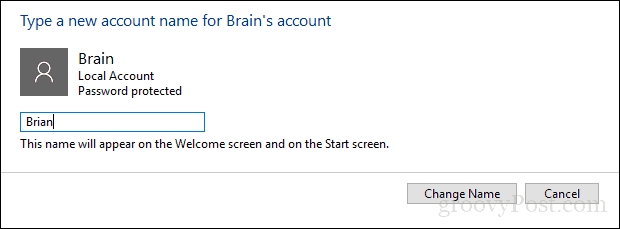
Enter the correct username for the account, then click Change Name.
 |
| Photo: Groovy Post |
Method 2: User Accounts Advanced Control Panel
There is another way you can do it.
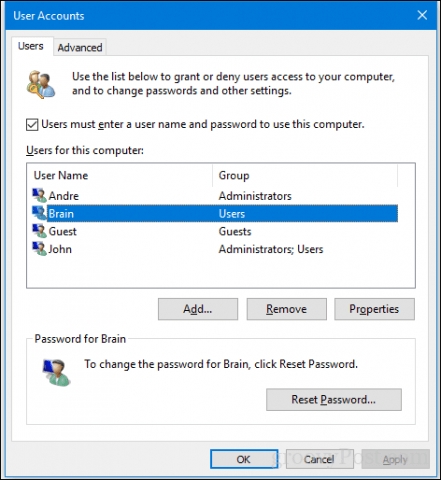
Press Windows key + R, type: netplwiz or control userpasswords2, then hit Enter.
Select the account, then click Properties.
 |
| Photo: Groovy Post |
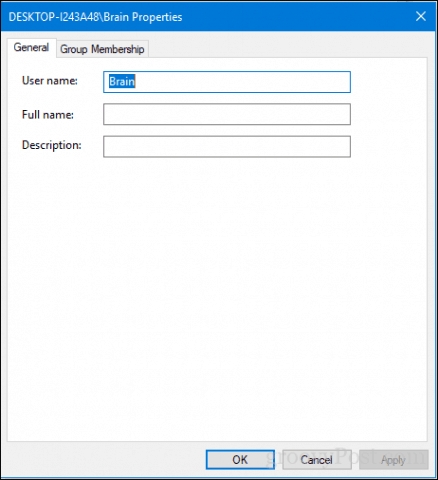
Select the General tab, then enter the user name you want to use. Click Apply then OK, click Apply then OK again to confirm the change.
 |
| Photo: Groovy Post |
For more interesting information, check out right below!
 How to Change Your Birthday on Facebook Using the Website or App How to Change Your Birthday on Facebook Using the Website or App Facebook is a social media website that allows users, to create their free profiles, to connect with friends, work, colleagues, or people who do not ... |
 How to Screenshot on Samsung Galaxy Note 20 and Note 20 Ultra How to Screenshot on Samsung Galaxy Note 20 and Note 20 Ultra Owing a Galaxy Note 20 or Note 20 Ultra is such pride since you're holding one of the best Samsung phones ever. Check out right ... |
 How to Take Screenshot on Any Device: Laptop, PC, Phone or Tablet How to Take Screenshot on Any Device: Laptop, PC, Phone or Tablet Taking a screenshot is an important skill for young people and parents to have. KnowInsiders will show you how to Screenshot an image on any ... |


