How to Take Screenshots on MacBook: Simplest Ways to Capture

 |
If your workflow requires taking regular screenshots on your MacBook or Mac Pro, then you'll need to know three common keyboard shortcuts, and a fourth if you have a MacBook with a touch bar. One of these techniques is a little newer. You might remember it from MacOS Mojave, but if you didn't, rest assured that it has carried over to MacOS Catalina.
Stick around, too, because we also walk you through how to work with those screenshots once you've taken them. Apple gives you a fair number of options to easily save, delete and open the screenshot for markup, tools that I've come to appreciate and regularly use.Tips for better screenshots
Try these tips below to fine-tune your screenshots.
 |
| Photo BusinessInsider |
Command+Shift+3: Taking a screenshot of the entire screen
This keyboard shortcut captures a screenshot of your entire screen.
Pressing Shift + Command + 3 will immediately take a screenshot of your entire screen. If you're using multiple monitors, it'll take and save screenshots of every monitor.
Note that unless you enable it in the screenshot menu, this won't capture your mouse cursor. And if you have the floating thumbnail option enabled, taking screenshots in quick succession will capture the floating thumbnail in the corner, too.
Command+Shift+4: Taking a screenshot of a highlighted section or window
Use this keyboard combo to turn your cursor into a crosshair, which you can drag to select a portion of your screen to capture. Release the mouse button or trackpad to take the shot.
You have a number of other options after hitting Shift-Command-4:
 |
| Photo BusinessInsider |
Press and release the space bar: The crosshair turns into a little camera icon, which you can move over any open window. Click on your desired window to take a screenshot of it. A screenshot captured by this method features a white border around the window with a bit of a drop shadow.
Press and hold the space bar (after dragging to highlight an area but before releasing the mouse button or trackpad): This locks in the shape and size of the selection area but lets you reposition it on the screen. It's very handy if your initial selection area is off by a few pixels; just hold down the space bar to reposition it before releasing the mouse button to snap a screenshot.
Hold down the Shift key (after dragging to highlight an area but before releasing the mouse button or trackpad): This locks in each side of the selection area made with the crosshairs save the bottom edge, letting you move your mouse up or down to position the bottom edge.
Without releasing the mouse button, release the Shift key and hit it again to reposition the right edge of your selection area. You can toggle between moving the bottom edge and right edge by keeping the mouse button or touchpad engaged and pressing the Shift key.
Command+Shift+5: Taking a screenshot with the screenshot menu
Press Command + Shift + 5 to open Screenshot.
 |
| Photo iMore |
A control bar will appear at the bottom of your screen. You can use it for grabbing still screenshots or for recording a video of your screen.
Click on “Options” to set your preferences. You can switch on your microphone, for example, set a timer, and choose where the recording will be saved.
To record the whole screen, click on the button that shows a screen with a solid outline and a circle in the corner.
To record a section of your screen, click on the button that shows a screen with a dotted outline and a circle in the corner. Part of your screen will be highlighted and you’ll see dotted lines marking what you’ll be recording. You can resize or move that window.
When you’re ready, click “Record.” If you’re recording your whole screen, you can click anywhere on the screen to start recording.
To stop recording, you can either press the stop button in the right corner of the menu bar at the top of the screen or press Command + Control + Esc. You can also press Command + Shift + 5 to pull up the Screenshot bar at the bottom of the screen and hit the stop button in the center of that bar.
**READ MORE: iPhone 13: Release Date, Price, Specs and Leaks
Command+Shift+6: Taking a screenshot of the Touch Bar
Not all Mac computers have the Touch Bar, a long but thin touch screen built into the keyboard. But if your MacBook does have one, you likely know how useful it can be.
If there's something on your Touch Bar that you'd like to show others, you can screenshot it by pressing Shift + Command + 6. This will immediately capture everything on your Touch Bar.
If you've got the 16-inch MacBook Pro or another model with the Touch Bar, did you know you can take a screenshot of what's currently showing on the Touch Bar? Just hit Command-Shift-6 to take a very wide and skinny screenshot of your Touch Bar.
Where are screenshots saved on Mac?By default, Mac screenshots are saved to the desktop. In Mojave or later, you can choose a variety of other places where your screenshot can be saved. However, if you were to use an app such as Grab (available in earlier versions of macOS) to take your screenshots then they might end up elsewhere. Grab is likely to save the screenshot to your Documents folder - and if you don't change the name of the image it will save as Untitled. |
 LastPass password Tool: Changes, How Useful, Available on Phones or Laptop? LastPass password Tool: Changes, How Useful, Available on Phones or Laptop? If you're afraid of lacking important information because of the weakness of computer security system, consider using LastPass, one of the best effective password tool. ... |
 45 Basic but Essential Shortcuts on Computer Keyboards 45 Basic but Essential Shortcuts on Computer Keyboards Compared to reaching for the mouse or navigating a menu, a single keyboard shortcut shaves a moment off your task. That's why it's important to ... |
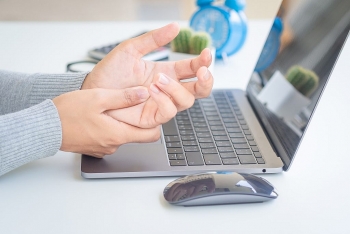 8 Tips for Relieving Finger Pain after Using Computer 8 Tips for Relieving Finger Pain after Using Computer It is common that you often suffer from finger pain after using computer. This problem makes you feel uncomfortable and worried, don't you? If the ... |