How To Take A Screenshot In Windows 11: Simplest Ways To Capture
 |
| How To Take A Screenshot In Windows 11: Simplest Ways To Capture |
Taking Screenshots Is Easier Than Ever in Windows 11
Windows 11 has brought plenty of new changes, but simple tasks like taking screenshots are more accessible than ever. You can take a quick snip, sketch all over it, and use it as needed in just a few moments.
We’ll be showcasing the easiest ways of taking a screenshot with Windows 11 – listing all the most popular methods and exactly how to do it.
What Is A Screenshot?
For those that are completely new to tech, a screenshot is a still image of a particular window or area on your display. It is a way of capturing exactly what your screen is displaying so you can share or use it in the future.
Screenshots are a great way of sharing interesting pieces of information or funny pictures with your friends, forums, or the internet in general.
How To Take A Screenshot In Windows 11: Latest and Easy Ways
There are multiple ways of taking a screenshot in Windows 11. Whilst not all features are new, there are some interesting additions to Microsoft’s new operating system that we’ll share with you below:
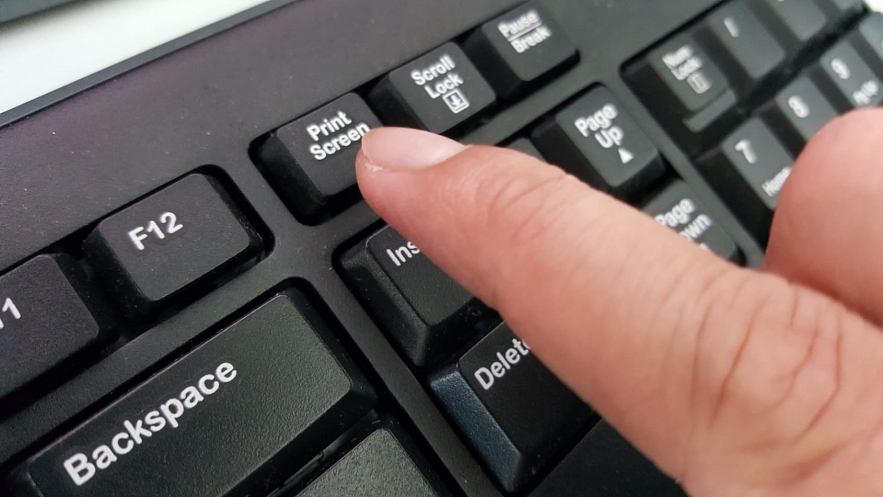
1. Press The Screenshot Button (PrtSc)
 |
| Press The Screenshot Button (PrtSc) |
This is the successor to the Windows 10 snipping tool. It will feature in Windows 11 and should offer some additional features for editing.
The Snip & Sketch tool is incredibly easy to use and allows you to save, edit, and customize any screenshot you take.
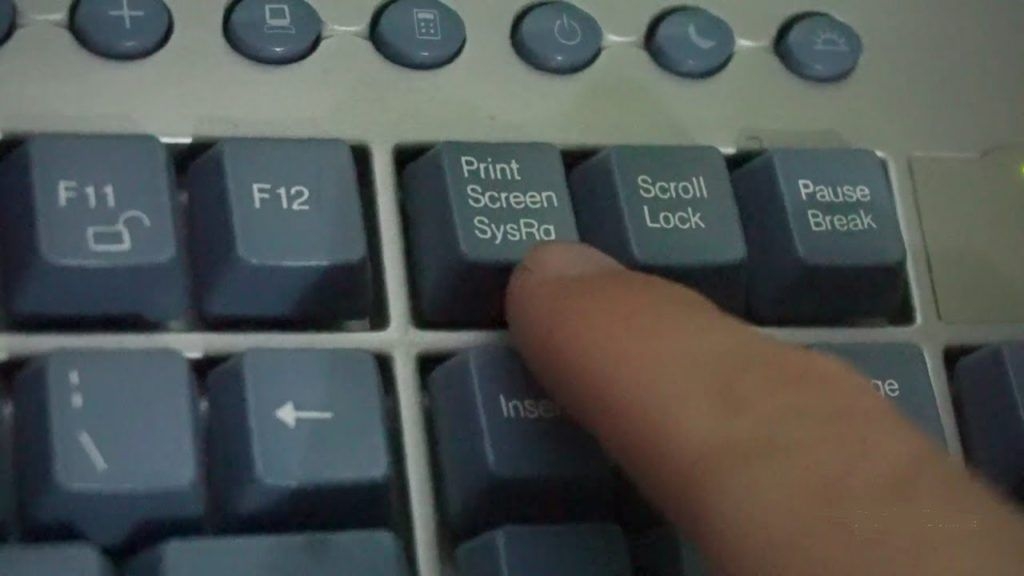
The quickest and easiest way to take a screenshot in Windows 11 is to simply press the Print Screen (PrtSc) button on your keyboard and your entire desktop will be copied to your clipboard.
Whilst this won’t save your image to your PC, it will add it to your clipboard – allowing you to paste it into various places like Paint or Word.
While easy, the PrtSc method is a little clunky. If you have multiple monitors, you'll grab all the desktops in one huge image and, if you want to save your image as a file, you'll still need to paste it into an image editor such as Microsoft Paint, Gimp or Photoshop.
On the other hand, if you are just emailing the image, including it in a document or posting it to Twitter or Facebook, you can hit just paste by hitting CTRL + V into the relevant editor and you're all set, provided that you want to show your entire screen.
| Tip: Whilst there are easier ways to save a screenshot in Windows 11, you can paste the image into Paint and save it for future use. |
2.Take Screenshots In Windows 11 With Snip and Sketch Tool to Captures Regions
Perhaps you want to screenshot just a small portion of the desktop. It could be a portion of a web page in your browser or a series of windows. Whatever the case, hit Windows Key + Shift + S and the Windows Snip & Sketch tool will launch, immediately giving you a rectangular box you can draw around whatever you want to capture from Windows 11.
The Snip and Sketch tool was added to Windows 10 as part of Version 1809. It was so handy, Microsoft decided to bring it along for the ride to Windows 11, where it comes preinstalled with the operating system.
The Snip and Sketch tool is a powerful native utility that lets you take screenshots and sketch over them for illustration purposes. It's useful to have on-hand if you don't want to, or cannot, download a third-party tool for taking and annotating screenshots.
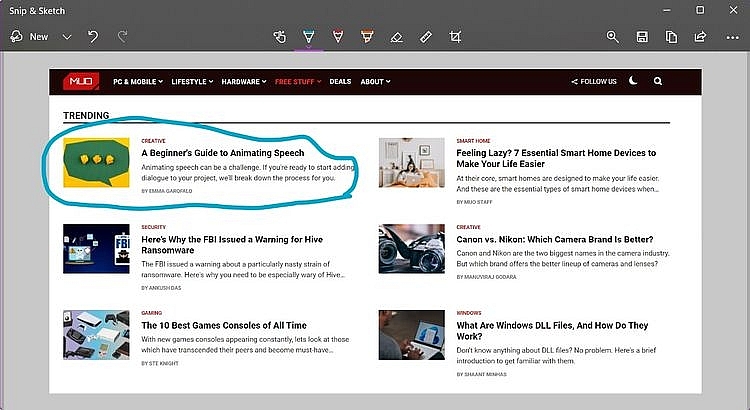
Take screenshots on Windows 11 with the Snip and Sketch tool - 5 simple steps:
1.Launch the Start menu by clicking the Start button or pressing Win.
2.Type Snip and Sketch and click on the Best match.
3.Click on the New button to take a free rectangular snip of your screen.
4.If you want to schedule a screenshot for the next few seconds, you can click on the dropdown button and click on the required time interval.
5.After you’ve snipped the screen, you can go ahead and sketch over it with the available pens and markers. You can also crop it, save it, or print it out as per your need. You can even share it with an email contact or add it to Microsoft OneNote.
 |
| Take Screenshots windows 11 With Snip and Sketch |
| Tip: If you don't want to screenshot a rectangular portion of the desktop, you can also choose to freeform sketch a shape, capture the active window or the full screen. Your picture will be captured to the clipboard, but you'll also get a Windows notification that shows what you captured and, if you click it, you'll open the Sketch portion of the Snip & Sketch Tool, where you can draw on top of your screenshot, crop it or highlight sections of it with a yellow highlighter. |
Take Screenshots With the Snip and Sketch Keyboard Shortcut
Going through the Start menu to take a screenshot can get really annoying if you've got an itchy photo finger. Fortunately, there is an easier way of taking screenshots using the Snip and Sketch utility on Windows 11.
All you need to do is hit the right key combination:
1.Open the window you want to screenshot.
2.Press Shift + Win + S. You'll know the Snip and Sketch tool has activated because the screen will darken.
3.In the menu that appears on the top of the screen, select the snip shape (usually you want to go with Rectangular Snip) and select the area that you want to capture.
4.Click on the Snip and Sketch pop-up that appears above the right of the Taskbar to edit the snip.
5.You can now sketch over your screenshot, print it, copy it to the clipboard, or save it for future use.
3. Press PrtSc + Win To Take A Screenshot In Windows 11
 |
| Press PrtSc + Win To Take A Screenshot In Windows 11 |
 |
| Press PtrSc + ALT To Take A Screenshot In Windows 11 |
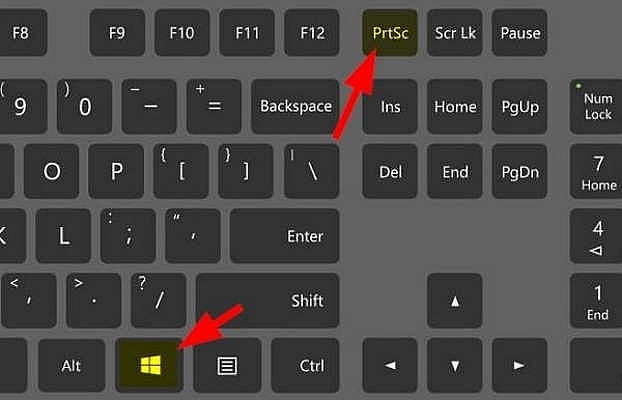
The simple way to take a screenshot on Windows 11 is to press the PrtSc + Windows key combination on the PC. This will directly save the screenshot to the PC memory (the previous method, however, copied it to the clipboard).
As mentioned above, there is a quicker way to take a screenshot and save it to your hard drive – and this is the way. Pressing the Windows key (WIN) and Print Screen key (PrtSc) at the same time will automatically save your screenshot to your drive. The location is set to Picture>Screenshots and all screenshots will be saved as PNG files.
| Tip: If you want to change the file type from PNG, simply open the image in Paint and save it as any file type you like – JPEG, GIF, etc. |
4. Press PtrSc + ALT To Take A Screenshot In Windows 11
 |
| Pressing PrtSc + ALT Combo |
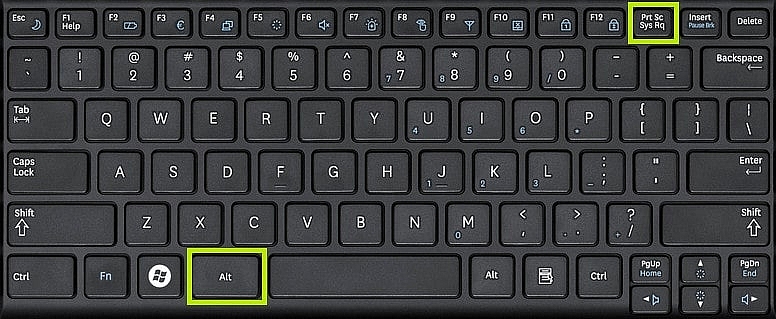
As a easiest method, you can take screenshots on Windows 11 by pressing the PrtSc + ALT key combination on your keyboard. Pressing these keys will copy the screenshot ONLY of the open or active program/screen to the clipboard.
If you’re looking to take a screen of a particular window instead of the entire screen you’re viewing, don’t worry – simply pressing ALT alongside PrtSc will only capture the active window you’re viewing.
Unfortunately, this won’t save the image to your hard drive but it will copy it to your clipboard where you can paste it various areas.
5. How to Take a Delayed Screenshot In Windows 11
Sometimes you need to take a screenshot not right now, but a few seconds from now.
To do a delayed screenshot in Windows 11, launch Snip & Sketch, not via keyboard shortcut but either by searching for it or from the Start menu. Then select "Snip in 3 seconds" or "Snip in 10 seconds" from the New menu. Do what you want to capture within that time frame and the Snip & Sketch tools will appear and let you draw a box around it.
To take a delayed screenshot on Windows 11, use the Snip & Sketch tool. This is an app on Windows 11 (and on Windows 10):
- Open the Start menu.
- Go to the list of applications.
- Open Snip & Sketch.
- Click the No delay button.
- Select a delay interval: 3 seconds, 5 seconds, or 10 seconds.
- Click New.
- Use the time delay to prepare the screenshot.
- Select the type of screenshot you want to take; Region, window, or full screen.
- Once captured, click the Save button and save the screenshot.
6. How To Capture a Full Web Page In Windows 11
There are a couple of things you simply cannot capture with Windows 11's built-in screenshot capabilities. You can't get Snip & Sketch to scroll down the length of a web page or other scrolling document -- a PDF for example -- and capture the whole thing. And you can't include mouse pointer in your captures.
However, if you install PicPick, you can do both of those things. To capture the entire contents of a webpage, click on the PicPick tray icon and select Screen Capture->Scrolling Window or hit CTRL + ALT + PrtScr (you can also assign a custom hot key). Then select the web browser you tab you want to capture from and watch as it scrolls through the whole page and captures it.
If you want to include the mouse pointer in any of your captures, open the Program Options menu, navigate to the Capture tab and check "include cursor image."
Take A Screenshot In Windows 11: Q & AQ. How Do You Take Screenshots on Windows 11? And Where Is It Saved? The easiest way to take screenshots in Windows 11 is to simultaneously press the “Windows + Print Screen” keys on your keyboard. The screenshot is then saved in the Pictures -> Screenshots folder on your computer. In this article, we have also detailed various other methods to take screenshots in Windows 11. Q. Can I Take a Screenshot on My Windows 11 Desktop? Yes. of course! You can use the same methods mentioned above, including the Snip and Sketch tool or PicPick app, to take a screenshot on your Windows 11 desktop. Q. How Do You Take a Screenshot on a Windows 11 PC in 2021? In 2021, it is easy to take a screenshot on Windows PC. Just press the “Windows + Print Screen” keys on your keyboard at the same time. The screenshot will be saved in Pictures -> Screenshots on your Windows 11 computer. |
 How To Get Best New Features Of Windows 11 How To Get Best New Features Of Windows 11 Windows 11 has a number of new features that might surprise you. Read on to know how to get the best new features of Windows ... |
 How to Screenshot on Windows 10 with 7 Quick & Easy Ways How to Screenshot on Windows 10 with 7 Quick & Easy Ways How to take a screenshot on Windows 10? We have 7 quick and easy ways to capture the screen. Check it out! |
 45 Basic but Essential Shortcuts on Computer Keyboards 45 Basic but Essential Shortcuts on Computer Keyboards Compared to reaching for the mouse or navigating a menu, a single keyboard shortcut shaves a moment off your task. That's why it's important to ... |

