Gmail Storage Full: How to Clean Up and Save Some Space
 |
| Gmail Storage Full: How to Clean Up and Save Some Space |
With Google’s deadline for Photos looming (June 1), it is important to clear up Gmail and delete all those thousands of unread emails. That’s because Gmail storage is counted toward the free 15GB of storage one gets with every Google account.
This 15GB free storage is allotted across Gmail, Google Photos, Google Drive, and other Google services. So, if you clean up your Gmail storage, then you will automatically get more space for Google Photos.
Here are a few ways to clear out the clutter and reclaim some space. Keep reading to know more about how to free up some Gmail storage space.
How to check Gmail current storage level
Log into Gmail and scroll all the way to the bottom of your inbox. In the lower-left corner, you’ll see how much storage you’re using compared to how much you have available. If the bar is mostly light gray, good for you; you’ve got plenty of space left. If it’s mostly (or all) black, it’s time to roll up your sleeves.
You’ll notice in this image above that I’m using a whopping 85 GB out of a total of 216 GB available. That brings us to our first tip.
Easy Tip - Pay for more Gmail storage
Google sells storage under the Google One brand. Head to one.google.com/storage and scroll down a bit to see the available plans. Easy route, you can pay for more Gmail storage.
 |
| Easy Tip - Pay for more Gmail storage |
Clean up Gmail automatic
You can get a good overview of what’s hogging space by visiting the Storage Management page. From there, you can review deleted emails that haven’t yet been expunged, spam, attachments, and other large files.
Click into each section, where you can review the items Google thinks you might want to jettison, and then either delete them one by one or check the “All items” box in the upper-left corner to go nuclear.
You can find the interface for this to be uncharacteristically clunky given Google’s typical UI chops, so let’s move directly over to Gmail to do things a bit more surgically.
Tips to clean up Gmail: Delete emails
Open Gmail and type “has:attachment larger:10M” in the search bar. This will bring up all emails with attachments of over 10MB in size. If you want to delete larger files, then you can replace “10” with a higher number. After Gmail displays the search results, select all the emails you do not need and tap on the delete button.
After this, head over to the Trash section and tap on the empty trash button. This is one of the easiest and best ways to quickly clean up the storage space.
Delete large attachments
In Gmail, click the little downward arrow on the far right of the search box to bring up the advanced search menu. Now, there are a bunch of fields we can fill out here, but the one we’re looking for is the “Size field” about halfway down. Let’s choose 15 MB, which kinda-sorta teeters on the edge of being a storage-sucking message.
Click the blue search button and you’ll see a list of all the emails you have with attachments totaling 15 MB or larger.
This view here is much easier to work with than the Google One auto-clean view. At a glance, you’ll have a pretty good idea of which messages you might want to keep and which ones you can safely torpedo based solely on the senders.
Check the boxes next to the emails you want to delete, then click the garbage can icon in the row of icons at the top of the messages list.
You’ll then need “empty” the trash to truly clear out these messages, which in turn frees up the storage space. Click “Trash” in the left sidebar, then click the “Empty Trash now” link. You can also wait for 30 days: The trash will then automatically empty itself.
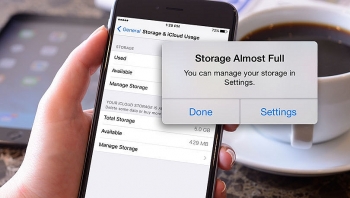 How to Free Up Space on Your iPhone and iPad: Best Ways to Do How to Free Up Space on Your iPhone and iPad: Best Ways to Do If your iPhone or iPad is full, there are many simple ways that you can do to claw back storage space right now. |
Delete old messages
Another good way to free up space is to simply delete old email you don’t need anymore.
Using the same drop-down from the search bar, set the “Date within” option to something like within one year of the second year since you first opened your Gmail account. That way, it’ll search backward a year and forward a year.
Notice that the search box says something like “after:2006/1/1 before:2008/1/2” now. You can manually adjust the before and after years to create a wider range for yourself.
You probably don’t want to just wholesale delete every single email you got over a period of a few years, and it would take forever to go through all these messages to choose which ones to oust. But there’s a quick way to clear out messages that weren’t important to you back then and probably aren’t important to you now.
Up above the messages list where all the icons live, click the left-most icon that looks like a square with a dash in the middle of it. From the dropdown list, select “Unread” and it’ll put checkboxes in all the messages you never bothered to read way back when.
Delete those, empty the trash, and be on your merry way.
Bury the bulk mail
Unless you’re hyper-organized about email, hypervigilant about unwanted messages, or both, it’s possible that your inbox is a dumping ground for bulk mail you either never asked for or you don’t care about anymore.
A simple search for “unsubscribe” in the search box works wonders to turn up a giant collection of old newsletters, marketing emails, order updates, forum posts, and who knows what else. This search gives you quick access to clear out old and/or large messages, too. You can pull down the advanced search box and work your magic in there: The “unsubscribe” parameter will be filled in for you already.
This is also a good way to look over your recent messages to see all the email lists you’re on and unsubscribe from the ones you don’t find helpful. After all: For every message you prevent from coming into your inbox, it’s one fewer message you’ll need to clear out later.
How to avoid ‘Gmail storage full’ issue in the future
You first need to unsubscribe all the unnecessary emails, and then delete all the old ones. If you signed up on a website that sends a lot of emails, such as promotions or newsletters, you can use the unsubscribe link to stop getting these emails. Notably, it could take a few days for the mailing list to stop sending you messages after you have unsubscribed, as per Google.
#Open Gmail on your PC or laptop.
#Open any email from the sender that you want to unsubscribe.
#Tap on the Unsubscribe button, which is located near the sender’s name.
#A pop-up window will appear. Click on “Unsubscribe” again to confirm that you want to stop receiving the emails. You are all set now. In some cases, you will be redirected to the sender’s site, where you can disable the email option. For example, when you unsubscribe to emails from Twitter, you are redirected to the official page, where you can immediately turn off the email option.In order to delete all the old emails, you can just type the name of the sender in the search bar and all the emails will appear in your inbox. You can then easily delete all of them without reading any one of them. For example, type Twitter in the search bar and Gmail will display all the Twitter-related emails. You can then click on select all button to delete emails all at once.
 How To Delete Your Google Account: Step By Step Guide How To Delete Your Google Account: Step By Step Guide Your Google account gives you access to a wide array of free services, including Gmail, Google Docs, Google Drive, and Google Photos, which you can ... |
 What Should I Do Before Google Photos End Unlimited Storage What Should I Do Before Google Photos End Unlimited Storage You’ve got roughly ten days to get yourself sorted before Google’s new policy comes into effect because Google will end unlimited storage on its Google ... |