How to Free Up Space on Your iPhone and iPad: Best Ways to Do
 |
| How to Free Up Space on Your iPhone and iPad: Some Simple Ways that You Should Try |
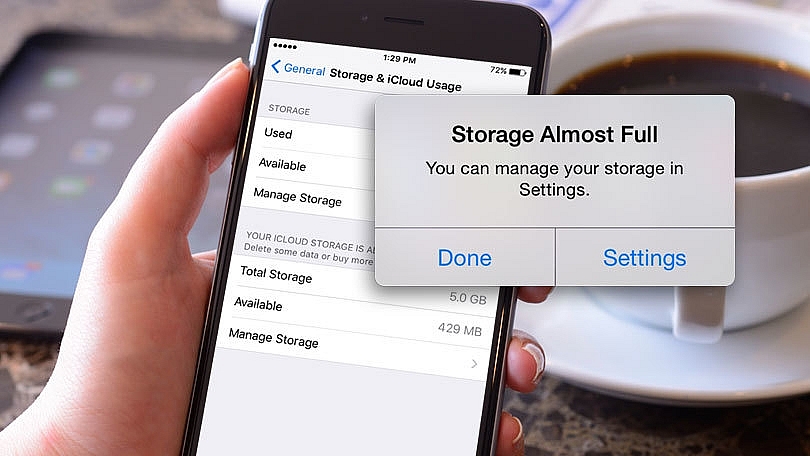
You'll have no space for the best games or useful new apps, nor room for making memories with new photos or videos. The good news is that it's not too difficult to free up some extra room on your iPhone, if you try some simple ways. In this guide, we run through several options and easy methods available to free up storage on iOS devices.
As you know, every iPhone and iPad comes with a set storage capacity ranging from 16 GB to 512 GB for iPhone, and 16 GB to 1TB for iPad. While it's always a good idea to buy a model with the biggest storage you can afford, after a while even the highest storage devices can fill up, and it often happens when you least expect it.
From the music you buy and the apps you download, to the photos you take and the messages you receive, all of that content has to live somewhere on your device. And when your iPhone or iPad storage is full, it's not like you can increase it. What you can do, however, is free up your existing storage.
Follow these few simple steps, and you'll be on your way to a less overloaded:
Check Your Total Usage on Your iPhone and iPad
After you set up your iPhone, you should have plenty of storage at the start – but you'll quickly find your available space dwindling. Your first step is to figure out what kind of files are taking up the most space.
First you're going to want to assess how much space you have.
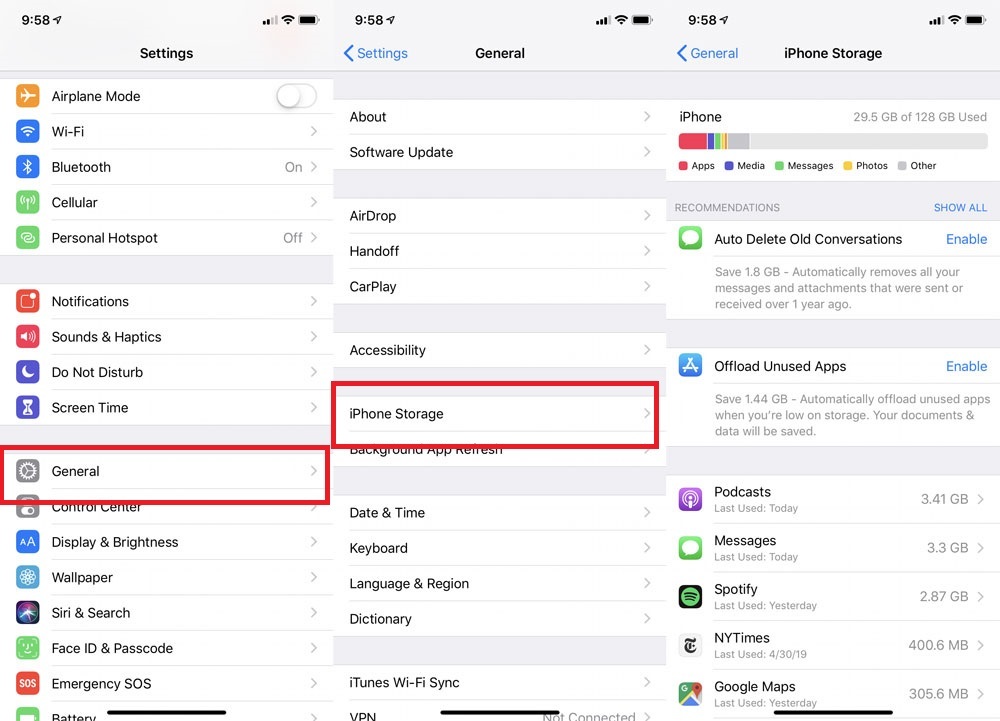
In your iPhone Settings, go to General > iPhone Storage. You'll see a list of apps descending from most to least storage used, with Music, Photos and other media apps most likely topping the list – especially if you're someone who shoots lots of 4K videos or downloads films for offline viewing.

You don't need to understand these numbers deeply. To update iOS, you'll want to have up to 5GB of free space. If you simply want to have enough free space so you can take new photos and install new apps without worrying about hitting an obstacle, give yourself at least 2GB of free space.
Note that when you add your available space and the used space, they won't add up to the total size of your phone because it doesn't include the space being used by the operating system.
You can also review your phone storage by connecting your iPhone to your Mac computer and opening your iPhone summary in Finder. If you sync music, movies or other files from your MacBook to your iPhone, you can quickly unsync playlists or media from your iPhone without having to delete them one-by-one.
You can also uncheck a playlist or film to see how much storage removing it would save, then decide whether or not to sync the changes or leave those files installed.
Delete music, movies and other media
The best iPhone files to delete in a pinch are those that you are certain you can re-download later. Whether you have tons of Music playlists, Audible audiobooks, Apple TV purchases, or other large downloads, you know for certain that these can all be redownloaded, either from the app or from your computer.
With first-party Apple apps, you can delete files in Settings > General > iPhone Storage. Select an app like Music, and you'll see a list of all downloaded music with file sizes next to them. You can then hit 'Edit' and remove the largest collections of songs, or simply swipe left on any song to reveal the Delete button.
Your other option, as mentioned above, is to manage your media files by syncing your iPhone to your computer. That way, you can add or delete files en masse, instead of having to remove them one at a time.
As for third-party apps, your only choice will be to open them and manually delete downloaded files using the tools available. Look for streaming apps with suspiciously high Data storage numbers: you may have downloaded offline videos for a flight and never removed them.

Find Apps You Don't Use and Delete
Select any app, and a new page shows the usage in two parts: the amount of space the app itself uses (in light gray at the top) and the space used by the app's data and documents. For example, the Podcasts app shown takes up 1.63GB total: 25.3MB for the app and 1.6GB for documents and data.
On that device storage page, look for apps you don't use. It's much easier to do this here than on your home screens, where apps are likely to be scattered across several pages and bunched into folders.
If you find apps you don't need, tap them and select Delete App. Any app you've purchased is always available to re-download again at no extra charge from the App Store.
To delete apps from the home screen, place your finger on an app you want to delete and hold. Apps will start to wiggle and a small X appears on each icon. Press the X, and confirm to delete. To stop the wiggling, press the home button on devices that have it or tap "Done" on the top-right for those that do not.
Offload Them
If you want to temporarily disable an app without deleting its settings, like when you have to free up space to install an iOS update, Apple lets you offload them. They'll remain on your home screen, but you'll need to tap to re-download to get back in. Find the app on the storage list, tap it, and select Offload App.
You can also set up the automatic removal of apps you don't use often. Go to Settings > General > iPhone Storage > Offload Unused Apps and tap Enable.
Empty Your Browser's Cache
One final smidgen of junk to wipe off your iPhone or iPad is the cache for the Safari web browser or other mobile web browsers you use. For Safari, go to Settings > Safari. Tap Clear History and Website Data.
For Chrome on iOS, open the app, tap the three dots on the bottom-right corner and select History. Then tap Clear Browsing Data to wipe everything out or Edit to erase specific sites. You can also navigate to Settings > Privacy > Clear Browsing Data, which will let you delete browsing history, cookies and site data, cached images and files, saved passwords, and autofill data—or everything at once.
Run a full reset on your iPhone
All of our tips on how to increase storage space on your iPhone involves individually deleting files. The other, more drastic option is to actually reset your iPhone, then specifically add the files and apps you know you need. That link will take you through the steps.
Don't do this lightly though – you need to make sure to back up your iPhone first, so you don't lose anything important. Then you'll need to restore the content you want without re-adding the superfluous junk taking up too much space.
Frankly, this option could be more time-consuming than just deleting content individually, unless you're really planning to trash the majority of your files. Otherwise, the previous sections should give you all the steps you need to increase your disk space.
Other Tips to Try
If huge apps are a problem but you don’t want to delete them, Apple has a handy Offload feature that removes them from your device’s storage but keeps them in place on your Home screen.
From the Settings > General > Storage menu, tap into an offending app and select Offload App. The next time you tap on it from your Home screen, it’ll be reloaded onto your device, provided you’re connected to the Internet.
You can also set your phone to automatically offload apps that you don’t use very often. That can be done from the Settings > App Store menu: Toggle the Offload Unused Apps slider on if it isn’t already.
And finally, if you listen to a lot of podcasts—or rather, if you mean to listen to a lot of podcasts but you never get around to it—you might have a bunch of large-ish audio files clogging up your device if new episodes are constantly being automatically downloaded.
Head to Settings > Podcasts and look for the Download Episodes option. Tap it, and you’ll be able to choose Off, Only New, or All Unplayed. Switch this to Off, and then either stream or manually download the episodes you actually want to store on your phone.
 Gmail Storage Full: How to Clean Up and Save Some Space Gmail Storage Full: How to Clean Up and Save Some Space Use Gmail long enough, and your free storage will buckle under the weight of modern digital life. With Google's free storage space ending for Google ... |


