10 Little-Known Mac Features You Must Try
 |
| Top 10 Little-Known Mac Features You Must Try Knowinsiders.com |
| Table Of Content |
The Mac operating system that we use today was introduced 21 years ago. Whether you’ve been using the Mac longer than that or just bought your first M1 MacBook, macOS is a vast operating system and there are tons of tucked-away features that you can take advantage of to help you get stuff done.
Macs are well-known for being easy to use, but they also have a lot of great features hiding just below the surface that many people never notice.
It doesn't matter if you're running MacOS Monterey or a prior version of the operating system (though, you should download Monterey for a number of reasons) -- you can still do all of these simple things to stay organized and get more done on your MacBook Pro, MacBook Air , iMac or Mac Studio.
Here are the top 10 hidden and little-known Mac features that you need to try right now.
What is a Mac?
 |
| Photo: Apple |
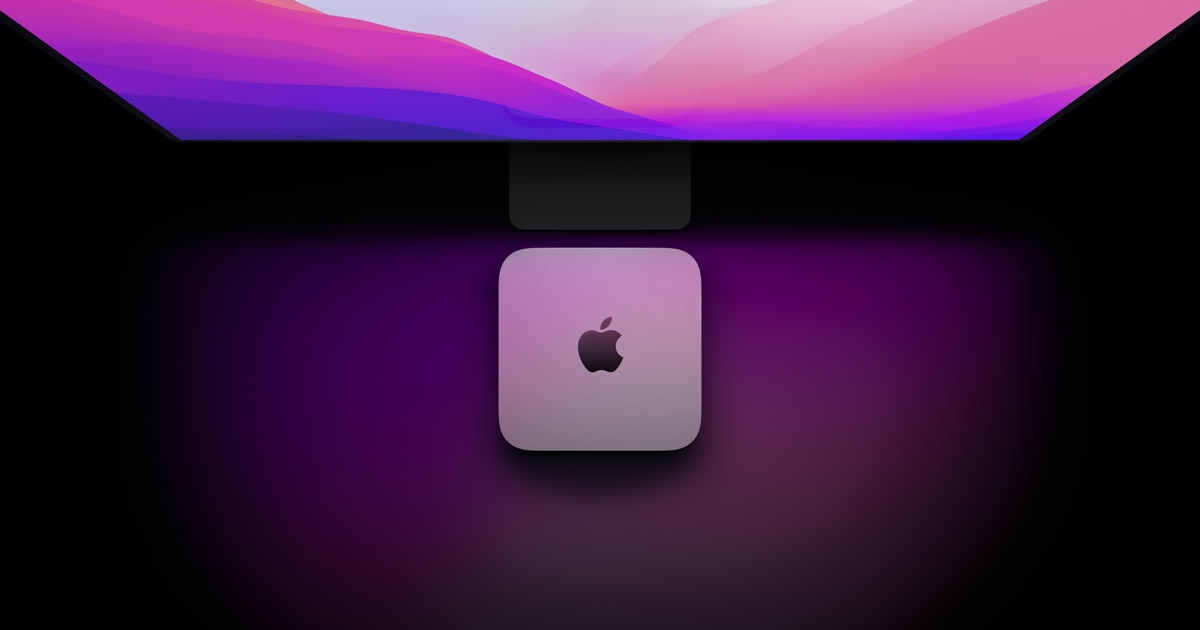
The nickname 'Mac' refers to the series of Macintosh computers made by Apple Inc. since 1984. With its very first model, Apple is largely credited with starting the trend of making computers that are easy for ordinary people to use and promoting the idea that anyone can find a computer useful. Macs are particularly popular with graphic and web designers.
Macs' main rivals are PCs running the Microsoft Windows operating system (i.e. the background software that runs everything else).
Key features and benefits of an Apple Macintosh computer
Apple Macs come in a variety of models. Most famous today is the all-in-one iMac, in which the computer is built into a screen. There are also the more expensive (and powerful) Mac Pro machines, which are like PCs in that they consist of only the main 'tower' case; there is the small monitor-less Mac Mini and finally, there's the MacBook laptop - which has three varieties on sale today: MacBook, MacBook Pro and MacBook Air.
All Macs come with Apple's 'Mac OS X' operating system installed, though on models made since 2006, it's possible to partition the hard drive and install Windows as well.
Macs are capable of all the same general functions as PCs, such as word processing, playing music and videos, games, accessing the internet, and more. Most features require different programs than those on a PC, however.
Apple Macs have a number of advantages over PCs. They're famously visually attractive and are known for the excellent quality of their build. The Mac OS is also largely regarded as much easier to use and 'prettier' than its Windows counterpart, and it's certainly safer from viruses (at the time of writing, there are no known Mac viruses).
Unlike PCs, which have many manufacturers, Macs are made only by Apple. As a result, they have far fewer hardware incompatibilities than their PC counterparts.
Macs used to be much less compatible with PCs than they are now. Sending Mac documents as email attachments to PCs was fraught with problems. However, nowadays it's extremely rare for there to be difficulties in Mac documents being accessed on PCs and vice versa.
It's not all sunshine for Macs, though. For one thing, they're generally more expensive than PCs and have far less software available, especially games. They also are much less open to personal modification, if you're so inclined.
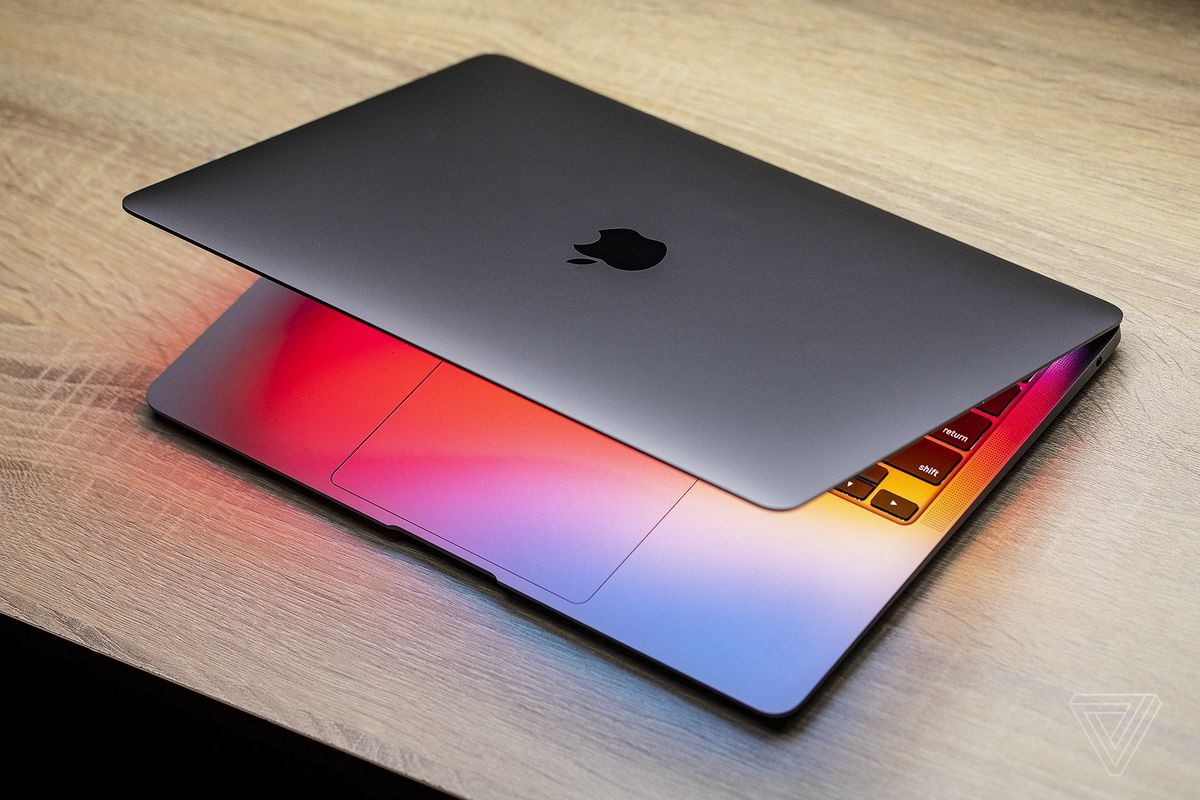
The Pros of macOS
 |
| Photo: The Verge |
1. Comes With Useful Free Productivity Apps
The selection of free Apple-developed apps preinstalled in a Mac device or available for downloaded through the App Store is another advantage of macOS. For example, there are office productivity apps such as Pages, Numbers, and Keynote that are free unlike the Microsoft Office Suite apps that are generally sold separately.
2. Simple and Cleaner User Interface than Windows
When stacked up against Windows, macOS has the advantage of having a user interface that is simpler and more upfront. Those who are familiar with the iOS mobile operating system used in iPhones and iPads will find using macOS very familiar. Apps are generally downloaded via the App Store and can be found in a central location called the Launchpad.
3. Has Dedicated Features for Multitasking
Several multitasking features are native to macOS and Mac devices. The operating system has a feature for running multiple workspaces that are similar to opening numerous desktops or home screens. Mac devices have dedicated keys and other hardware inputs such as gestures for switching between apps or workspaces.
4. Optimized Software and Hardware Due to Better Integration
Another advantage of macOS is that it runs with less to zero hiccups. Apple is both a hardware designer and a software developer. Third-party hardware components are selected based on established criteria while third-party apps undergo tests and verifications for compatibility and security. The strong attention to software-hardware integration results in optimized performance.
5. Less Susceptibility to Malware and Security Issues
Take note that macOS is still susceptible to malware. However, when compared to Windows, there are few types of malware developed specifically for the macOS. It is also important to note that Apple regularly provides security updates for the entire operating system and its apps. The fact that apps can be generally downloaded via the App Store means that there is a fewer risk of installing other apps from suspicious developers.
6. Compatibility with Other Apple Devices and Services
Apple has developed and marketed products and services that are seamlessly compatible with one another. Both macOS and iOS have a near similar user interface and workflow logic. In addition, apps developed by Apple and those from third parties have versions available for both macOS and iOS. Files or data are synchronized across devices due to dedicated and free cloud services from Apple.
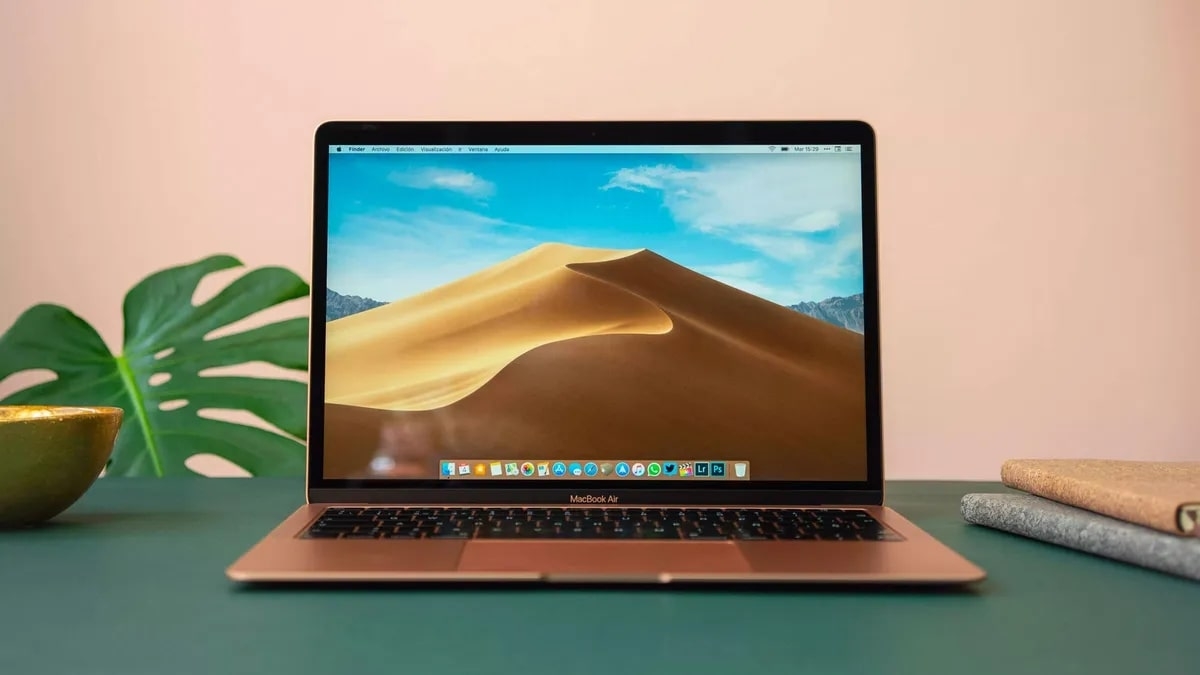
The Cons of macOS
 |
| Photo: CNET |
1. Limited and Restricted Availability of Apps
One of the drawbacks of macOS is that it still has a limited number of apps. Note that Windows enjoy a huge selection of apps from different categories and it also has a broader selection of games. macOS is not ideal for gamers. It is worth mentioning that Windows devices are more accessible than Mac devices. Hence, developers prioritize developing for Windows because of the better market reach.
2. Inflexibility for Hardware Upgrades and Customization
Although not a direct limitation or disadvantage of macOS, it is still important to mention that Mac devices have a limited option for hardware upgrades. For instance, the CPU or RAM of a MacBook laptop or iMac desktop cannot be replaced easily because these components are deeply integrated with the entire hardware system. A number of Windows computers provide a better level for customization and upgrades.
3. It Can Be Very Expensive to Own a macOS Device
MacBook laptops and iMac desktops are very expensive when compared to Windows-based counterparts with similar or better hardware specifications. Take note that macOS is exclusive for Mac devices. Hence, another key disadvantage of this operating system is that it is very expensive to own. There are workarounds for installing macOS on non-Apple devices, but this is illegal.
4. Lacks Appeal for Hardcore Gamers
Remember that macOS has limited game titles and restricted options for hardware upgrades or customization. What these facts mean is that both the operating system and Mac devices are not appealing for gamers. Although high-end Mac devices have capable hardware features, the lack of game titles and the fact that these devices are more expensive than their Windows-based counterparts dissuade both gamers and game developers alike. Essentially, macOS is not marketed for gamers.
Top 10 Hidden Mac Features That You Must Try Right Now
1. Rearrange menu bar icons
 |
| Photo: MacRumors |
The menu bar is a good way to quickly access frequently-used settings and other functions. To get the most out of it, you can rearrange the icon order to your preferred locations. To move an icon, hold the Command button, and then click and drag the icon to where you want.
A few menu bar items can’t be moved, such as the date and time, Siri, and Control Center. All of the icons to the left of those immovable icons can be rearranged.
To move an icon in the menu bar, hold Command, then click and hold the icon to drag it across the bar. Simple.
There are no restrictions here — feel free to move icons anywhere you see fit. Don’t like the clock all the way over there on the right-hand side? Drag it to somewhere more suitable.
The only icon that cannot be tampered with is the Notification Center. Apple has decided this must remain in the far right corner of the menu, which is fair enough — it looks good there.
Note that the above refers to the modern versions of macOS. The movement of icons on old versions (El Capital and older) is reserved for selected apps only: Bluetooth, audio, Time Machine, WiFi, battery, clock, and user switching. Spotlight and Notification Center must stay put, as must all third-party apps.
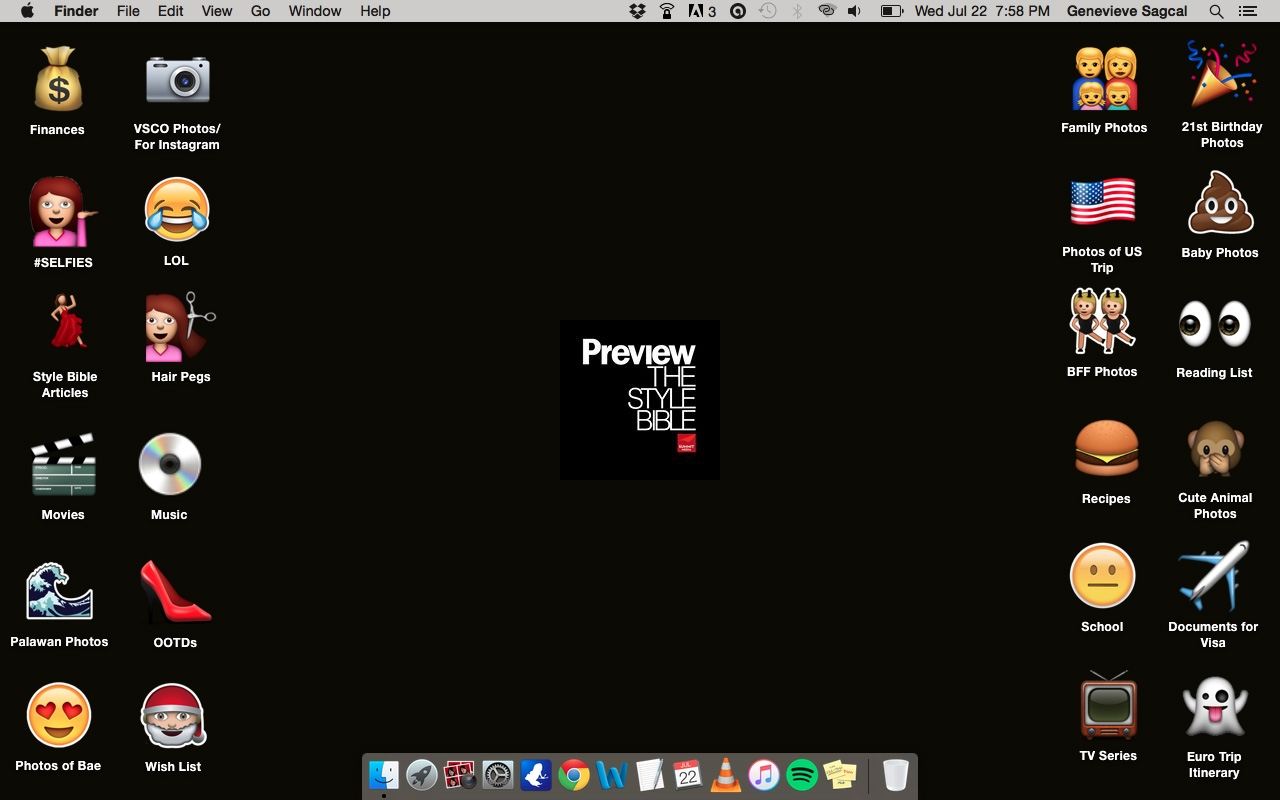
2. Turn your desktop folders into emoji
 |
| Photo: Screenshot |
Make your desktop folder icons easier to differentiate (and just more fun) by turning each folder into the emoji of your choice. Here's how to do it:
1. Create a folder on your desktop by clicking File > New folder.
2. Do a Google Image search for the emoji you want (e.g. "heart emoji" or "star emoji").
3. Drag the image you want to your desktop.
4. Double-click the image to open it in Preview.
5. To make the image transparent, press the markup icon (it looks like a magic wand), click the background of the image so that a moving outline appears around it and click Edit > Cut.
6. Click the markup icon again, and click and drag a box around the emoji.
7. Click edit, select all. Press Command + C.
8. Go back to the original folder you created on your desktop and right-click on it.
9. Click Get Info.
10. In the screen that pops up, click the blue folder icon and press Command + V. You should see your emoji appear.
3. Do calculations and currency conversions in Spotlight
 |
| Photo: OXSDaily |
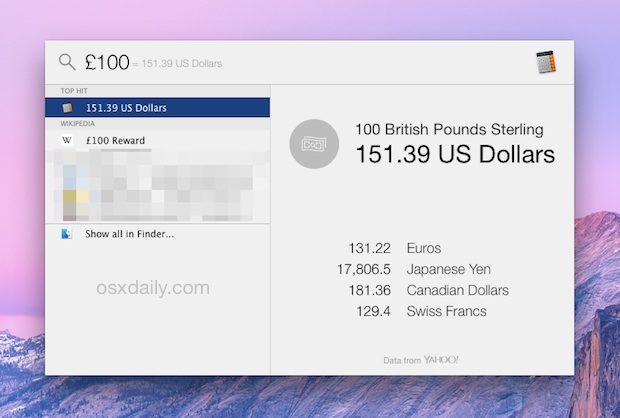
Spotlight is one of the more underrated Mac features -- when you know how to use it, it's a useful tool for getting around your computer faster, and without using a mouse. For example, you can use Spotlight as a calculator and also convert currency.
To open Spotlight, click the magnifying glass icon at the top left of the menu bar, or tap Command + Space bar on your keyboard. To use it as a calculator, simply type what you want to calculate into the search bar (for example, "919+1246/2") and the answer will appear as the search result, which you can copy and paste.
To use Spotlight as a currency converter, type the amount you'd like to convert, with its currency symbol (for example, $100 or £100) and the search results will bring up conversion rates in different currencies, with data drawn from Yahoo.
You can also use Spotlight for other tasks. It can show you dictionary definitions, calculations, measurement conversions, and more:
- To get a definition, enter a word or phrase, then click the result in the Definition section.
- To get a calculation, enter something like “2+2” in the search field.
- To convert measurements, enter something like 25 lbs or “32 ft to meters.”
4. Customize (and locate) your cursor
 |
| Photo: MacRumors |
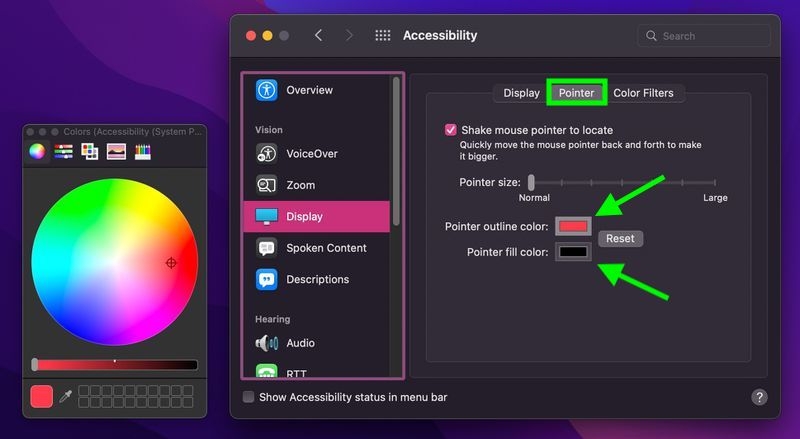
Typically, there are two ways you can change your mouse cursor: you can change the Mac’s cursor size and its color. Changing the size of your mouse cursor is easy and fairly fast, with no other apps required. But you will need a special app if you want to change the color of your cursor.
Long-time Mac users might have noticed that the Mac’s cursor is getting smaller. That’s because larger and higher-resolution displays have become today’s norm. They visually make your mouse or trackpad pointer smaller. Just take a look at the Mac’s laptop lineup with Retina displays, the 27-inch iMac with a high-resolution Retina display, and the 21.5-inch iMac with a 4K display. It’s definitely getting tougher and tougher to see the mouse pointer as it zooms across your Mac’s screen. So, you might want to make your Mac’s mouse pointer larger so that it'll be easier to spot.
Or, on the other hand, let’s imagine that you’ve just switched from a 21.5-inch iMac with a 4K display to a 12-inch Mac and you are getting extremely annoyed with the seemingly-huge mouse pointer and you can’t manage to concentrate on your work.
Here’s how to change the size of your Mac’s pointer:
Note: the screenshots you will see below are taken using macOS High Sierra. There may be some slight differences if you have a different macOS version.
- Go the Apple menu, choose System Preferences, and select Accessibility
- Go to Display.
In Display, find the horizontal slider titled Cursor Size. Drag it to adjust the cursor size. You can visually see how the cursor changes as you adjust that cursor size slider. That’s it!
How To Change The Color: Customize Cursor On Mac Via Special Apps
If you want to adjust your Mac’s cursor acceleration and sensitivity, consider using special applications. Such cursor effect apps can make your Mac’s mouse pointer look more vibrant, colorful, and unique.
Let’s review some of them.
CursorSense is a great app that adjusts the cursor acceleration and sensitivity. Once both values are set, you will be able to move the cursor just like you move your hand. It’s also good for the fact that all mice and trackpads are supported.
EyeSpy is a fun app with some great customizable effects for you to try. Cartoon eyes watch your mouse cursor as it moves about the screen. You can easily share cartoon characters via Messages, Twitter, Facebook, Mail, and any other social media sharing app.
SmoothCursor is another good app you can try. This menu-bar app comes with separate controls for customizing the mouse and trackpad accelerations. You’ll particularly enjoy using it in combination with drawing applications or FPS games.
5. Sign documents in the Preview app
 |
| Photo: MacRumors |
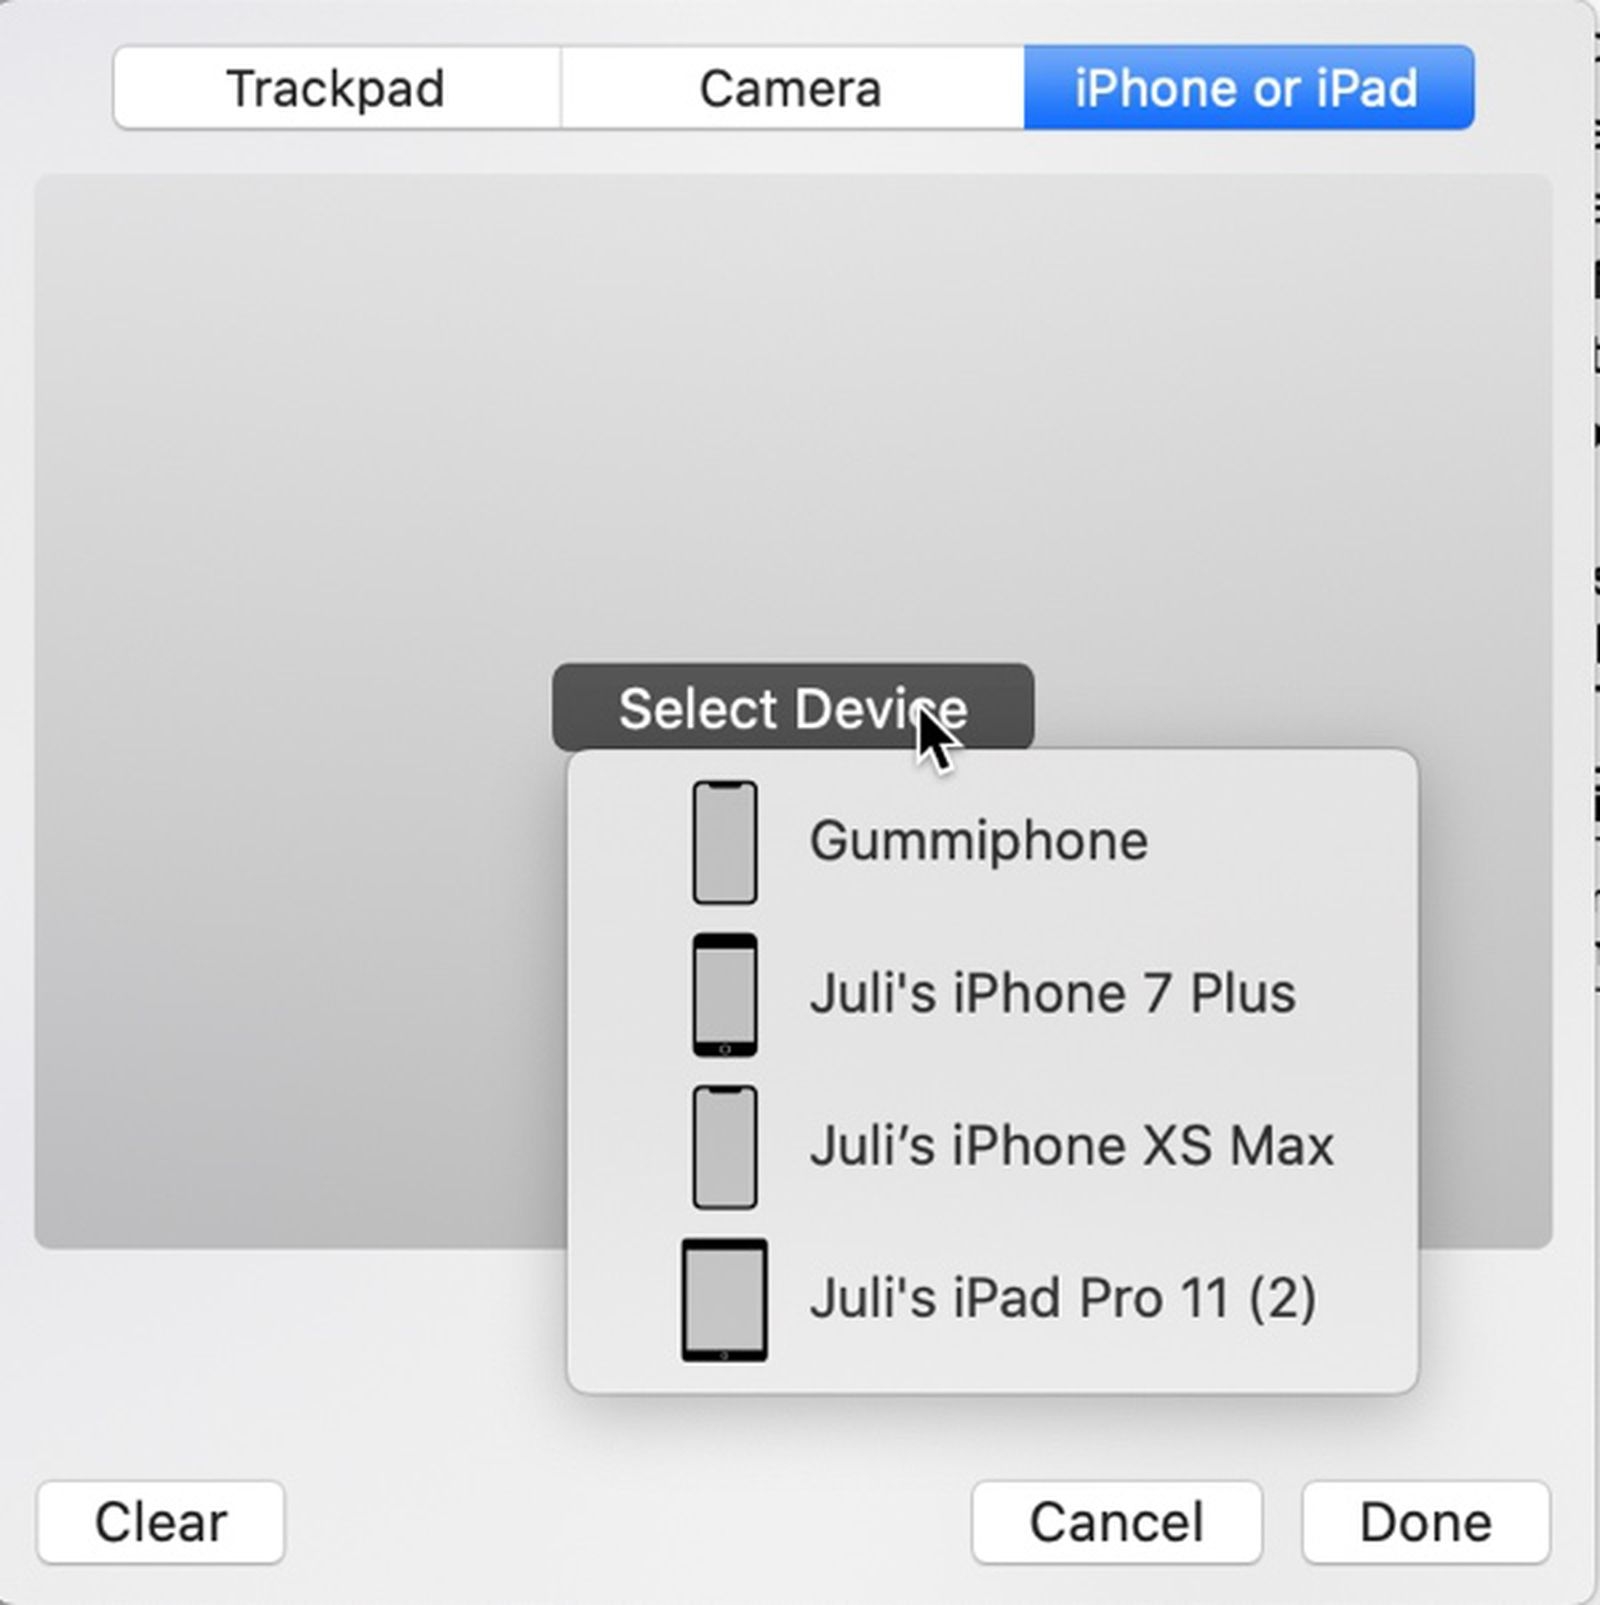
If you're emailed a PDF to sign, you don't have to go through the tedious process of printing it out, signing it and scanning it back in -- your Mac allows you to sign documents directly on your device in the Preview app.
You can do this in several ways in different apps and programs, including saving a scanned copy of your signature on a piece of white paper and adding it as an image in a given document. However, if you are working in the Preview app here's what to do:
1. Click the Show Markup Toolbar button; it should look like a small circle with a marker inside of it.
2. Click the box at the top that looks like a signature.
3. Click Trackpad to sign your name with your finger on the trackpad, or click Camera to sign your name on white paper and take a photo with your computer's webcam. You can also save a signature to reuse.
6. Use Split View to see two apps side by side, without resizing
 |
| Photo: CNET |
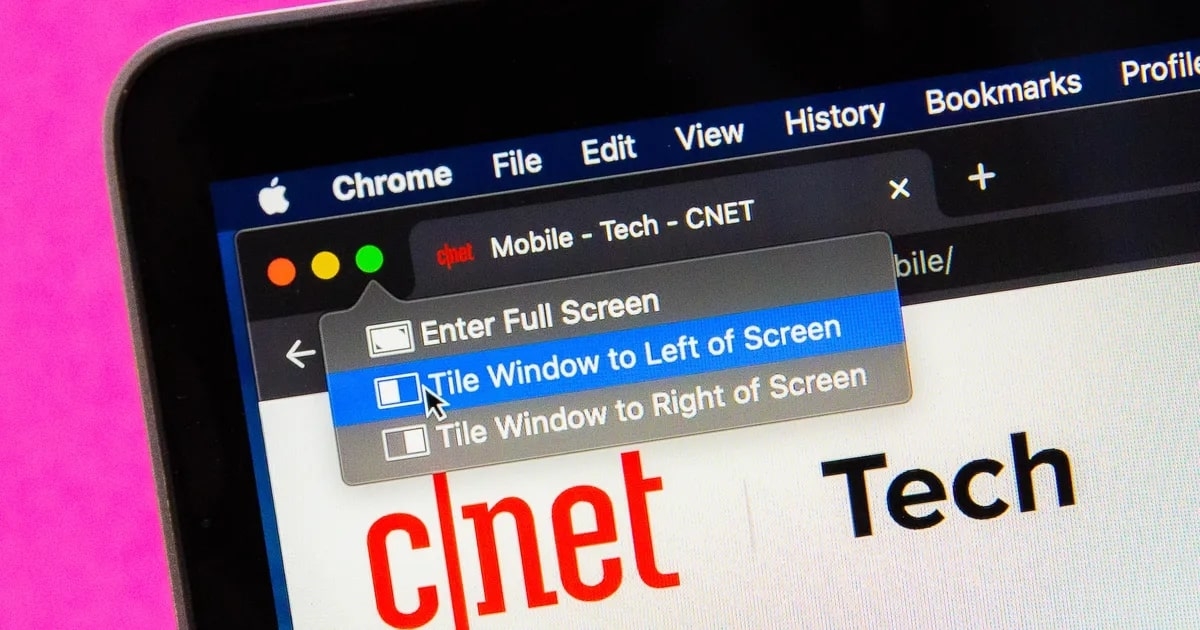
With Split View, your Mac allows you to work in two apps side by side without resizing them, and without the distraction of other apps.
1. In MacOS Monterey, go to the upper left corner of a window, and either hover your mouse over or click and hold the green full-screen button.
2. Choose Tile Window to Left of Screen or Tile Window to Right of Screen from the menu, and the window will fill that side of the screen. In past versions of MacOS (you need OS X El Capitan or later to use Split View), click and hold the green full-screen button, and drag the window to the left or right of the screen to tile it.
3. To get out of Split View, move the cursor to the top of the screen, making the green full-screen button reappear. Click and select "Exit Full Screen."
7. Create and customize Memojis
 |
| Photo: iDownloadBlog |
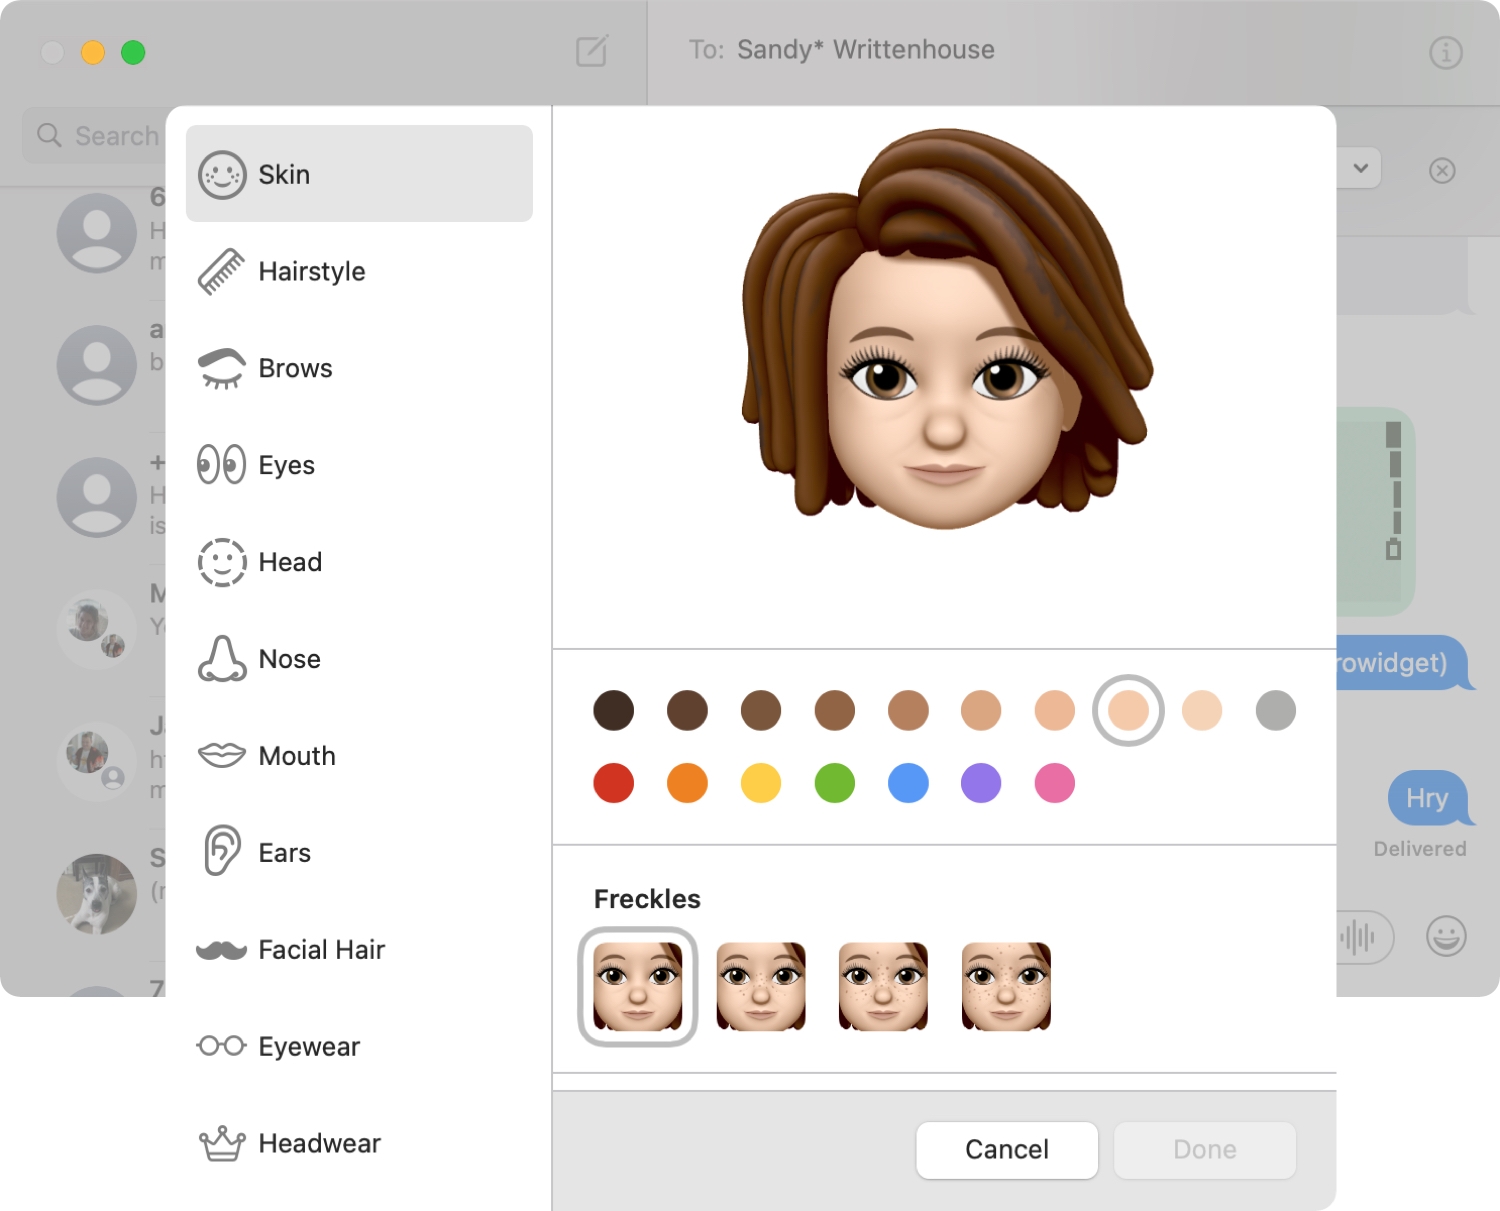
Memojis are thought of as an iPhone/iPad thing, and while they are a bit more functional (and fun) on those devices, you can still create or make them in macOS. Here’s how.
Launch System Preferences (located under the Apple menu).
Your account should be at the top of the System Preferences window. If you move the cursor over your profile pic, “edit” should appear. Click it.
In the window that appears, a list of different profile pic options are on the left. Make sure Memoji is selected.
Your available Memoji appears on the right. If you already have a Memoji and you want to make changes to it, select it and click the Edit button. To make a new Memoji, click the “+” button.
You will be presented with a set of characteristics you can modify, from Skin to Clothing. Go through each one and make your selections.
Click Done when finished.
After creating a Memoji, you can also set a Pose or a Style (which is basically a background color). If you want to set the Memoji and your Mac’s user profile pic, select it so that it appears in the lower-left corner. Click Save.
If you’re using iCloud and your devices are on the same account, your Memoji will carry over to your other devices.
8. Turn on iCloud Private Relay
 |
| Photo: HowToiSolves |
Apple created iCloud Private Relay to help preserve your privacy when you’re browsing the web. When you use Safari, the data that is sent is encrypted, and then it travels through two intercept relays—points on the internet that data travels through—to help hide your location, IP address, and browsing activity to prevent a profile about you from being created. The second relay is performed by a third-party service to prevent Apple from knowing the user’s information. It’s not quite a VPN, but it’s a great tool for privacy.
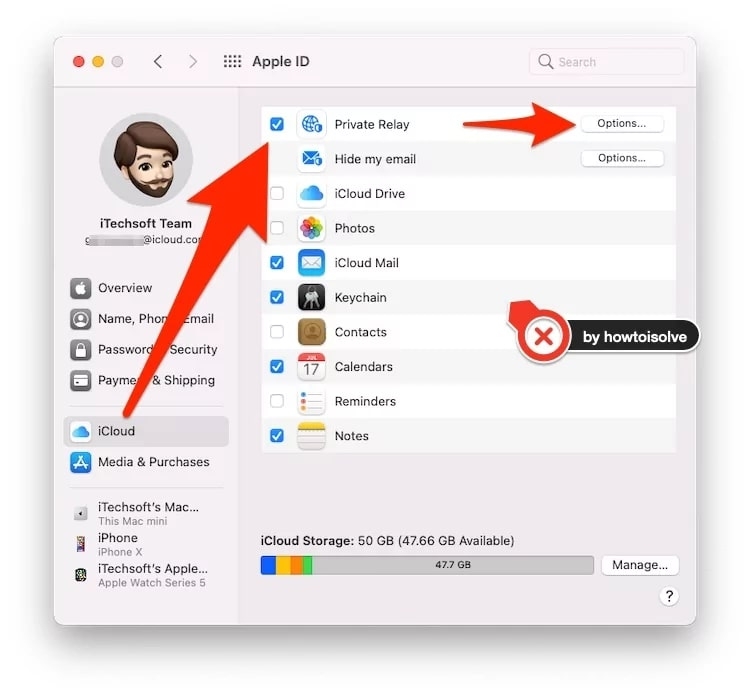
To turn on iCloud Private Relay, go to System Preferences and click on your Apple ID. In the checklist on the right, look for Private Relay (Beta) and check the box and click the Options button. There’s also an IP Address Location setting you can modify.
Internet Private Relay is still a beta feature, which means it is usable but it still has some obvious kinks to work out and Apple could at any time make a major change to how it works. It requires an iCloud+ subscription, which costs as little as a buck a month for 50GB.
1. On your Mac, choose Apple menu > System Preferences, click Apple ID , then select iCloud in the sidebar.
2. Click Private Relay, then click Options.
If an Upgrade button appears, click it to upgrade to a storage plan that includes iCloud+.
If requested, enter your Apple ID password and click Continue.
3. Do any of the following:
Turn Private Relay on or off: Click the Turn On or Turn Off button.
Select an IP Address Location: To keep your general IP address location as it originally was, click Maintain General Location. To use a broader IP address location in your country and time zone, click Use Country and Time Zone.
4. Click OK.
9. Add extensions to your contextual menu
 |
| Photo: Stack Overflow |
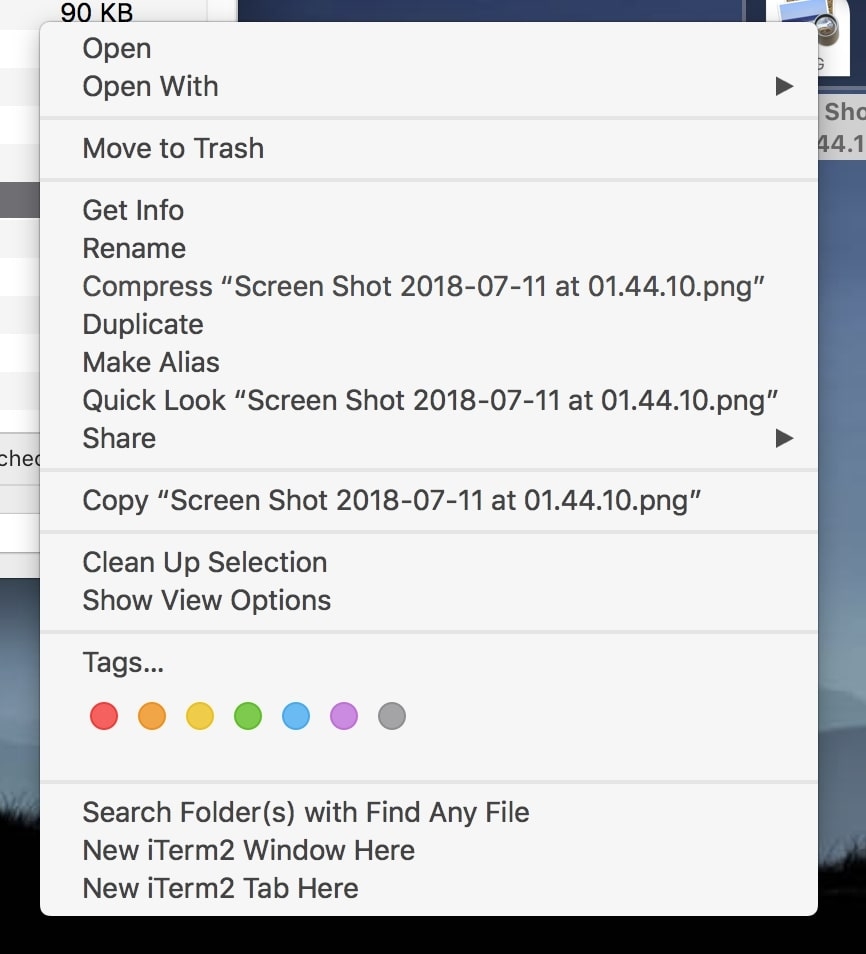
The macOS contextual menu, accessible by right-clicking, control-clicking, or tapping with two fingers on the trackpad, is great in that it can allow you to do some tasks immediately, saving some steps. It’s not just system functions, though—when you install an app, it often adds functions to the contextual menu.
You may see some app-related actions at the bottom of the pop-up menu, or, when you right-click a file and select Quick Actions, a list of app-related tasks appears. When an app adds this kind of functionality, it’s adding an extension to macOS. But sometimes there are items in the menu that you never use, or you may not know that there are functions available that you could be using.
To manage the contextual menu, go to System Preferences and open Extensions. To specifically manage the Quick Actions section of the contextual menu, go to the Finder section. There are other sections in the left column where you can add to remove tasks. For example, in the Share section, you can add apps to the Share menu.
10. Erase All Content and Settings
 |
| Photo: Apple Support |
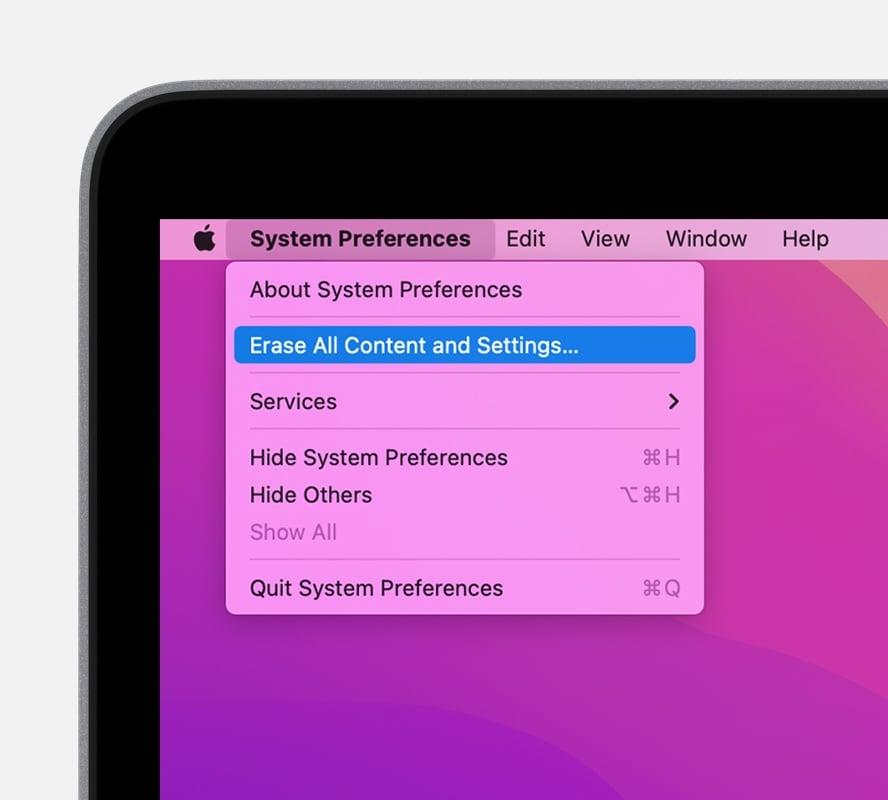
We all run into issues on our Mac that could use a factory restore. If you’re using an Apple silicon Macs or an Intel Macs with a T2 security chip running macOS Monterey, there’s a quick way to erase your Mac’s settings, data, and apps while keeping the currently-installed operating system. This doesn’t erase a Mac completely, just your personal stuff.
Open System Preferences (Apple menu > System Preferences), and then with the System Preferences window at the front, go to the menu bar and click on the System Preference menu. Under About System Preference is a new item called Erase All Content and Settings. It works just like it does on the iPhone and iPad: select it when you want to wipe out your personal info without wiping and reinstalling the entire operating system.
You’ll need to enter an administrator password, and you’ll have to go through the steps of the Erase Assistant. The Mac will restart and take you through the setup process. If you don’t want to set up the Mac, press and holding the power button to shut it down.
 How to Take Screenshots on MacBook: Simplest Ways to Capture How to Take Screenshots on MacBook: Simplest Ways to Capture Simple ways to capture screenshots on MacBook that will assist you in your work. Check it out! |
 Apple’s Events For Next iPhones, MacBook Pros and More Apple’s Events For Next iPhones, MacBook Pros and More A series of big events of Apple are waiting for you this fall. Check out full details about them! |
 How to Set a Screenshot Timer on Your Mac How to Set a Screenshot Timer on Your Mac Apple MacBook provides us with tools and apps that help taking screenshot process much easier. Here is how you can set a screenshot timer and ... |
 How To Reset Your Computer With The Simpliest Ways? How To Reset Your Computer With The Simpliest Ways? Before selling your computer, the first thing to remember is to factory reset it. Check out easy ways to reset your computer. |


