10 Hidden Chromebook Features You Must Try
 |
| Top 10 Hidden Chromebook Features You Must Try Knowinsiders.com |
| Table Of Content |
A Chromebook (sometimes stylized in lowercase as chromebook) is a laptop or tablet running the Linux-based Chrome OS as its operating system. Initially designed to heavily rely on web applications for tasks using the Google Chrome browser, Chromebooks have since expanded to be able to run Android and full-fledged Linux apps since 2017 and 2018, respectively. All supported apps can be installed and launched alongside each other.
The Chromebook is one of the hottest gadgets out there currently, with it being typically lighter than the standard laptop, and less prone to viruses and malware. They practically require no maintenance and lower software causes, making it quite popular with people on a budget looking for a nice laptop.
Most of the data reside on the cloud than on the device itself, meaning you don't have to worry about data losses and data wipes if it gets lost or stolen. But there are things you didn't know you're Chromebook could do.
Take a look at this top 10 hidden Chromebook features that you must try right now.
What is a Chromebook?
 |
| Photo: Android Authority |
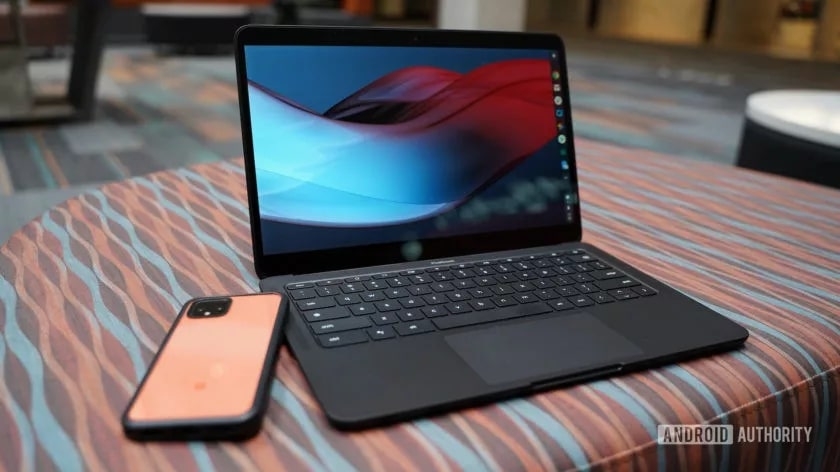
You may be used to choosing between Apple’s macOS and Windows when shopping for a new computer, but Chromebooks have offered a third option since 2011. But what is a Chromebook? These computers don’t run Windows or macOS operating systems. Instead, they run on Linux-based Chrome OS.
Chromebooks are portable computers running Chrome OS, designed to run workflows that generally run in a browser. They have plenty of app support, but they’re not meant for heavy workloads. As a general rule, if the work resides mostly in a web browser, you can use a Chrome OS machine to get it done. In case of complicated workflows that need specific apps, a Chromebook may not be the best fit.
What’s the difference between a Chromebook and a laptop?
Chromebooks aren’t all that different from laptops from a hardware perspective. They’re portable computing devices that are rather similar to laptops in terms of design and basic hardware, with some of them sharing similarities with tablets, as some 2-in-1 laptops also do. The major difference comes down to the operating system on board, which is Chrome OS, compared to Windows on traditional laptops, and macOS on MacBooks.
One of the major hardware differences is the built-in storage space. Given that Chrome OS is quite light, and most of the apps are really web apps, most Chrome OS laptops come with limited internal storage. Most Chrome OS users don’t need a lot of storage though, and there are always external storage options like external HDDs/SSDs, if needed. You also get an SD card slot with some of these Chrome OS laptops.
How to use a Chromebook
 |
| Photo: Android Authority |
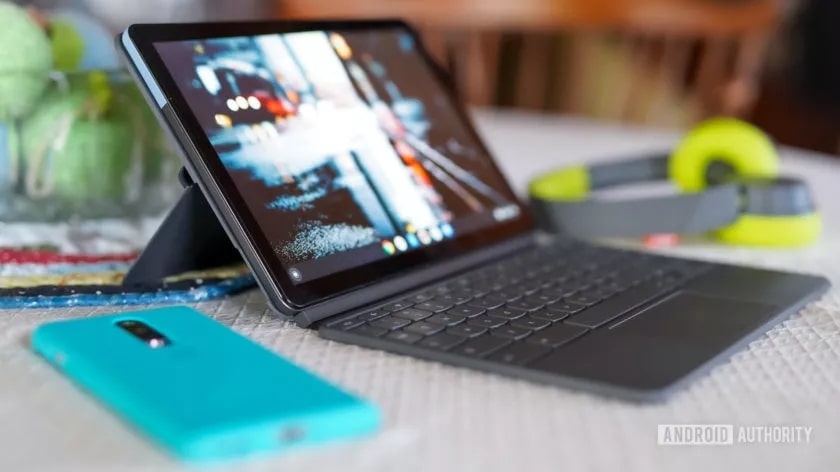
A Chromebook is a computing device at the end of the day and is actually simpler to use than many modern computers. Chrome OS has that going for it on the whole. While different, it won’t really be unfamiliar to most users. It borrows a lot of cues from Android, and the Chrome browser and its ecosystem of apps.
Chrome OS is made for very basic tasks, and if your machine supports it, you can expand the functionality by installing some Android apps or even some full Linux apps. Below are some guides to help you get the most out of your Chrome OS machine.
Chromebooks cost as little as $150-$200 and go up to over a thousand dollars if you want one of the fancy ones. They typically cost less than Windows laptops with similar specifications. There are many sub-$200 Chrome OS laptops, and some pretty good ones under $300 as well. The best value for these machines lies under the $500 mark, where you get a solid balance of specifications for the price.
Those with higher-end needs will need to really pay up to get a superior Chrome OS laptop. Those can cost over $1,000. At that price point, there are many other options to consider, many of which have a full desktop OS.
What are the Hidden Chromebook Features that You Should Try - Top 10
1. Use ChromeOS Launcher As A Calculator
 |
| Photo: XDA Developers |
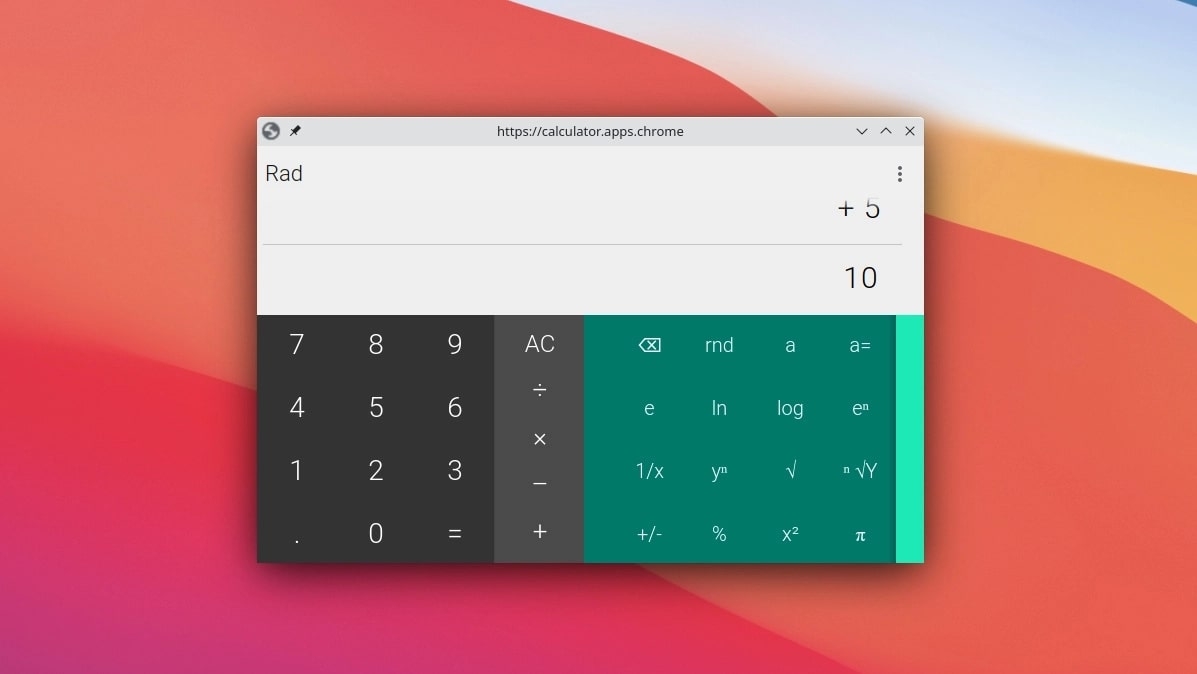
Don't tell this to your kids stuck on their maths' homework. But yes you can use ChromeOS Launcher as a calculator, bu using the new ChromeOS Launcher, just put in the maths problem and add an equal sign at the end and get your answer quickly, easily and swiftly, a nifty little feature you didn't know you could do, and one which is extremely minor yet largely helpful to one's needs and daily life, and now, one you can use. Also, it can convert units into other units, for example, "4 ounces into grams."
For years now, Chromebook owners have been able to use Google’s free calculator app. It’s built with Web technology but is a native app, pre-installed with Chrome OS. The app starts off with a simple layout for addition, subtraction, multiplication, and division, and can be expanded to reveal tools for geometry and trigonometry.
In the last few years, Google has been moving away from native apps like these on Chromebooks, opting instead for formal web apps where possible, as well as apps for Android and Linux. For example, the Chrome Canvas app, which lets users draw and create simple artworks with their Chromebook, is hosted fully online rather than being pre-installed or downloaded from an app store.
Chrome OS’s Calculator is the latest app to make the jump to fully online, starting with the recently released Chrome OS version 97. When you launch Calculator, you’ll now briefly see the URL where Google is hosting the web app — calculator.apps.chrome — in the app bar. Despite the fact that the app is now online, it’s fully functional when offline thanks to the technology of Progressive Web Apps.
Where things get interesting is when you realize that Chrome OS’s Calculator is now just a normal web app. And like any good Progressive Web App, it can be used and even installed on just about any device you can think of, including Windows, Mac, Android, and iOS.
Each of these platforms offers its own Calculator app, and while it’s unlikely that Chrome OS’s version would be any better than your default calculator, it’s good to see that Google’s option is so widely available. That said, the app was clearly not designed with certain form factors in mind, with the Chrome OS Calculator looking particularly awkward when used on a smartphone in portrait orientation.
2. Make Skype Calls
 |
| Photo: XDA Developers |
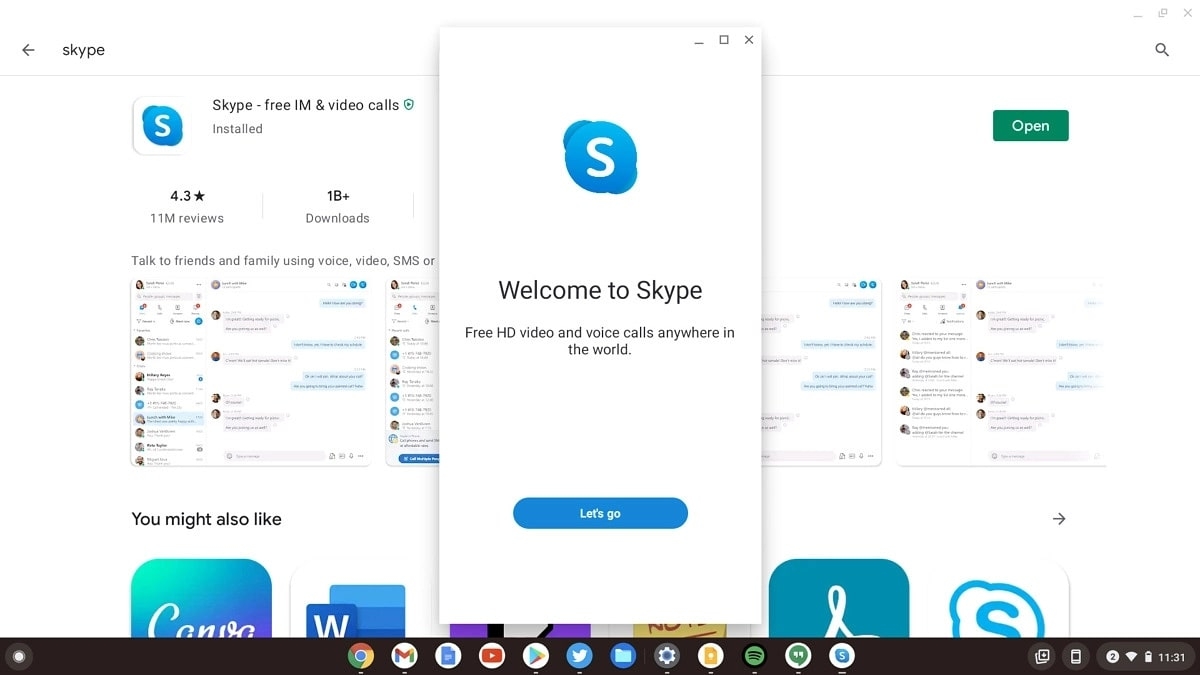
Chromebook users can now log in to their Skype accounts and chat over the internet using the service provided by Skype, which can also be used to make voice and video calls. As this is still in its beta testing stage, there are occasional bugs and freezes, which will most likely be improved by the time in updates and bug fixes, most probably in the near future.
This is a major feature, as what people thought to be just a web browser for money can actually allow you to video and voice calls.
1. Open Chrome and navigate to web.skype.com(opens in new tab). You will be redirected to a sign in page.
2. Enter your username, email account or phone number.
3. Enter your password and click Sign in.
4. Choose a friend to chat with, or press + to add a new one
5. Click the camera icon to start a video call, or the phone icon to start an audio call.
You're making Skype calls on a Chromebook!
3. Launch Apps using keyboard
 |
| Photo: Chrome Unboxed |
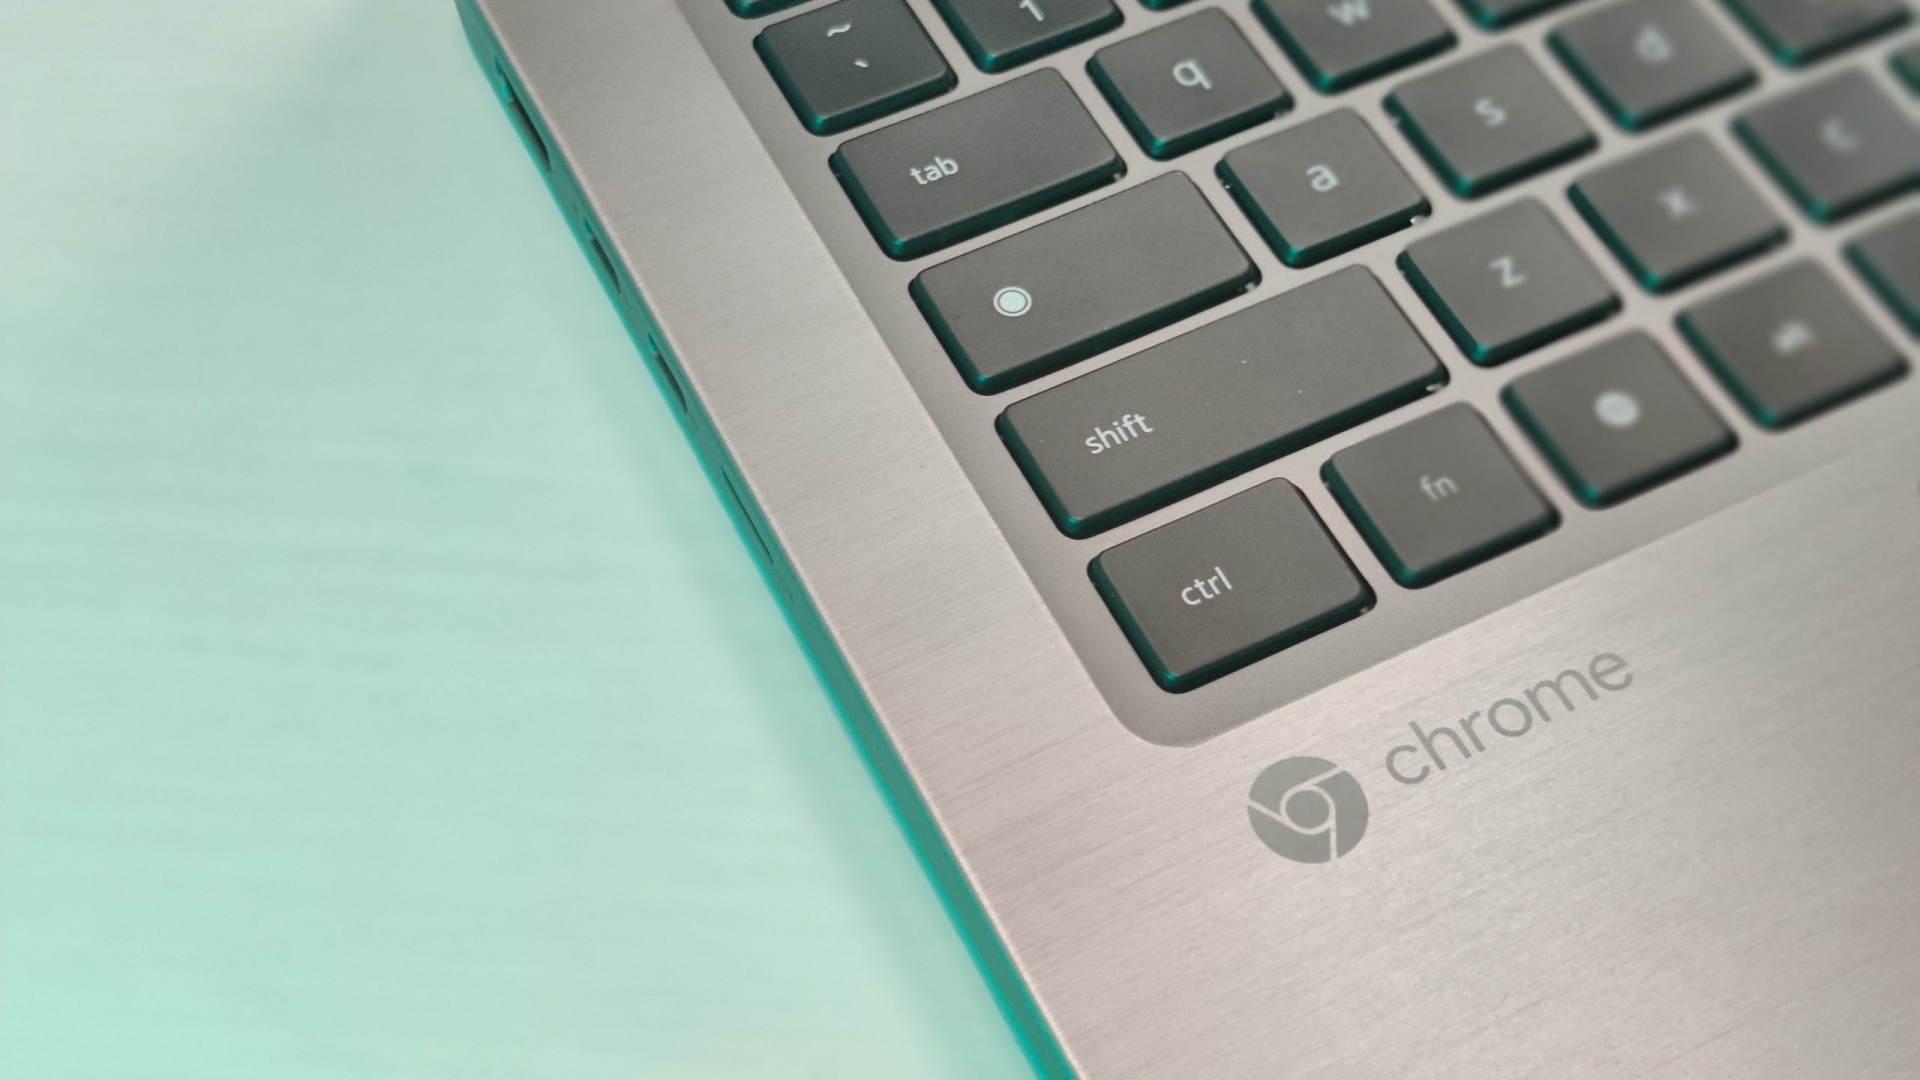
A shared feature by Windows and iOS, now Chromebook users can also access their apps by typing after clicking on the launcher icon and typing the name of the app, in the search button on the lower left, and run apps like "WeVideo Video Editor" just by typing its name. Yes, it's that easy. It's a quick little feature that saves lives so why not?
At the bottom of the screen of your Chromebook, you’ll see a row of icons representing applications. They call this bottom part of the screen the “app shelf.” Keyboard shortcuts let you launch a specific application on the app shelf. Alt + 1 will launch the first app from the left on your shelf, Alt + 2 will open the second app from the left on your shelf, and so on.
It's one of the few similarities, that a Chromebook shares with regard to other laptops like Windows, etc, which the community will accept with open arms.
4. Record screen activity
 |
| Photo: Online Tech Tips |
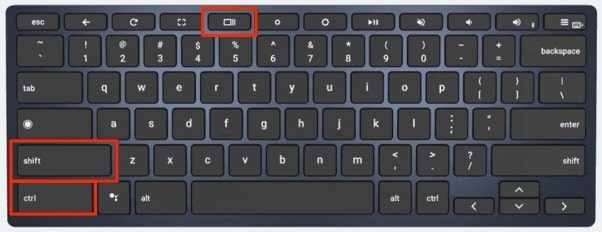
The screen capture capabilities of Chrome OS have been significantly improved recently. Press Ctrl+Shift+Show Windows (the fifth button from the left at the top), or click Screen capture in the Quick Settings pane, and you get a new pop-up panel. This lets you switch between image and video capture, opt to include the microphone in video recordings, capture part or the whole of the screen, or capture activity in one specific window.
Recording your smartphone or computer’s screen can be useful, but sometimes you have to download third-party apps to do it. Fortunately, Chromebooks have a built-in tool that makes it easy to create screen recordings with no extra software required.
Introduced in Chrome OS 89, the Chromebook screen recorder tool is available in the Quick Settings panel. The tool can be used to capture static screenshots and record video. It’s surprisingly powerful, yet easy to use.
First, click the clock on the Shelf in the bottom-right corner to open the Quick Settings panel.
Select the arrow in the top-right of the menu if it’s not fully expanded.
Next, click the “Screen Capture” button.
The Screen Capture toolbar will appear at the bottom of the screen. Make sure the video icon is selected for screen recording. The camera icon will only capture screenshots on your Chromebook.
There are a few different ways you can record the screen. You can choose to record the full screen, partial screen, or a specific window.
5. Change wallpapers automatically
 |
| Photo: OMG! Chrome! |
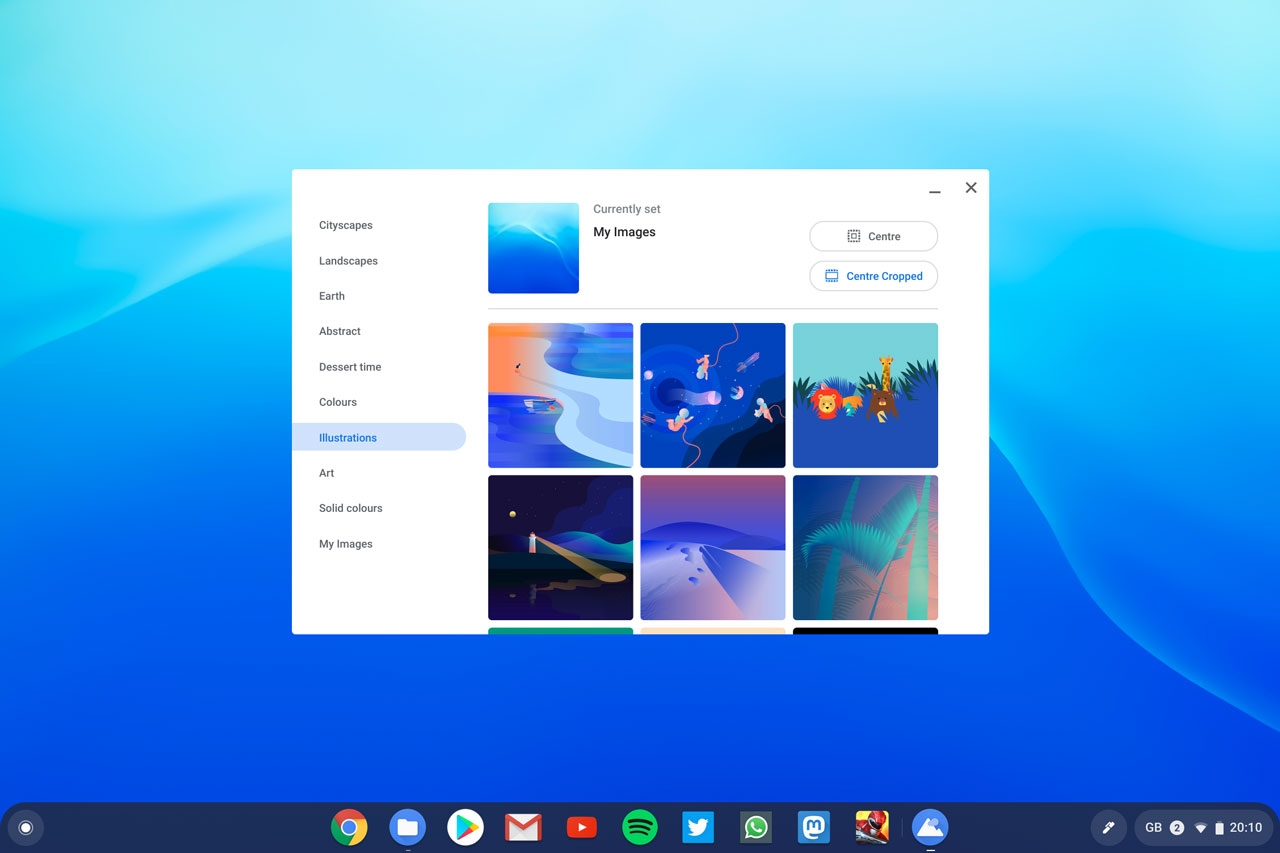
Make sure you’re fully aware of all the options you get for setting the wallpaper on your Chromebook. If you right-click on the desktop and choose Set wallpaper, you can pick from a wide range of gorgeous-looking images provided by Google (or select an image of your own). Note that some categories on the left (including Landscapes and Art) reveal a Daily Refresh toggle switch when selected. Enable this to get a new backdrop every day.
Changing the wallpaper on your desktop is an easy way to personalize your Chromebook. It’s what you see any time you’re not using an app. We’ll show you how to automatically see a new desktop background every day.
Google has equipped Chromebooks with some of the best wallpapers you’ll find on any computer. It can be hard to choose just one to stick with full time. Chrome OS’s built-in wallpaper picker has a nifty feature that can automatically change the wallpaper every day. You don’t have to stick with just one.
To get started, go to the desktop and right-click or tap and hold to bring up the menu. Select “Set Wallpaper.”
Next, choose one of the wallpaper categories. All of the categories can be automatically cycled through except “My Images.”
Now simply select the “Change Daily” button.
Once set, you have the option to turn it off by de-selecting “Change Daily” or use the “Refresh” button to manually swap a different wallpaper from the category.
That’s all there is to it! Chrome OS will now automatically select a different wallpaper from the category every day. It may not change immediately when you unlock your Chromebook tomorrow, but it will happen. This is a nice little trick to get the most out of your Chromebook.
6. Access the clipboard history
 |
| Photo: Alphr |
The traditional computer clipboard has always been somewhat limited, what with it only being able to hold one item at a time. That’s starting to change across multiple platforms now though, including Chrome OS: If you hit the Search+V keyboard shortcut rather than the more traditional Ctrl+V shortcut, you’ll see the last five items copied or cut to the clipboard. Click on anything in the list to paste it, or use the X icons to remove something.
That’s precisely why the clipboard manager is so helpful, especially if you’re processing a lot of data every day.
If you’re a first time Chromebook user, you’ll need to ensure the clipboard history is available to you, and here is how you can do that:
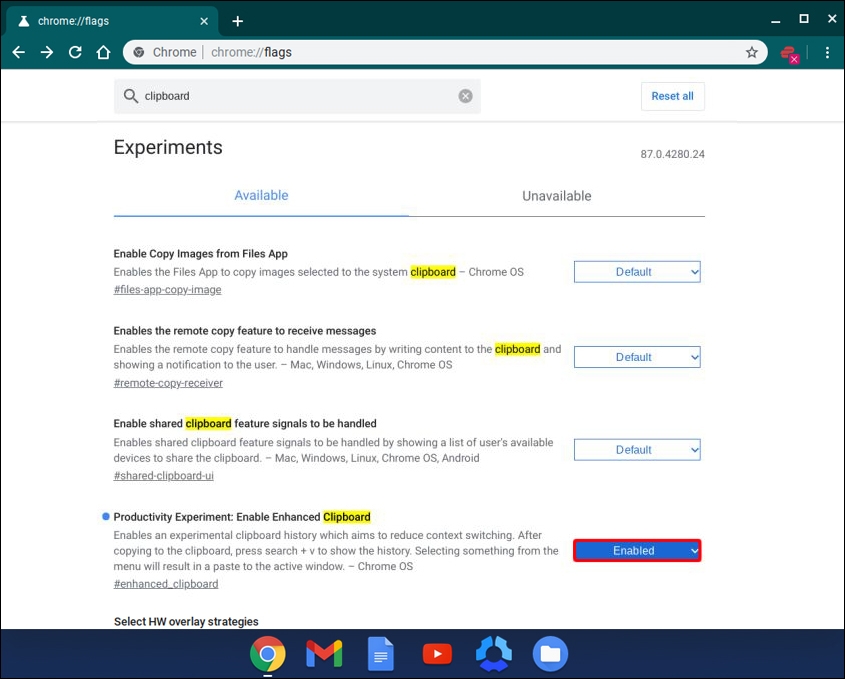
1. Launch Chrome browser and enter “chrome://flags” and search for “Clipboard.”
2. Among other results, the search will yield “Productivity Experiment: Enable Enhanced Clipboard.” Make sure to enable the feature via the button next to it.
3. Also, switch on the “Enable Copy Images from Files App” button to have the option to save images to the clipboard.
4. At the bottom right corner of the screen, click on the “Restart” option.
Viewing History
When you’ve enabled all the clipboard manager features, you’re safe to copy up to five items without the fear of losing track of them. For example, you want to send a few links to your friend but save them first. With the clipboard history on Chromebook now enabled, that’s a straightforward process.
Here’s what you should do:
1. Press the Search or the Launcher Key + V on your keyboard.
2. This will launch the clipboard history and show all the links you have saved.
3. You can also right-click on any field and select “Clipboard” from the menu.
7. Turn on the Night Light
 |
| Photo: Films News Feed |
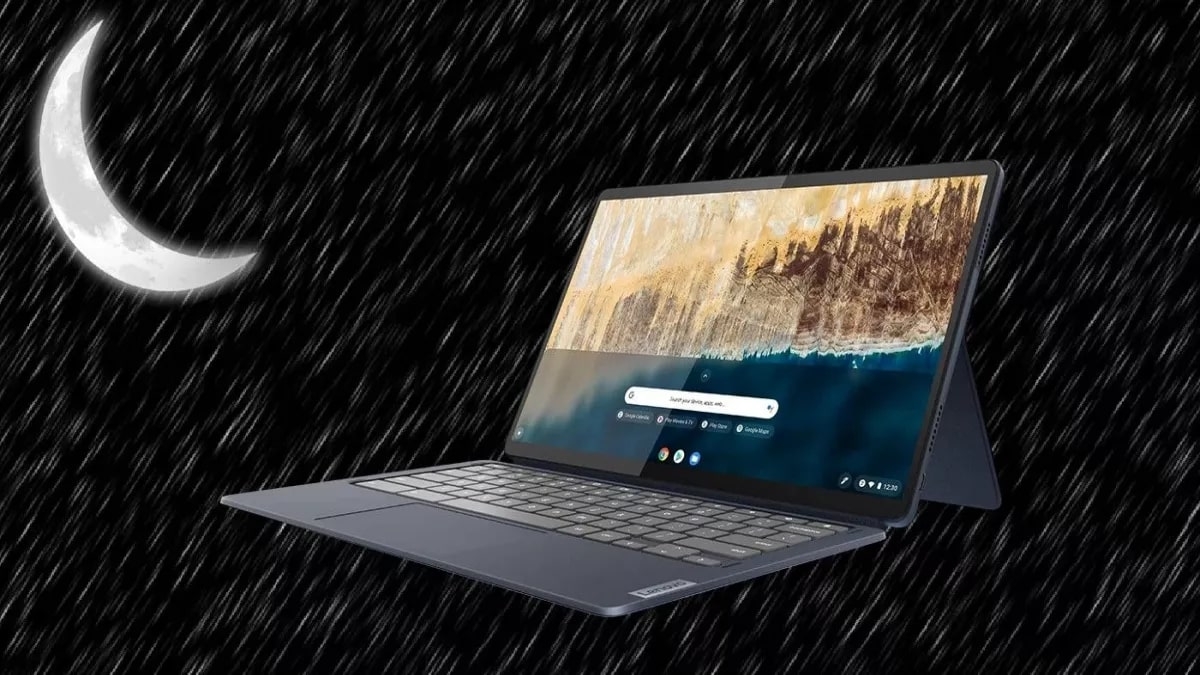
Chrome OS comes with a built-in feature for making the display warmer and reducing the strain on your eyes late at night. To turn it on, click the time (bottom right) to bring up the Quick Settings panel, then choose Night Light. It’s also available in the main Chrome OS Settings pane (under Device and Displays). Here you can also schedule Night Light to turn on automatically, either from sunset to sunrise, or at a time of your choosing.
Night Light is one of many useful features that Chromebooks offer, and helps to prevent eye fatigue by tinting the display. When enabled, the mode makes it easier for the screen to be viewed, especially in low light or at night. Many brands have developed methods to combat eye strain on different devices by reducing the amount of white light emitted from the screen.
Dark Mode is another popular solution, available natively on some operating systems such as Android. Google has been working on bringing Dark Mode to Chrome OS, and it can currently be tested by enabling the right flags. While Dark Mode has already been enabled in some Chrome OS elements, like the app drawer, the effect has not been made system-wide yet.
There are a couple of ways to turn on Night Light on Chromebooks but the easiest way is from the Quick Settings menu. To turn on Night Light using this method, click on the battery or Wi-Fi icon at the bottom right corner of the screen. Doing this will bring up the Quick Settings menu which has a tile labeled Night Light. Clicking the tile will immediately enable Night Light. At which point, users will notice the screen becoming dimmer and taking on a reddish hue.
Night Light's Customization Settings
Another way to turn on Night Light is from the device's Settings app. To open Settings, click on the Everything button (the one with a search icon) on the keyboard or tap the white button at the bottom left corner of the screen. Search for “settings” and click on the gear icon in the results to open the Settings app. Scroll down to Device and select Displays. Activate the toggle in front of Night Light. This method not only allows users to turn the feature on, but also makes it possible to customize how it works. Users should see a color temperature slider under the Night Light toggle. Moving the slider will adjust the intensity of the tint on the screen.
Another customization option available for Night Light is the ability to create a schedule. A drop-down box is visible next to the Schedule option, and users can set a custom time for enabling and disabling the feature by selecting Custom from the drop-down menu. There is also the option to make Night Light automatically turn on at sunset and go off at sunrise. If enabled, the Chromebook will use the owner's current location for sunset and sunrise times. Alternatively, users can select Never to stop night mode from automatically being enabled on their Chromebook.
8. Right-click for quick answers
 |
| Photo: 9to5Google |
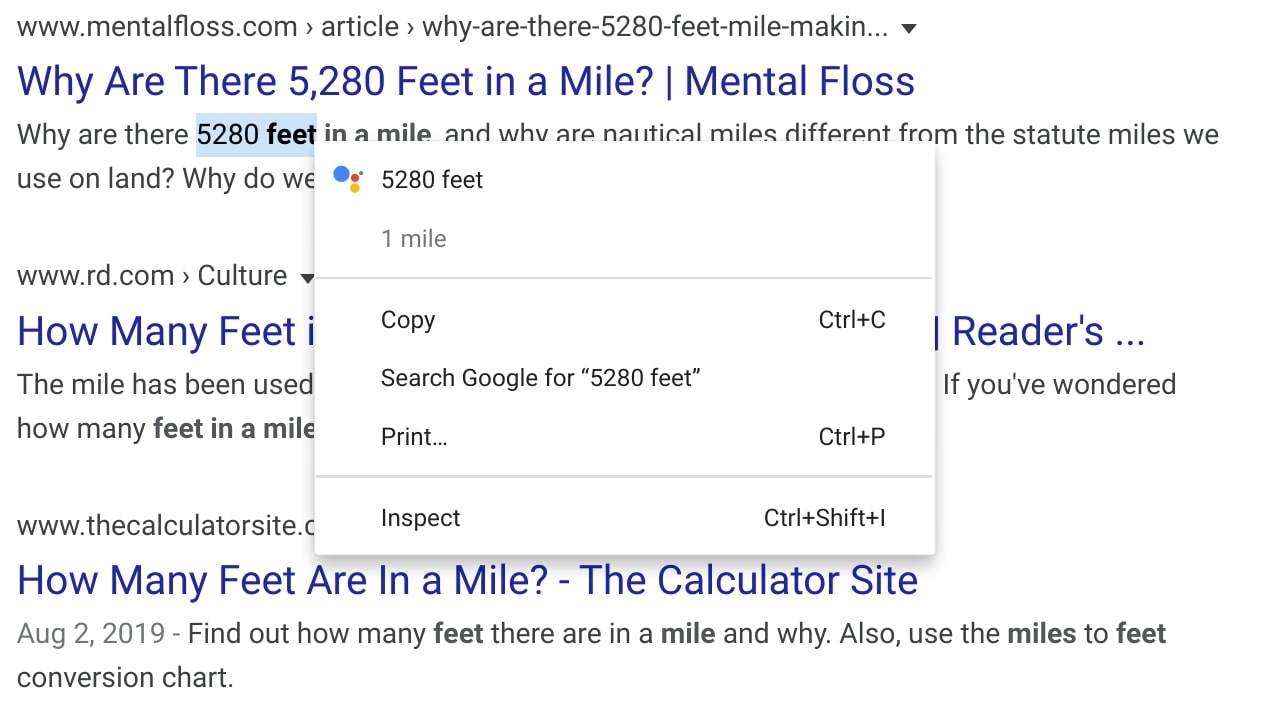
The right-click option in Chrome OS is more powerful than you might have realized: Select a word or phrase in a webpage, right-click on it, and Google Assistant swings into action to bring you definitions, translations and conversions right in the pop-up menu. (The options you see will vary depending on what you’ve selected.) You can click the Google Assistant icon on the left to open up the full Google Assistant interface and get more answers.
On Chrome for Android, it’s all too easy to get more information about a word or phrase on a website by simply selecting it, then opening the new Google Search panel that appears on screen. Spotted by Chrome Story, a similar, but more powerful version of this feature, “Quick Answers,” is being developed for Chrome OS, similar to Look Up on macOS.
On Chrome OS, Quick Answers is powered by Google Search and the Google Assistant, and while it’s very much a work-in-progress, there’s enough to glean how it will work when it arrives. First, like many other Chrome features, it will initially only be available behind a flag in chrome://flags.
Once enabled, you’ll be able to select any text or images in Chrome OS, then right-click it to get some relevant Quick Answers. By default, Chrome OS will simply pass the text and images off to Google Search and return certain relevant info from the search.
As of right now, the only Quick Answers that have been developed are unit conversions. For example, highlighting the text “23 cm” and right-clicking for Quick Answers would likely return something like “9.05512”. It’s too early to know for sure, but the result may even look visually like the answer card shown on Google Search, similar to how Look Up on macOS can pop up a dictionary definition and other info.
9. Scan QR codes
 |
| Photo: Youtube |
You might not spend much time thinking about the camera(s) on your Chromebook—at least not in between video call meetings—but if you open up the Camera app you’ll notice a little QR code icon on the right (just above the shutter button). Click this to open the QR code scanner, and you’ll be shown where the QR code needs to be lined up. The other icons in the app let you mirror the camera, set up a timer, and put up a grid overlay.
Scan QR Code on Chromebook – Using Camera
Open your Chromebook’s camera app.
Tap the QR code icon at the top-right corner.
Show the QR code in front of the camera. You will see the link from the QR code on the screen.
Click the link or copy the content.
That is how you use your Chromebook camera to scan QR codes. No extensions or apps are needed.
10. Pin files to the shelf
 |
| Photo: Howtogeek |
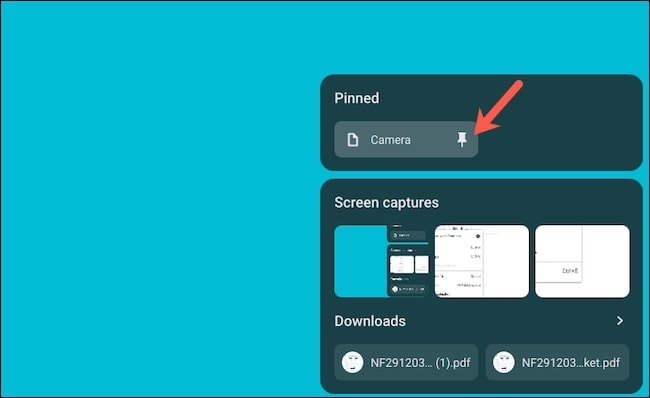
Need easy access to a specific file or group of files in Chrome OS? If you open up the Files app on your Chromebook, then right-click on a particular file or folder and choose Pin to shelf, you’ll then be able to access it by clicking on the icon just to the left of the Quick Settings buttons. Note that some types of file, including screenshots and downloads, automatically appear in this pinned section so you can access them more quickly.
At the time of this writing, the feature is hidden, and you will need to enable a flag first. To do that open the Chrome browser and type the following into the address bar and hit Enter:
That will bring you to the “Quick access to screenshots, downloads, and files” flag. Select the dropdown menu and set it to Enabled. Then you will need to click the Restart button at the bottom of the browser to apply the flag.
After the browser reboots, you’ll see a new “Holding Space” icon at the bottom-right corner of the taskbar next to the clock. Click on it and you will have quick access to your most recent screenshots and downloads.
To pin a file or folder to the taskbar, open the Files app and find the item you want to pin. Note that this works for the Play Store and Linux partitions on your Chromebook, too. Right-click the item and click on Pin to shelf from the menu.
After that, when you click the Holding Space icon, you will find the file or folder that you pinned.
If you want to unpin an item from the Holding Space, hover over it and click the pin icon.
Chromebook advantages and disadvantagesChromebooks are perfect for some use cases, and not so ideal for others. Let’s get into the major advantages and disadvantages of these computers. Chromebook advantagesHere are some scenarios where Chromebooks make the perfect computing devices: • They’re great for student and light office use. Chromebooks do well with work that mostly needs to be done in a browser. From the typical work-from-home workflows, including online classes and meetings to word processing and spreadsheets, Chromebooks do it all. They’re the ideal machines for such work, especially as more and more work in these use cases has moved online with services like Google Docs Editors suite and Office 365, among others. • They generally have a better battery life than similarly-priced laptops. Chrome OS is rather light in comparison to Windows, and that shows when you’re using a Chrome OS laptop for the kind of usage it’s intended for. Most of these machines, especially the cheaper ones, will give you quite a decent battery life. • They’re cheaper. They’re often quite a bit cheaper than Windows laptops that come with the same processor and similar specifications. This has been a major reason why they’ve been adopted by the education community. It’s also led to their growing popularity in the low-end segment of the portable computer market. Premium options can cost quite a lot, but those aren’t for everyone. Chromebook disadvantagesBasically, Chrome OS is awesome unless you’re using it for certain types of tasks. Here are some very specific situations where they aren’t the best option: They aren’t great for gaming. Sure, Chrome OS laptops have Android app support, so mobile gaming is an option. There are also browser games. But if you’re looking to play high-profile PC games, you should look elsewhere, unless you can live with cloud gaming from services like Stadia and GeForce Now. Those cloud gaming services require a very good internet connection though. These computers aren’t always a great option for creative professionals. That’s unless you’re a writer, in which case they work wonderfully. Google Drive is baked in, and there are even ways to get Microsoft Office and Skype working. Unfortunately, most of these devices aren’t really powerful enough for 3D editing. Even if you pay big bucks for one of the powerful machines, most of the popular creative software isn’t available for Chrome OS. Photographers could live off the Lightroom Android app and other mobile editing options, and there are some ways to edit video, but most options require significant sacrifices, and/or pretty fast internet. They aren’t powerhouses…though there are exceptions. Many of them are affordable, low-end machines. That means a Chromebook typically can’t handle 500 browser tabs and other intensive tasks. Of course, more powerful options exist. If you really want Chrome OS and the power to run Linux apps, Android apps, and more, you could go for something like the Google Pixelbook, Pixelbook Go, or the Samsung Galaxy Chromebook. |
 What Are Computer Viruses And How Do They Spread? What Are Computer Viruses And How Do They Spread? Computer viruses can be a nightmare with so many people in the world using computers. So what it is, how it spread and how to ... |
 How to Download Music to iPhone Without Computer, iTunes for Free How to Download Music to iPhone Without Computer, iTunes for Free Now you get a new iPhone and can’t wait to add some songs to it, then you can enjoy music anytime and anywhere. This article ... |
 How to Stop Finger Pain After Using Computer With 8 Easy Tips How to Stop Finger Pain After Using Computer With 8 Easy Tips It is common that you often suffer from finger pain after using computer. This problem makes you feel uncomfortable and worried, don't you? If the ... |
 Top Easy and Essential Shortcuts On Computer Keyboards You Should Try Top Easy and Essential Shortcuts On Computer Keyboards You Should Try Compared to reaching for the mouse or navigating a menu, a single keyboard shortcut shaves a moment off your task. That's why it's important to ... |


