How to Create A Website: Step by Step for Beginners
 |
| Photo: KnowInsiders |
It doesn’t matter if you’re launching a passion project to have fun in your downtime—or if you’re launching a business to make your first million dollars.
You need a website.
Luckily, creating a website today is easier than ever.
You don’t need to know a bunch of code—and you don’t need to hire a pricey developer. You just need to follow a few very simple steps to get your website up and running in less than 20 minutes.
Will I need technical skills?
This depends on the purpose of your website. The most complicated way would be to learn how to code HTML, CSS, JavaScript and PHP – the basics of practically any website.
But this isn’t the only way to create a website: even if you aren’t very familiar with the technical side of things, you can easily set up a good website.
But how?
By using a Website builder. If you can use Word, Facebook, or PowerPoint, you’ll be able to use these tools without any problem. These easy-to-use platforms offer a visual editor, hosting, and you can get a domain name through them: a one-stop-shop.
How to Build a Website in 9 Steps:
1. Choose the right website builder for you.
2. Sign up for a plan that suits your needs and budget.
3. Choose a unique and relevant domain name.
4. Pick a design template you love.
5. Customize your template design.
6. Upload and format your own content.
7. Choose and download apps.
8. Preview and test your website.
9. Publish your website on the internet.
Now, let’s get started!
1: Choose the Right Website Builder For You
An enormous number of people use website builders to make a website. Wix alone has over 100 million subscribers, while Shopify recently passed 1.2 million.
Why is this? Website builders mean anybody can make a website, regardless of technical skill. In the early days of the internet, making a website required a working understanding of HTML (Hypertext Markup Language). Then CSS (Cascading Style Sheets) came along to make things even more confusing.
Website builders take care of the technical jargon and let you focus on design and content. Some do this through templates, others through drag-and-drop interfaces, which make building a website no harder than assembling a PowerPoint presentation.
That does then mean choosing the right website builder is very important. Different builders serve different needs. Moving forward with the right one is essential to making a website you’ll be happy with.
Which website builder should you choose?
 |
| Photo: DreamHost |
What is the best way to build a website? Which website builder should I use? What’s the easiest way to build a website? These are questions we get asked every day. There are so many questions and so many builders. We get it, it’s hard.
That’s why we’ve conducted in-depth research. Personal experience with website builders is all well and good (and we have plenty of it), but we test builders with people just like you. So when you’re making your own website, you can rest assured we’ve got you covered.
Our team conducts user testing and interviews and tracks hundreds of features across dozens of products to provide you with a bird’s-eye view of the market. We want you to find builders that fit your needs. With that in mind, here’s the lowdown on the top builders for creating websites around today.
Wix and Weebly are two of the most popular builders on the market, with their intuitive drag-and-drop features making web design feel like child’s play. Squarespace is a dream for creatives, while Site123 is perfect for small websites and has brilliant live chat support.
| Top tip! Because most builders offer either a free trial or are free website builders anyway, it’s easy to take one for a spin before you spring for a paid plan. |
To be clear, the builders listed above aren’t the only ones worth considering. Not by a long shot. They perform best overall in our research, but, again, it comes down to your needs. WordPress.com, for example, is a superb website builder for blogging, while Shopify leads the way on ecommerce.
Be clear on what your priorities are, have a browse through our comparison chart and reviews, and settle on two or three builders that seem like a good fit. Once you have that shortlist, you’re ready to start testing.
Top-Rated Web Hosting Providers to Create a Website
The first thing you need in order to build a website is a company to host your website with. Here’s our full top list of the best web hosting providers.
• Bluehost – Best Web Host for Beginners
• Hostinger – Most Affordable Hosting Plans Overall
• DreamHost – Most Affordable Month-to-Month Plan
• HostGator – Best for Lean/Minimal Needs
• GreenGeeks – Best Eco-Friendly Hosting
• SiteGround – Best for Making Your WordPress Site Speedy & Secure
• A2 Hosting – Fast & Reliable Shared Hosting
• InMotion – Best VPS Hosting
• WP Engine – Best Managed WordPress Hosting
• Nexcess – Best for scaling and growth
Why use WordPress and not website builders?
1. It’s FREE (no recurring subscriptions, open-source)
2. It’s highly customizable and user-friendly
3. Your site will be ‘responsive’. Meaning it’ll work on smartphones & tablets, too
4. Help available from the community
Good alternatives for WordPress:
• Wix is an easy-to-use website builder with a simple drag and drop interface, but it has a higher cost, is not suitable for larger sites and it’s impossible to migrate your website out if the need should arise.
• Squarespace is a very aesthetically beautiful website builder which makes creating beautiful websites easy, but it comes at a higher monthly cost and doesn’t have a function to migrate your website out.
• Drupal is a powerful platform that is popular with experienced coders and web developers, but it has a high learning curve that makes it not the best option for beginners.
• Joomla is almost like WordPress and is a good tool for website building, but it does require at least some basic understanding of how to write code to make things work the way that you want.
2: Sign Up For a Plan That Suits Your Needs and Budget
Once you’ve settled on a website builder, you need to sign up for a plan. Website builders tend to offer multiple plans. Different sites have different needs, and plans ensure you aren’t paying for things you don’t need.
Good to know: Website builder plans vary in price, but will generally cost between $8 and $40 per month, which is an all-inclusive price. If you’re on a budget, either stick with a free plan (although they have their disadvantages, which we’ll get to soon) or check out our roundup of the cheapest plans.
This is a massive plus for website builders compared to web developers. A web developer can cost between $300 and $1,000 for template customization alone, and a fully customized website built from scratch will often amount to thousands. Making your own website using a builder, meanwhile, allows you to get a fully functioning website up and running for less than the price of a coffee.
Which plan you choose depends on your needs. Are you making a website for a portfolio to showcase your artwork? Wix’s Combo plan, costing $13 a month, will probably do. Want to create a website for your business that will get thousands of visitors and have multiple staff accounts? Then the VIP Plan, costing $25 a month, maybe a better fit.
| Top tip! If you’re looking to sell a few products on your business website, why not use Square Online Checkout links? These checkout links make it super easy for you to securely accept payments through your website without needing to sign up for an ecommerce plan. However, if you want to sell 5+ products, we’d recommend a specialist eCommerce website builder. |
Rest assured there’s a plan out there for everybody. If in doubt, start small and scale-up.
3: Choose a Unique and Relevant Domain Name
 |
| Photo: Designing Bulls |
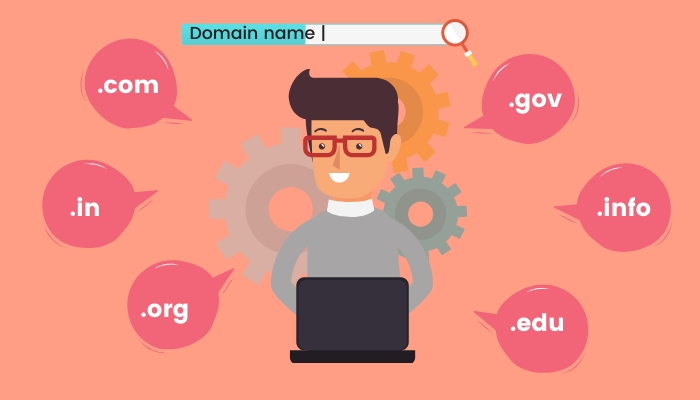
A domain name is a bit of the URL (the site address in your browser’s search bar) that identifies a web page — in this case, your website. For example, ours is websitebuilderexpert.com. You can register them separately at sites like Domain.com, but website builders offer to do it for you when you sign up with them. Most provide it for free (at least initially), while a handful charges a few extra bucks.
A domain name is one of the main ways a site presents itself to the internet, so make it count. Here are a few rules of thumb when choosing a domain name.
• Make it relevant. This sounds obvious, but it’s worth mentioning. Make sure the domain matches what visitors see when they visit your site. If your company is Vintage Pantaloons ™, don’t register the domain flipflopsfromthefuture.net
• Keep it short, or at least memorable. If you want people to remember your site don’t pick a domain that’s dozens of characters long. It will look silly and no-one will remember it
• Avoid numbers. It’s generally best to avoid numbers in domain names. It (generally) looks unprofessional and adds another element for people to remember.
• Check the branding doesn’t already exist. There are millions of websites already out there. That means there are millions of domains already taken. Check whether yours will stand out before committing to it
Once you’re sure about a domain, simply register it as part of the signup process with your chosen website builder. Some of the leaner plans will require an annual renewal fee of around $12, though with premium plans it’s usually included.
4: Pick a Design Template You Love
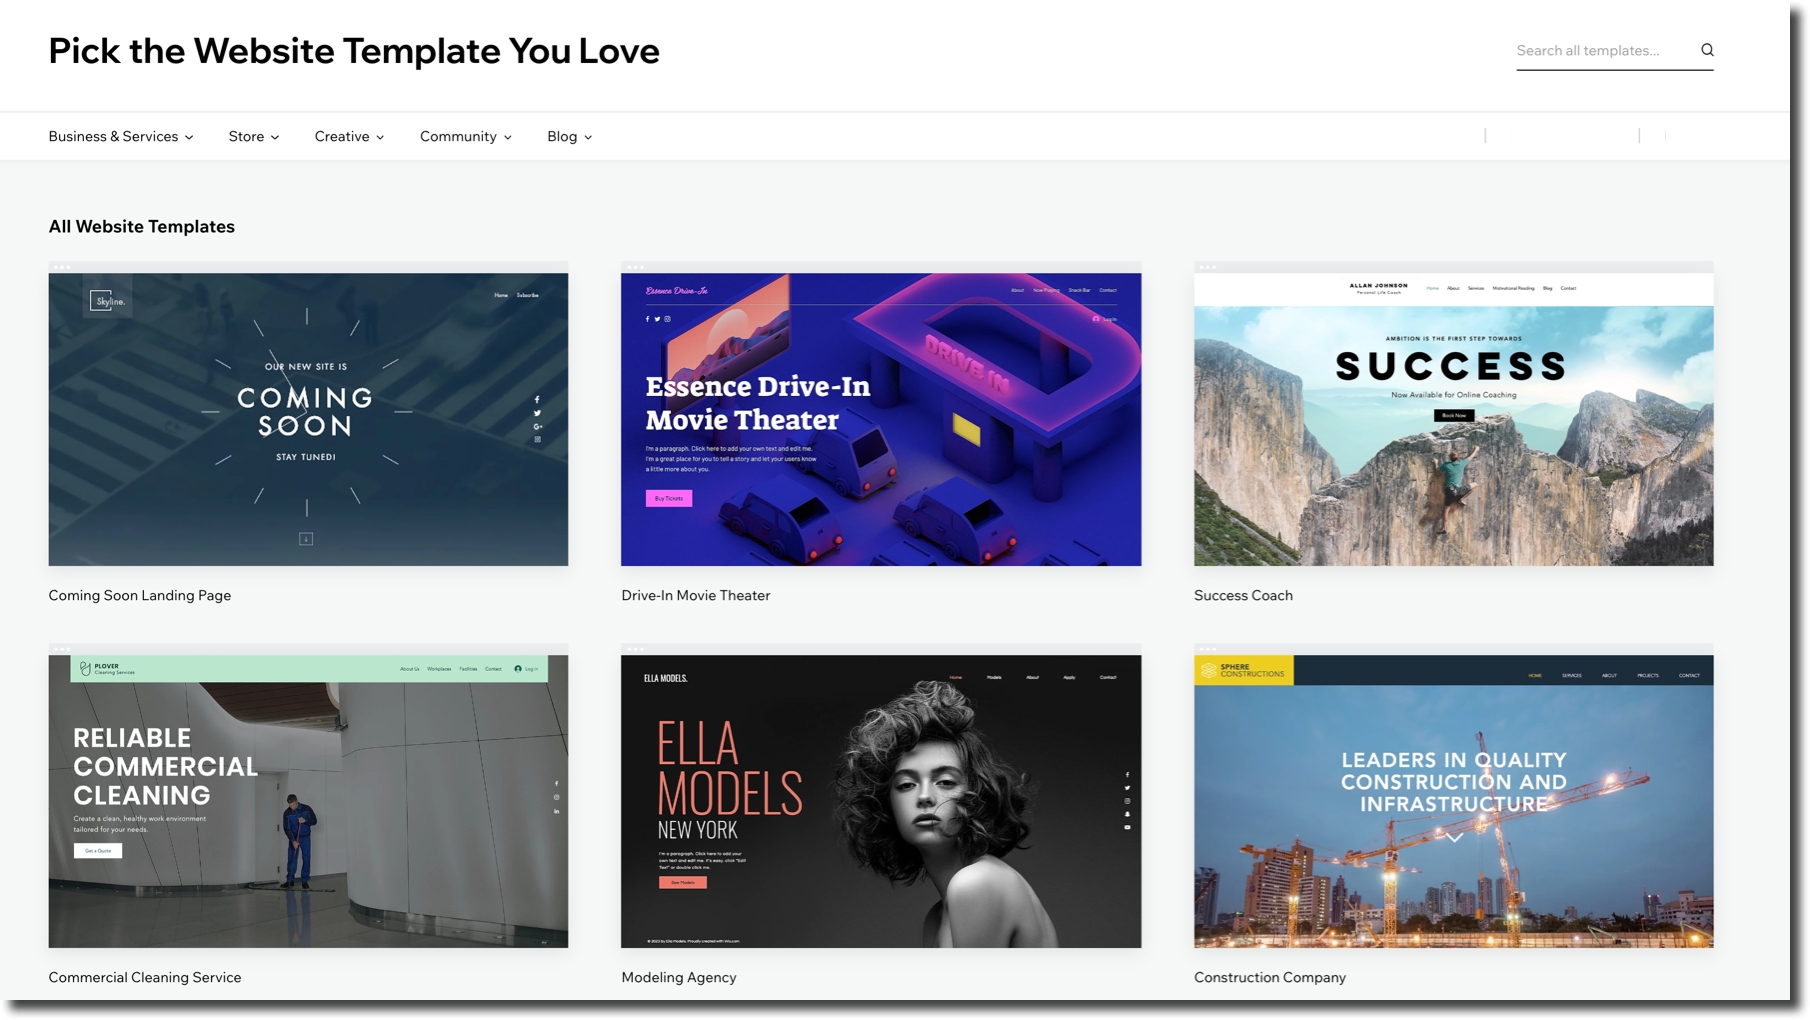
OK, so you’ve followed our steps to the letter: you’ve chosen a website builder, signed up for a plan, and registered a domain. You’re ready to start creating a website. Rather than leaving you to do this all by yourself, website builders support you through the process with templates.
Templates provide a framework for your website – a canvas for you to paint the content of your site onto. They’re how you can have a site that looks good without having to hire a designer.
Whichever website builder you’ve chosen, you’ll have an extensive selection of design templates to choose from. Generally speaking, the better your plan, the more templates you’ll have access to. The top builders provide hundreds of templates across dozens of categories. Whatever the focus of your site is, there will be a template for it. For example, if you’re thinking of starting a fitness website, most builders will let you filter your template search accordingly.
These are just a handful of the other categories you can expect to find when starting your own website:
• Photography
• Restaurants
• Online Stores
• Portfolios
• Blogs
Think of templates as ‘clothes’ for your website. If you don’t like one set of clothes, just change to another one to give your website a completely different feel. And again, don’t rush into it. Choose different templates, browse them, see if they fit. The whole point of templates is choice, so dive in and find one that feels right for what you want to achieve.
5: Customize Your Template Design
 |
| Photo: Wix Help Center |
As we said in the last step, templates provide a framework. Given how many people use builders to make a website nowadays, odds are there are a few sites out there with the same framework as yours. At the very least you will need to populate a chosen template with content specific to you. And to really stand out, you’ll need to do some customization.
| Building a website is like cooking dinner. Just like cooking, knowing how to build a website from scratch is much easier with the right tools and instructions. A template gives you a recipe — you can choose to follow it or you can mix up the ingredients and style to give your dish your own flavor. |
What goes into customizing a website? Well, that’s largely up to you. Website builders are very flexible these days. Customization can include:
• Adding new pages to your navigation
• Changing the size, colors, and fonts of buttons
• Adding new elements like contact forms and menus
• Editing the images on your homepage gallery
• Choosing a different color palette
• Linking/embedding social media channels
The best website builders walk you through all these things, so don’t be intimidated. They understand their purpose is to make web design easy. As is so often the case with website builders, don’t be afraid to play. You’ll be surprised by how much you can do.
If those template customizations don’t look like enough for you (though if you’re building your first website, they will be), you might want to think about building your website on an open-source platform like WordPress.org – this is the ‘Option 2’ that we’ll be covering a little later on.. You will get more flexibility, but if you’re not a coder, learning WordPress takes a lot of time — especially compared to drag-and-drop builders.
You can almost always play around with templates as part of the free trials, so you can get a sense of how easy customization is without spending a cent.
6: Upload and Format Your Own Content
Once you’ve played around with the colors and layout of your website, it’s time to start adding your content – that means images, videos and text.
If you need some writing tips, you’ve come to the right place; we’ve already written a complete guide to write for the web, jam-packed with research, expert opinions, and our own learnings.
Now, on to images. When it comes to picking the right pictures for your site, quality is key. Blurry images are simply out of the question.
Some website builders have a bank of free images available for you to use. If not, there are plenty of free image sites available online, such as Unsplash and Pixabay (two of our favorites).
| Top tip! Make sure you ‘compress’ any images before you upload them to your site by running them through a free site like Kraken.io or TinyPNG. This will reduce the file size to stop the image from slowing your site down, but it won’t visibly affect the quality. |
7: Choose and Download Apps
Whatever you need your site to do, you can guarantee there’s an app for that. Installing these apps is super simple – just head to the App Market (or equivalent) for your builder. There, just like the App Store, you can see how much an app will cost (although many are free), what it does, and its user rating.
Wix has over 300 apps in its App Market. Search for what you want, then hover over the app you’ve chosen and click ‘Add+’
8: Preview and Test Your Website
With your template chosen and customized, you’re probably itching to publish and get your website live. Slow down there. Knowing how to make a website is one thing. Publishing your website blindly is another.
Always preview changes to your website before publishing them. You need to be sure things are working the way you want them to. Some of the key questions to ask are:
• Is all the spelling and grammar correct?
• Are all the buttons on the menu working?
• Does your site fulfill a purpose?
• Is your formatting consistent?
• Does it function on desktop and mobile phone screens?
• Does the site load quickly?
You’ll have done so well to get this far. Be vigilant. It would be a massive shame to build your own website, only to publish an unfinished site.
How do you preview your website?
Website builders make previewing your site really easy. Usually, you just have to hit the preview button in the editor mode to see what your website would look like live. Most offer a toggle so you can see how it works on different screen sizes.
| Top tip! Don’t forget about mobile! More than half of Google searches are carried out on mobile, and this number is only on the up. Making your mobile experience a seamless one is a must for any successful site – particularly because of the benefits that mobile responsiveness can have in terms of making your website more accessible. |
An easy-to-use preview mode saves you a lot of time as you won’t need to keep saving changes and switching back and forth between editor and preview mode. You can make a change and then just hit preview to see how it would look live.
| Top tip! Don’t just test your website yourself. You will be blind to some of its faults. Plus, you know how your site is supposed to work, so while you might find navigating it easy that’s not to say a stranger will. Get a fresh perspective. Ask family members and friends to test your site and give feedback. If they’re anything like our family and friends they won’t be afraid of offering criticism. |
9: Publish Your Website On the Internet!
 |
| Photo: Website Designing Company in Gurgaon |
All this done, you should be ready to go. Before you hit that ‘Publish’ button and send your site out into that cold, unforgiving world, let’s recap the steps you should have gone through to get to this point:
• Choose the right website builder for you.
• Sign up for a plan that suits your needs and budget.
• Choose a unique and relevant domain name.
• Pick a design template you love.
• Customize your template design.
• Upload and format your own content.
• Choose and download apps.
• Preview and test your website.
Are you all done? Splendid. Press ‘Publish’! Tell your friends, shout about it in crowded streets, hire a blimp — get the word out. Your site is now live for the world to see. You can still customize and develop it of course, but you’ve taken the plunge. How very exciting.
If you’re still a bit unsure whether you can do it, especially if you feel that you’re not the creative type, we have a comprehensive What You Need To Build A Website guide that covers all of the checklist items above, plus Google Analytics, logo design and images, in detail. For more specific guides to website creation – such as how to make a booking website, or how to build a membership website – explore the range of diverse guides on our site.
Your website is up. Now what?
If you’ve already created your website and published it, you can start promoting and optimizing it to increase visits and improve the user experience.
• Update your website: Websites are not books. Once published, they can still be updated. Make sure that you create new and relevant content when you have the chance and that you’re constantly updating the website. For example, imagine a restaurant’s website: if the menu changes, it should be reflected on the website as quickly as possible.
• Online positioning: To attract as many visitors as possible, you’ll have to optimize your website’s SEO. This is not very complicated but it requires time and work. Check out this guide for more information.
• Web analysis: Your efforts in online positioning (above point) will be useless if you don’t measure your website traffic. That’s how you’ll know whether it’s working or not. The most popular website analysis tool is Google Analytics. And it’s free! Of course, once you publish your website, you should register with Google Search Console to notify Google that your page exists and get information. Or at least send your website’s URL (address) to Google so that it can index it.
• Email Marketing: Another usual strategy, especially for businesses, is to send regular emails to its visitors not to lose contact. This is especially useful for online stores, small businesses, and bloggers. Email marketing is a science in itself. You can read this how-to guide to find more information on how to get started sending newsletters.
• Social media: Finally, most websites also have social media profiles (e.g. Facebook, Instagram, Twitter, LinkedIn, etc.) to be able to interact with their visitors (and potential visitors) outside of the website you’ve created. This works especially well for visual professionals, like illustrators, jewelers, or photographers.
 Can Foreigners Buy Or Invest In UK Stock Market? Can Foreigners Buy Or Invest In UK Stock Market? How to buy (invest in) stocks in the UK for non-UK residents? Read on to know the guidelines and tips for investing the stocks for ... |
 How To Find The Cheapest Flights To Anywhere By Google Flights How To Find The Cheapest Flights To Anywhere By Google Flights You can use a website like Google Flights to find the cheapest dates and prices. How to find the cheapest flights with a few simple ... |
 How To Find The Best Early Black Friday Deals in the UK? How To Find The Best Early Black Friday Deals in the UK? Black Friday is coming this month and the best deals are waiting for you. What to expect for Black Friday in the UK 2021? Check ... |


