Simple Ways To Convert WEBP Images To JPG, PNG On Any Devices
 |
| Simple Ways To Convert WEBP Images To JPG, PNG On Any Devices |
When saving images from the web you may have encountered a strange file format called WebP. This is one developed by Google and while it may have the convenience of making images smaller, the downside is that not all applications accept it, with Photoshop being a prime example. WEBP images have small file sizes and are great for websites, but not many photo apps can open them or edit them.
So, how can you easily convert a WebP file to a more usable format like JPG or PNG? Here are a few simple ways.
What is WebP?
WebP is an open-source image format that was introduced by Google back in 2010. The idea was to compress images files so that they required less bandwidth and thus made web pages quicker to load. It’s a good idea, in principle, and has found favor with the majority of browsers over the last decade.
The only significant holdouts have been Internet Explorer and Safari for Mac, but even Apple is now opening its arms to Google’s initiative, with the format expected to be included in version 14 of Safari when it’s released in the latter half of 2020.
WebP pros
Compression is WebP’s most prominent selling factor. After compression, WebP pictures are smaller than other image file formats, yet they retain the quality.
Using WebP pictures on your site will make it load faster while also using fewer data storage. If people open your site within several seconds, you may win more chances to keep them here. For example, Amazon has shown that each additional 100ms cost them 1% in sales.
There are three pros to WebP format:
1. Faster Loading Times
The advantage of the WebP format is that it can compress an image. The resulting size file is smaller than other formats while maintaining the same quality. You can thus load WebP images faster.
2. Less Data Storage
WebP’s improved compression and takes up less memory. That is critical for sites containing many pictures. It may even result in cost savings on web hosting. Smaller picture files also save bandwidth and device resources, which is essential on mobile devices, which are used more nowadays.
3. Support for transparent background and animations
WebP is the only image format that features both transparent backgrounds of PNG and animations of GIF.
PNG maintains the same image quality regardless of how many times it’s transferred and stored. It can also PNG display transparent backgrounds. Thus you can re-edit images on any design software easily. GIFs are like videos, but their colour palette allows only 256 colours.
Both PNG and GIF often take up a lot of space on your device. Best of all, Webp can add an alpha channel mask (transparent background), like a PNG. However, you can compress it to one-tenth the size of its PNG equivalent. Moreover, Webp can animate images in the GIF format. With some Chrome Extensions or converters, you can turn GIF to Webp. The result is a lightweight GIF.
WebP Cons
1. Not supported in all browsers
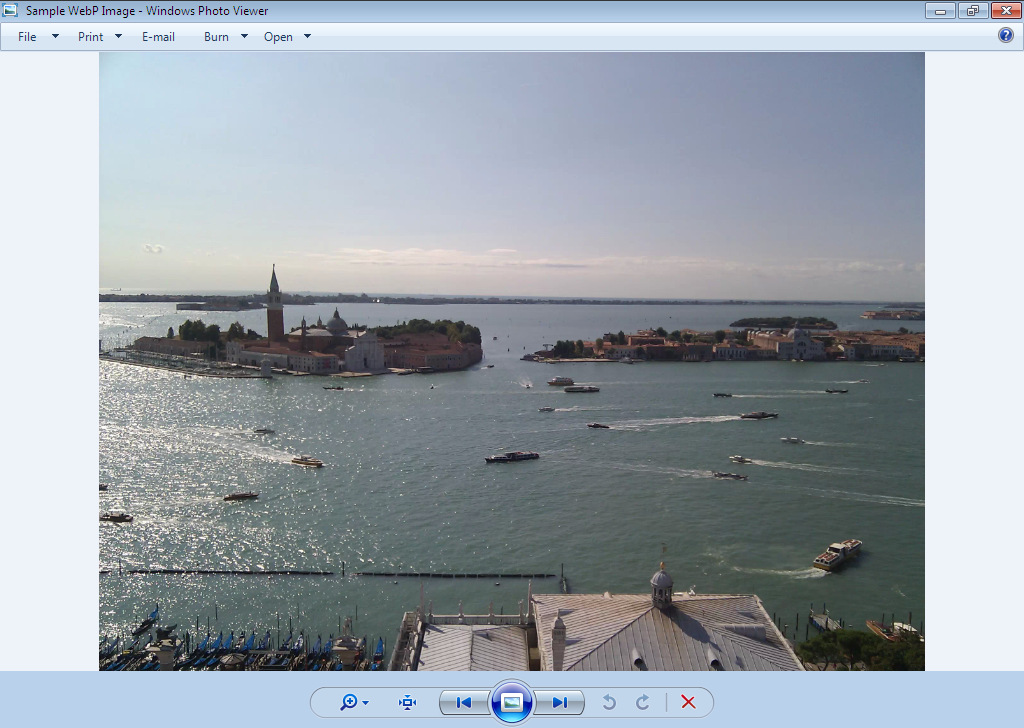
WebP was just recently embraced by major web browsers and image viewing and editing applications. Despite being extensively featured in Google products, it is still not supported by some of the most widely used image tools. For example, Microsoft’s Windows photo viewer doesn’t open it.
To ensure your pictures are compatible with multiple platforms, you may need to prepare both WebP and JPEG images.
2. Higher CPU usage
An animated WebP image requires higher CPU usage than a general GIF image does. The decoding of a lossy WebP image takes longer than decoding a GIF does.
3. Not supported by some websites
Many websites have no support for uploading a WebP image yet. Other image formats like JPG and PNG have been developed for a long time and gained popularity on the web. On the other hand, WebP is still relatively new.
Most of the time, when you want to share an image post on social media or upload a picture for an article, you are asked to provide JPG, PNG or GIF. To our disappointment, Webp is usually not an option.
How To View a WebP File?
 |
| Photo: techdows |
View WebP with a Web Browser
There are a few options for viewing a WebP file, but the one that’s most intuitive is doing it online. If you’re running a browser that supports WebP just find the image file and double click. It will open in the browser and you can easily view it.
View WebP in Finder or File Explorer
If you just want to see a preview of your image, you can do that while scrolling through files. In either Finder (for a Mac) or File Explorer (for a PC), set your view to thumbnails. Open the folder with your WebP images and you can see previews right there.
View WebP in Preview (Mac) or Paint (Windows)
You can open WebP images natively on your computer. You’ll want to find the image file, and right click. Choose “open with” from the menu.
The program you choose will vary depending on the type of computer you’re using. For Windows, choose Paint. For Mac, choose Preview. The image will open in your program.
One quick note here: if you’re running an older OS, Preview may not be able to open the image. You’ll need to update to BigSur if you’re having a problem.
How to Convert and Save WEBP Files to JPG: Best Tools Online
1. Google’s WEBP Photoshop Plugin
Before moving onto online solutions and third-party tools, wouldn’t it be great if you could open Webp files directly through Photoshop? Well, some Google developers with a bit of time on their hands made this a reality. Yes, that means you can open Webp files directly through Photoshop, and convert them there (note that this will only work on the recent Photoshop versions).
- First, download the binary (WebPShop.8bi) from Github.
- Next, move the file over to your Photoshop plugins directory (default: C:Program FilesAdobeAdobe Photoshop 2022Plug-ins). You may get a message saying you require administrative permission. Just click “Continue” if that comes up.
- Restart Photoshop if it’s open, and you’ll be able to open WEBP files just like any other image format. To save it as a JPG, go to “File -> Save for Web (or Save As)”, then select the JPG format from there.
2. iLoveIMG
 |
| iLoveIMG |
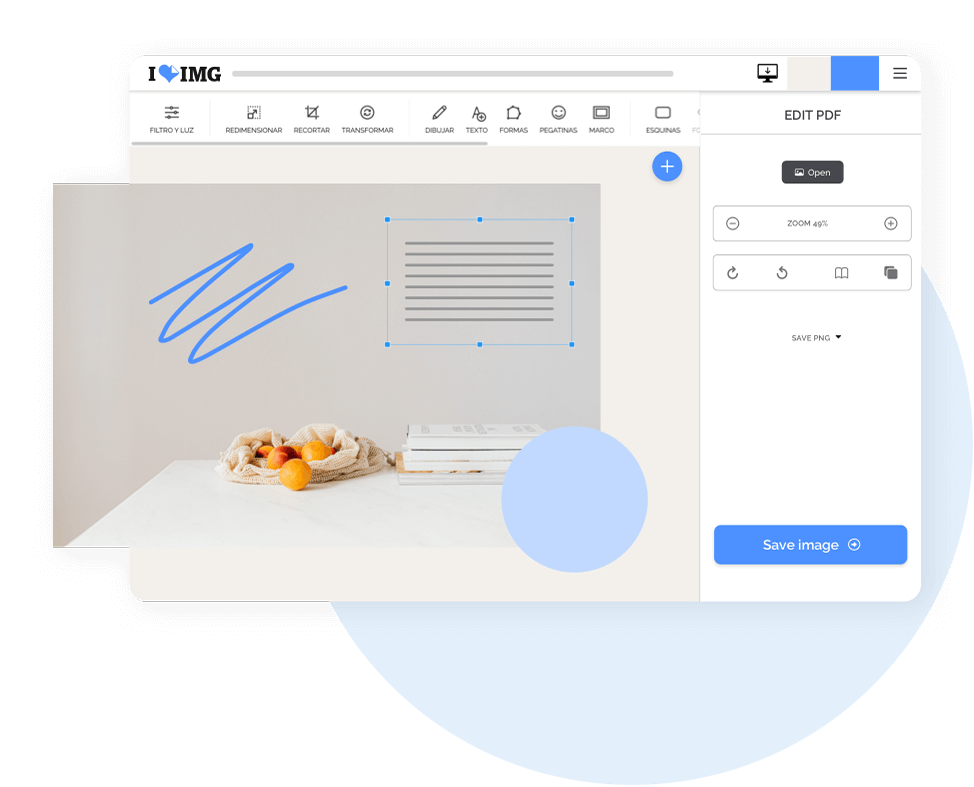
iLoveIMG is my favorite as it has the ability to convert almost any image format into JPG, be it PNG, GIF, TIF, PSD, SVG, WEBP, or RAW. Simply upload the source image and hit the “Convert to JPG” button.
The iLoveIMG website has a clean user interface. It allows the user to upload images via Google Drive or DropBox and converts them for free. Moreover, the website also allows unlimited batch conversions, and you can add watermarks to the images for promotion.
3. FreeConvert
Another free and easy-to-use website to convert Webp to JPG is FreeConvert. With the help of this website, you can convert Webp to JPG and other formats, including SVG, BMP, GIF, PNG, etc.
The FreeConvert website gives you access to additional settings to tweak output image size and background color. You can also choose to compress the image. Notably, this website also performs batch conversions. For free users, there is a max file size limit of up to 1GB.
4. Tinyimg
Tinyimg is another website to convert your Webp files into JPG format. It does the job of converting Webp into Jpg quickly. You can upload and convert 10 images at the same time. The maximum file size allowed is 3MB each.
All you need to do is upload the source image, and it will automatically upload, process, and convert to JPG format. Once the conversion is done, hit the “DOWNLOAD ALL” button at the bottom to download all files at once.
5. Aconvert
 |
| Aconvert |
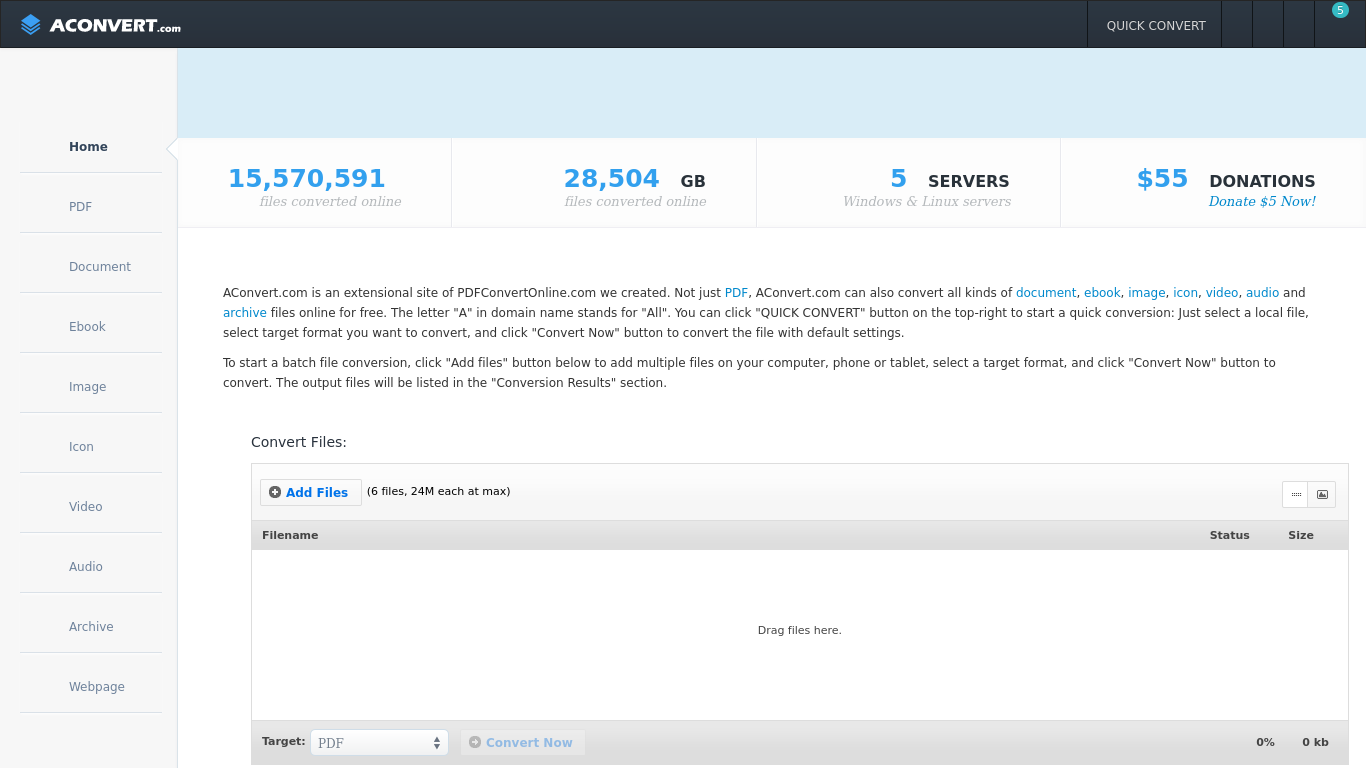
Another popular website that allows batch conversion of Webp files to Jpg format is Aconvert. You can upload as many files as you want in a single session and get the desired result in JPG format. The conversion process is quite fast. However, there is one downside. You cannot download all the files at once and have to download each file manually.
Notably, there are some settings you can change and play with before you begin the conversion. You can set the target format and change the size of the image. Once you are happy with the settings, hit the “Convert Now!” button.
6. OnlineImageTool
OnlineImageTool is a nicely designed online solution for converting Webp images to JPG. There are no limitations to using this website. You can upload and convert as many files as you want to JPG. The OnlineImageTool comes with drag-and-drop support.
One nifty feature of this website is that it allows you to see the compression of image quality in real time via a slider. You can download all the converted images at once in a zip file, thus saving a lot of time. The conversion process is also pretty swift and fast.
How to save WebP images as JPG or PNG on Mac
1. Using Preview on your Mac
Apple’s macOS has a built-in image viewer called Preview. While Preview allows you to view, edit, crop, and even annotate images on your Mac, it can even be used to convert a WebP image to JPG on your Mac.
Although this process is a tedious one, it gives you granular control over the image quality. Here’s how to do it.
- Open the WebP image using Preview.
- Now, in the Preview’s menu bar, click File → Export.
- In the window that pops up, select the image format to be exported in.
There are plenty of image formats to choose from, including JPEG, PNG, TIFF, and even PDF.
- Adjust the image quality using the slider.
- Once done, click Save.
Additional tip: If you plan on using this solution to convert WebP images, head over to System Preferences → Keyboard → Shortcuts → App Shortcuts → click the + button → select Preview. In the Menu title, copy and paste ‘File → Export…’ and add keyboard shortcut as ‘Cmd + E.’
Next time you use Preview to convert WebP images, open the image and press Cmd + E to open the Export window quickly.
2. Use online tools to convert WebP to JPG
There are a lot of tools available on the web to convert WebP images to JPG. As for my choice, cloudconvert is one of my preferred options to perform this conversion.
It not only has an easy-to-use interface but also allows you to set image’s quality, height, width and lets you save images directly to Google Drive — so that you can seamlessly attach them in your Google Docs. Moreover, it’s ad-free!
3. Take screenshots to save JPG image
 |
| Photo: media |
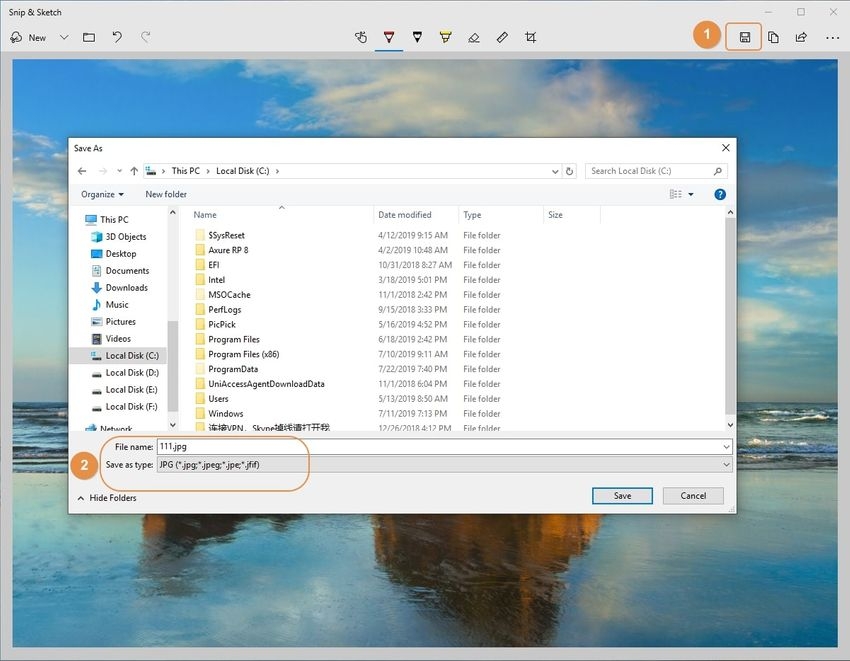
Well, this is not one of the ‘cleanest’ ways to convert WebP images on your Mac, but it gets the job done. Depending upon the browser you’re using, open the image in a new tab — to retain its high quality — and simply take a screenshot by pressing Cmd + Shift + 4 on your Mac’s keyboard.
After pressing the key combination given above, you’ll be presented with a cursor to select the area to be captured. Once you’re done, you can find the screenshot on your Mac’s desktop.
WebP images can protect your image files and even save some of the storage space on your Mac, but not all browsers and websites support this image extension. Using the above solutions, you can quickly convert WebP images to JPG on your Mac.
How to Save WEBP Images as JPG and PNG on Any Devices
1. Edit image URL
This is probably the best manual method to save WEBP images as PNG or JPG. WEBP images saved online are available in both WEBP and JPG/PNG formats, as some of the browsers like Firefox and Safari don’t support WEBP. So in those browsers, the JPG or PNG image is loaded instead. With a simple URL tweak, you can load the JPG or PNG format instead of the WEBP. Here’s how:
- Right-click on the WEBP image and select Copy image address from the menu
- Now paste this address into a new tab and remove the last 3 characters from the URL. Therefore, remove
-rwit at the end of the URL. When you’ll hit enter the image will be loaded in JPG/PNG format. - You can then right-click on the image and select Save image to save the image.
2. Use "Save Image As PNG" Chrome extension
On Google Chrome, you can use a handy extension called Save Image As PNG that adds an option in the context menu to download WEBP images as PNG.
Note: Opera users can also use this extension by installing the Download Chrome Extension. This extension will allow you to install most Chrome extensions in Opera, including Save Image As PNG.
- Install the Save Image As PNG extension from Google Play Store.
- Right-click on the WEBP image and select the new option Save Image As PNG. That’s it, now you can save the image in PNG format.
Unfortunately, this extension will only let you save images in PNG format. If you want to save in JPG format, you’ll have to convert the PNG format to JPG format using an image converter or use a different method in this list.
3. Use an unsupported browser
 |
| Photo: whereby |
Currently, the WEBP format is only supported by Google Chrome and Opera. And as I said before, on websites both the WEBP and JPG/PNG formats are uploaded for an image to ensure all the browsers can open it. You can simply use an unsupported browser to load the image and it will be loaded in JPG or PNG format.
You can use any browser you like, including Firefox, Safari, Internet Explorer, and Microsoft Edge. Save the image as you normally do and you will see it will be in JPG or PNG format.
4. Spoof user agent
Following up on the above method, you don’t necessarily have to switch browsers to download WEBP images in JPG/PNG format. You can simply spoof the user agent of your Chrome or Opera browser so the website will think you are browsing from an unsupported browser and load a JPG or PNG image instead of WEBP.
For this purpose, I’ll recommend you to use the extension User-Agent Switcher for Chrome as it’s quick and easy.
- Install the extension and click on its icon in the address bar.
- You’ll see a list of supported user agents. Select any unsupported browser such as Safari or Firefox.
- Now refresh the page with the WEBP image and it will load in JPG/PNG format. You can then download it using the standard Save image as an option.
5. Use an online image converter
In case you already have WEBP images on your PC, you can convert them in JPG or PNG format as well. This will also be useful if you don’t want to follow extra steps in the above methods, but instead download all the WEBP images and then convert in bulk.
For quick conversions without any need of an extra software, an online converter is a good option. For that, Zamzar is a reliable image converter that supports WEBP conversion and is free to use. However, you can only convert 10 images concurrently.
- On Zamzar website, click on Choose Files in Step 1 and select up to 10 WEBP images.
- Select JPG or PNG from the drop-down menu.
- Now provide your email address and click on Convert to finish the process.
The images will upload and the converted images will be sent to you via email. You can repeat the process to convert as many images as you like. If Zamzar doesn’t interest you, then you can also use cloudconvert. It offers fast on-site conversion, but it’s only limited to 25 conversions/day for free (registered users).
6. Use a desktop image converter
If an online conversion isn’t your thing, then a desktop image converter app would be a great solution. Although there are many, but I personally like XnConverter as it is completely free and comes with a plethora of features.
XnConverter is available for Windows, macOS and Linux, and lets you convert unlimited images in bulk. Let’s see how you can use it to convert WEBP images to JPG or PNG:
- Download and install XnConverter and launch it.
- In the Input tab, click on Add files and select as many images as you like.
- Move to Output tab and you will see dozens of options to tweak. Although, you can tweak as you prefer, but just selecting your desired output format (JPG/PNG) should be enough as well. You can also click on Settings below the format to further adjust output quality.
- Now click on Convert and all the images will be converted and saved in the specified location.
Convert Animated WEBP Images to GIFYou have several ways to convert animated WEBP images to the GIF format, but the fastest method is to use an online conversion tool. There are numerous services you can use for that, but a few noteworthy picks include: CloudConvert ZamZar EZGIF Most sites allow you to upload one or more animated WEBP images for conversion. After doing that, specify GIF as the output format, start the conversion procedure, and download the converted files to local storage. Alternatively, you can paste the URLs of any WEBP images for conversion. That allows you to download them directly in the GIF format. |
 Easy Ways To Convert HEIC Files To JPG For The First Time Easy Ways To Convert HEIC Files To JPG For The First Time What should you do if you have a HEIC file and want to convert to JPG? Beginers, follow our easy steps below! |
 How To Convert Images To PDFs On iPhone and iPad How To Convert Images To PDFs On iPhone and iPad What should we do if we want to convert images into PDF files on iPhone or iPad? Don't worry. This article will show you the ... |
 The Best Ways to Convert MOV Files to MP4 on Mac/PC The Best Ways to Convert MOV Files to MP4 on Mac/PC Learn how to convert MOV files to MP4, keep reading the article below. |


