Top 10 Trendy Hairstyles For Long Haired Women This Summer
 |
| Top 10 Trendy Hairstyles For Long-Haired Women This Summer |
| Table of Content |
Whether you are a girl who loves safety or is not afraid to change herself, do not miss the hairstyles that promise to "storm" this summer.
According to Larry Sims, hairstylist for top stars like Winnie Harlow, Zendaya, or Tessa Thompson, this summer will see a return to 90s hair fashion with some new and groundbreaking hairstyles.
Here are some of the best and most trendy hairstyles that can suit you.
List of Top 10 Trendy Hairstyles For Long-Haired Women In The Summertime
1. Blowout
2. Pixie
3. Blunt Bob
4. Tousled Wavy
5. Half Top Knot
6. High Ponytail
7. Bobby Pin
8. Space Buns
9. Braided bun
10. Loose side braid
What are the trendy hairstyles for long-haired women this summer 2022?
1. Blowout
 |
| Photo: Pinterest |
Trey Gillen, Sachajuan's hairstylist and creative director, says the '90s Blowout will become popular this summer. So, if you already have layered hair, don't forget to use a little hairspray to style it and keep up with the trend.
How to Maintain Your Blowout Hairstyle Longer
We get it, blowout hairstyles aren’t always cheap, so it’s no surprise why you’d want to make your style last as long a possible. Scroll to find out the top ways we preserve out blowouts.
1. Don’t Brush it on Day 1
Revel in your gorgeous blowout on Day One by trying your best to look and not touch! We know it’s hard, but trust that it’s worth it. Also, avoid brushing or putting any additional product in it. Doing so can create more oil and cause your hair to lose its newfound volume.
2. Use a Comb
This is especially important for the first few days. A comb helps maintain your hair’s style and body, whereas a brush can flatten the look, creating a limp and dull effect.
3. Sleep with a Light Hair Oil
Maintain the sleekness of your blowout by using some hair oil like Nexxus Clean & Pure Nourishing 5-in-1 Invisible Hair Oil whose formula can help smooth frizz and make your hair soft. Squirt a dime-sized amount into your hands and mix it around as you work the oil into your strands, focusing on the frizzy or unmanageable areas.
4. Sleep with a Low Ponytail and Headband
A lot of how your hair is going to look during the week is dependent on how you wear it during bedtime. Make sure to lightly wrap your hair in a low pony. Anything with too much grip can cause your hair to retain a bend. Also, cover the front of your hair with a loose headband or hair wrap to help tame any frizz or flyaways.
5. Revive Your Hair
By day three, you may notice that your locks are starting to get a bit limp. Revive them with a dry shampoo like Love Beauty and Planet Coconut Water & Mimosa Flower Dry Shampoo whose formula absorbs your hair oils as it cleans and revives your hair. Simply spritz some dry shampoo onto your roots and then use your fingers or a comb to distribute the product throughout your ends.
6. Refresh your blowout hairstyle
Another technique for holding onto a blowout is to re-blow-dry your hair. This step usually happens on day three or four and is really only done in certain areas where you start to see frizz or where you think your hair needs a lift. This is also a good way to revive any curls or bounce created during your blowout. Make sure to apply a heat protectant to your hair like TRESemmé Thermal Creations Heat Tamer Spray whose formula can help to protect your hair from heat styling as it also helps to guard against dryness and frizz.
How to do an Easy Blowout Hairstyle
You know, sometimes you may not want to have to go to a salon to achieve that sleek and smooth blowout. We’re sharing how you can easily achieve similar results yourself!
1. Start with Freshly Washed Hair
When doing a blowout, you want to begin with clean hair that is still wet. We love using a set like Suave Up The Volume Shampoo and Conditioner. This set is one of our favorites because it helps add an extra dose of volume while moisturizing and softening your hair.
After your hair is washed and conditioned, use a towel to gently squeeze out excess water so your hair isn’t dripping wet.
2. Apply a Protectant/ Blow-Dry Accelerator
Using a hair protectant is an absolute must, which is why we opted for a blow-dry accelerator. A blow-dry accelerator has so many benefits when it comes to giving yourself a blowout. We love Suave Blow Dry Accelerator in particular because it protects your hair up to 450°F, speeds up your blow-dry time, and also uses an Amino Acid complex to help soften strands.
3. Section off Your Hair
Once your hair is clean and a protectant is applied, section off your hair to make blowdrying more manageable. This will be easier if you have layers already, but if not, there’s no need to worry. Use a clip to split your hair in half, like when you do a half-do.
4. Apply Nozzle and Begin Drying Hair
When your hair is sectioned off, it’s time to start drying! You’ll want to attach a nozzle at the end of your blow-dryer. This will help the air stay in a centralized location, giving you more control over your style and where the air blows.
Use a round brush to brush through small to medium sections of the hair slowly. While brushing through your hair, you’ll want to hold the hair-dryer with the other hand, slowly running it over that same section of hair where you are brushing.
If you want an extra voluminous look, hold the section of hair up, towards the opposite side of your head, while focusing the nozzle at the root for a few seconds. Trust, this extra volume boost can make a huge difference.
2. Pixie
 |
| Photo: All Things Hair |
A pixie haircut is a great solution for a contemporary woman on the go. It’s convenient, pretty and appropriate for hair of any type. Pixie haircuts for thick hair are full of texture and manageable volume. If your hair is fine, you may also choose the right pixie hair cut that adds dimension and boosts thickness of your short locks. Modern pixie cut styles are not limited to modest boyish ‘dos. You may indulge in a variety of pixie hairstyles with slicked back or tousled hair, try short pixie hairstyles for curly hair, asymmetrical vintage ‘dos or funky Faux Hawks. Short and long pixie haircuts with bangs are the most popular short hair choice nowadays. There are cute ideas of pixies for most face shape, including cute pixie cuts for round face.
A pixie cut is a short women’s haircut you typically see on a fashionably gamine woman. If you are a tomboy at heart or just want to shake things up a bit and don’t mind a crop, definitely go for a pixie haircut! You may lose most of your locks but what you gain is a simple wash-and-go style, an added edge to your and lots of compliments.
Long pixie hairstyles are a beautiful way to wear short hair. Many celebrities are now sporting this trend, as the perfect pixie look can be glamorous, elegant and sophisticated. Here we share the best hair styles and how these styles work.
Every one loves a great hair cut: men, women, young and old! Sometimes it can be hard to find one that is perfect for you and your style. With all those magazines and suggestions from social media gurus, it is easy to become overwhelmed with options! Fear not! This article will give you insight as to how you can choose the perfect pixie cut.
A pixie haircut is a simple way to make your looks sharper and brighter. Short hair draws extra attention to your face, so you should think in advance what features you’d like to accentuate with your short haircut. Extra short pixie, for instance, flatters girls and women with delicate facial features and big eyes. If you have some extra pounds, it’s better to decide on a pixie with a tapered silhouette and elongated bangs.
3. Blunt Bob
 |
| Photo: Hair Adviser |
The blunt bob is perfect for teenagers this summer. It has style and keeps you from sweating, thanks to its short length. You will need to get regular trims to keep this hairstyle looking fresh, though.
The blunt cut bob that we might usually associate with Uma Thurman in Kill Bill or Velma Kelly from Chicago looks clean, sleek, and razor-sharp. The look might sound intimidating and difficult to pull off, but with a seasoned stylist to execute it, a blunt cut can work well on every hair texture, face shape, and personal style with ease. Whether you opt for asymmetrical and pin-straight or curly and tousled, you can still get all the volume, shape, and texture that we're usually lauding layers for (believe it or not).
One of the more popular versions of this is the blunt bob because they’re haircuts without layers. Also known as soft blunt cuts, this sleek hairstyle is great for women with oval, square, or heart-shaped faces.
Blunt bob haircuts are a super customizable and versatile cut that can fit any type and texture of hair. The bluntness of the ends gorgeously emphasizes the jaw area and brings a strong and flattering look to its wearer.
Classy yet simple and straightforward, blunt haircuts ensure comfort and easiness in styling. Pair it with a complementary hair color, some gorgeous waves, or a stellar fringe, and you’re ready to go!
4. Tousled Wavy
 |
| Photo: Hot Hairstyles |
The tousled waves look is all the rage right now. Just style your hair in some relaxed waves. Even without using a styling tool, you can braid your hair after washing it and leave it in overnight. Untie it the next morning to reveal your gorgeously wavy hair.
Tousled Cut: What to Ask for at the Salon
1. How short or long to go
How low do you want to go? Do you want a bob length or a lob length for styling flexibility? Communicate to your stylist how you plan to wear your hair everyday, as well as on days you don’t have time to come in for a hair appointment or if you’re just feeling lazy. If throwing your hair up into a ponytail is one of your go-to styles, opt for a lob that hits you right above your shoulders.
2. To layer or not to layer?
More layers, more movement. If you really want a true tousled cut, go for gold! Settle on just enough layers to give your look enough body and swing.
3. Choose your finish.
How do you want your hair to feel on a day-to-day basis? Do you want loads of texture in your tousled cut everyday? Or do you want to switch it up and wear it bone-straight? Depending on what you choose, ask your stylist what you can do at home to recreate the look. Here’s a little cheatsheet: For sleek styles, opt for flat ironing with TRESemmé Get Sleek Heat Protection Spray. To create the tousled look, check out our tousled hair tutorial. Or you can apply a product, like Suave Professionals Sea Mineral Infusion Texturizing Sea Salt Spray, onto damp hair to create effortless-looking waves. Finish with Dove Style+Care Strength & Shine Flexible Hold Hairspray to secure your look.
5. Half Top Knot
 |
| Photo: girlstyle.com |
Though this bun is pretty simple, it is extremely stylish and perfect for an everyday summer look. All you have to do is wrap half your hair in a bun at the crown and secure it with a hair tie.
How to Do a Half Up Top Knot
The half up top knot has all the qualities of a great hairstyle. It’s easy and quick to do, it works on virtually all hair lengths, and it’s trendy. If you’re familiar with the top knot, you already have the skills to create the half up top knot. The only difference is that this time, you’re only knotting up half your hair! If you love the look of a messy topknot but like to wear your hair down, this style is the perfect compromise.
1. Sectioning Off Your Hair
Separate the top section of your hair. First, make sure that all of your hair is swept back. For this style, you do not want to have a part in your hair. Then, decide how much hair you want to leave down, and how much you want to put into the top knot. You can section off all the hair from your ears upwards, or just a little bit of hair on the top. Pick up that top layer, holding it in one hand.
me volume to the top layer. With your free hand, use a brush or come to tease the top section. This will make sure that it isn’t slicked back to your head, but has some nice volume. You can also spritz a bit of texturizing spray into the top section to add a bit of texture. This style is meant to look effortless and messy, so volume and texture are key.
Tie your top section into a ponytail. Once you are satisfied with the amount of hair in your top section, tie it off with a hair tie. Some people skip this ponytail step and go straight into the topknot. If you’re not a topknot pro, though, a ponytail is a helpful intermediate step.
2. Creating the Top Knot
Begin twisting your hair into the top knot. Grab your ponytail and coil it around the base of the ponytail. Remember, this look is not meant to be perfect. Don’t worry if it’s perfectly twisted or even ¬– just make sure that all of your hair has been coiled up around the base of the ponytail. Then, using a large hair tie, secure the entire bun. Wrap the hair tie around coiled section until it feels secure.
Adjust your top knot until you like it. You probably won’t love the top knot immediately after you’ve coiled and secured it. Once it’s secured, use your hands to play around with the bun. Pull on pieces to loosen it up, giving it a loose, messy feel. Even out the sides of the bun. Just gently mess with it until you like how it looks.
6. High Ponytail
 |
| Photo: Getty Images |
A high ponytail is popular because it is so versatile and easy to do. Worn slick and straight, it is a perfect complement. Even, its messy, wavy version is a good idea for a fun and flippy casual summer look.
It is common for those who wear tight ponytails to experience traction alopecia, a form of hair loss. It has been proven that traction alopecia is highly associated with hair-pulling hairstyles, including the ponytail, and that hairstyles involving less tension are not associated with this condition. Sometimes it can cause a headache.
Additionally, people who wear ponytails may experience extracranial headaches due to tension from prolonged tying of the hairs together in a bundle, pulling at the skin of the head. The pain that results is also because the ponytail pulls at the nerves in the scalp around the face, resulting in light to serious headaches or migraines. Many well-known popstars who don a ponytail such as Ariana Grande experience such effects with the ponytail after long hours of performances and rehearsals with the hairstyle.
Loosening the ponytail may relieve pain and the headache, though the extent of this varies for different individuals.
Creating a Basic Ponytail
Comb your hair and wrap a hair tie around your wrist. Keep the hair tie on your dominant hand so that it is ready to use. It's best to use a color that matches your hair, but you can use a bright one too.
Gather your hair into your dominant hand. Make an L-shape with you dominant hand. Hook it around your hair at the back of your head, with your thumb at the bottom. Use your other hand to gather your hand into your dominant hand. Keep your hand at the base of your head.
Lift your hair up to the height you want it. If you want a low ponytail, keep your hand near the base of your neck where your hairline begins. If you want a mid-height ponytail, lift your hand up until it is level with your ears. For a high ponytail, lift your hand up past your ears. Use your free hand to catch any hair that comes loose and gather it back into your dominant hand.
Smooth your hair back. Use a brush or your hands to comb your hair until it lays smooth. Work your way along the top, bottom, and sides of your head. Always brush the hair from the hairline and back towards your hand. You will have to pass the ponytail from 1 hand to the other.
Wrap a hair tie around the ponytail. Hold the ponytail with your dominant hand. Use your free hand to pull the hair tie off your wrist and onto the ponytail. Pull the ponytail through the hair tie. Twist the hair tie, and pull the ponytail through it once more. If you have thin hair, you may have to twist the hair tie a third time, and pull the ponytail through it again.
Touch up the ponytail, then mist it with hairspray, if desired. If you want a nice, full ponytail, split it into 2 sections. Pull the 2 sections apart to tighten the hair tie, then let go of them. Use hairspray to lightly mist your ponytail to set the style.
7. Bobby Pin
 |
| Photo: Good Housekeeping |
Don't deny it - this hairstyle is super cute. While the summer is hot, flaunt your short haircut in all its glory! Part your hair on one side or do a middle partition and add a simple bobby pin on the sides to create the cutest hairdo of all time.
Bobby-pin hairstyles:
Whether you want your bobby pins to do some behind-the-scenes work, or you just want to show them off, here are a bunch of bobby-pin hairstyles and tutorials to copy asap.
How to pin long hair up
The trick to making your faux bob look real? Pull your shortest layers aside and let some fringe pieces hang around your face while you pin the rest of it. Then, let your pieces down to hide the tucked ends.
How to use bobby pins for curly hair
If you feel like your usual twist out or braid out needs a little somethin' extra, try accessorizing with some ~intentional~ bobby pins. Here are more than enough ideas for you to switch it up every day of the week.
How to use bobby pins for an updo
Half-ponytail hairstyles, half-buns, full buns—this video demonstrates a ton of ways to use bobby pins in all kinds of updos, and every single one is worth trying.
8. Space Buns
 |
| Photo: We Heart This |
We didn’t think we could love space buns anymore – that was until we saw this little floral update! Perfect for chilled summer days and, of course, our fave summer pastime – festivals – space buns are among the hottest hairstyles right now.
Between messy buns, ballerina buns and braided buns, it’s safe to say there’s a bun hairstyle for every occasion. And while some of them make for ultra-polished looks, space buns bring an element of fun and playfulness to the hair.
In addition to being a great way to spice up your typical ‘do, space buns work on a variety of hair types and can be customized to suit your preferences. They can be created as a full updo, or they can be part of a half-up, half-down style for a dimensional look. If you’re ready to sport the style, keep reading because we’re sharing how to do space buns in just a few easy steps.
1. Brush and Part Your Hair
Like with most hairstyles, it’s important to start with tangle-free hair to prevent breakage and make it easier on you when creating the look. Gently brush through your strands until they’re knotless and then part your hair in the middle. A middle part is key for this style so that the size of both buns are equal.
2. Create Your Ponytails
Starting on one side, gather a section of hair and put it into a ponytail towards the back of your head and make sure to smooth any bumps during the process. Your placement can be adjusted based on your preference, just keep in mind that the base of your ponytail will be where your space bun is.
If you want some extra volume at your roots, use a dry shampoo like the L’Oréal Paris EverPure Sulfate Free Tinted Dry Shampoo for Brown Hair if you’re brunette, or the L’Oréal Paris EverPure Sulfate-Free Tinted Dry Shampoo for Blonde Hair if you’re blonde. If you’re neither brunette or blonde, try the L’Oréal Paris Elvive Dream Lengths Air Volume Dry Shampoo which rids the hair of grease and adds a bit of lift.
Once you’ve created a ponytail on one side of your part, create an identical ponytail on the other side. Make sure to mirror your placement — you don’t want your space buns to be lopsided.
3. Wrap the Hair to Create Buns
To create your space buns, you’ll want to wrap the length of your hair around the base of your ponytail. Hold this newly-formed bun into place while you secure it with bobby pins and repeat on the other side.
For a more intricate look, you can first twist the hair in the ponytail around itself to create one large twist and then wrap it around the base of the ponytail to create the bun.
4. Perfect the Look
If you’re going for a loose, lived-in style, you can pull out a few tiny sections of hair near the front to give it a casual look.
If you prefer a more sleek appearance, you can use a bit of hair gel, like the L’Oréal Paris Studio Line Mega Gel, and an edge brush to slick back the front and sides of the hair, creating a smooth look.
5. Set the Style In Place
To ensure your space buns last all day and night, keep them in place with the L’Oréal Paris Elnett Satin Extra Strong Hold, Light Hairspray Unscented. Hold the can twelve inches from your head and spray the product in short bursts evenly coating your hair. You’ll be left with a sleek style that lasts.
9. Braided bun
 |
| Photo: Luxy Hair |
After spending the day wearing our hair in a simple braid, we absolutely love to switch the style up to a braided bun for a summer evening (because who has time for a hair makeover when the sun is shining).
How To Do A Braided Bun
1.Begin by sectioning hair from the ear forward on both sides, leaving small face-framing sections for the braids.
2.Pull the rest of the hair into low pony close to nape of neck , pinch and pull to tease the top of the hair, for a messier undone look.
3.Add another elastic a couple of inches down from the first one, tease the hair on the bottom out of the elastic, tuck it in and roll up to give more fullness in bun. Bobby pin the bun on the sides - the messier the better for that effortless look.
4.Using a classic three strand Dutch braid (where the hairs go under instead of over), braid remaining side pieces of hair, then pinch and pull at braids to make them fuller and messier.
5.Wrap braids across the top of the bun to the opposite side and bobby pin underneath bun. Lightly spray with hair spray to hold.
10. Loose side braid
 |
| Photo: Getty Images |
With its laid-back appeal and subtle nod to the hot-off-the-runway bohemian trend, a loose side braid is totally on point this summer.
Great for achieving a more organic look, this is a style that looks just as good by the pool as it does at a summer wedding. Try styling yours with a strip of ribbon at the end just like Emily Ratajowtski.
Everyone loves a good messy side braid, but most ladies who style their hair into the plait know that it takes just the right combination of precision and messiness to look perfect. Sure, girls with messy side braids may look like they just threw their hair into the style, but we know they put some effort into the look. Between technique, product, and luck, it takes just a little bit of practice, but when you get it right, this braid can’t be beat.
Step 1: Give yourself a deep side part, separating your hair in two. From there, separate each section in two again, leaving you with four sections of hair.
Step 2: Starting with the section on the far left, cross underneath the next section, then over the third section, then under the fourth section, as if you were basket weaving your hair. Continue this with each “new” far left section until your hair is completely braided all the way down.
Step 3: Secure the end of the braid with a clear elastic.
Step 4: Gently tug sections of the braid apart to loosen things up a bit, giving you the messy look. Don’t pull too hard — just enough to loosen the plait.
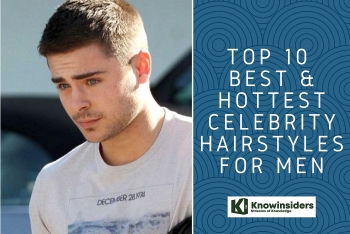 Top 10 Best & Hottest Celebrity Hairstyles for Men - Big Trend 2022/2023 Top 10 Best & Hottest Celebrity Hairstyles for Men - Big Trend 2022/2023 When planning your next hairstyle, celebrity hairstyles are great to look at and make your choice. Which are the most trendy hairstyles for men in ... |
 The Best Hair Style For Your Zodiac Sign The Best Hair Style For Your Zodiac Sign If you're contemplating what haircut trend to try this season, let the stars guide you by picking a hairstyle based on your zodiac sign. We ... |
 How to Style A Ponytail Haircut With New Ways How to Style A Ponytail Haircut With New Ways In all the famous hairstyles, the ponytail is the easiest type to do and is suitable for all the hair types. |
 How to Style Men Undercut Hairstyle in Hottest Trends How to Style Men Undercut Hairstyle in Hottest Trends Undercut is one of most popular and favorite haircut nowadays, and create a modern, handsome look for men. Here is what undercut is, and how ... |