How To Draw A Cute Girl Eyes - Step By Step in New Trends
 |
| How To Draw A Cute Girl Eyes Step By Step |
Eye is the important and most beautiful part of human’s body, and some girl’s eyes are extremely attractive and cute. The first thing to remember is that male and female eyes are practically the same, and the process of drawing female eyes is not very different from the process of drawing any other eyes. Take a look at the article below for the guide of drawing cute girl eyes, and what to prepare to do the drawing.
Anatomy of the Eye
 |
| Photo: All About Vision |
The human eye is an organ that detects light and sends signals along the optic nerve to the brain. Perhaps one of the most complex organs of the body, the eye is made up of several parts—and each individual part contributes to your ability to see.
Cornea
The cornea is the transparent, dome-like structure on the front part of the eye. It gives the eye two-thirds of its focusing or refracting power. One-third is produced by the internal crystalline lens.
The cornea is also full of nerves that alert us to irritations that could potentially harm our vision and eye health. And the cornea is susceptible to injury. Common injuries of the cornea include "scratches" to its surface known as abrasions. Minor corneal scratches usually heal on their own, but deeper injuries can cause pain and sometimes corneal scarring.
A corneal scar can result in a haze on the cornea that impairs your vision. If you scratch your eye significantly, it's important to see an eye doctor. An eye doctor can view the cornea under a slit lamp biomicroscope.
Another common ailment of the cornea includes contact lens complications, especially corneal ulceration. An ulcer is a wound on the surface of the cornea caused by bacteria often caused by poor adherence to strict contact lens hygiene; Sometimes, a virus can cause corneal ulcerations like the herpetic virus (the one that causes cold sores on the lips) which 90% of humans have in their bodies.
Pupil
 |
| Photo: WebMD |
The pupil is the hole or opening that is located in the center of the iris of the eye. The pupil controls the amount of light that enters the eye. Pupil size is controlled by the dilator and sphincter muscles of the iris.
In humans, the pupil is round. Some animals have vertical slit pupils while some have horizontally oriented pupils. Pupils appear black because the light that enters the eye is mostly absorbed by tissues inside the eye.
Iris
The iris is the colored part of the eye that controls the amount of light that enters into the eye. It is the most visible part of the eye. The iris lies in front of the crystalline lens and separates the anterior chamber of the eye ball (anything in front of the human lens) from the posterior chamber (anything behind the human lens).
The iris is part of the uveal tract—the middle layer of the wall of the eye. The uveal tract includes the ciliary body, the structure in the eye that releases a clear liquid called the aqueous humor.
Iris color depends on the amount of melanin pigment in the iris. A person with brown eyes has the same color of melanin pigment that a person with blue eyes. However, the blue-eyed person has much less pigment.
Crystalline Lens
The crystalline lens is a transparent structure in the eye—suspended immediately behind the iris—that brings rays of light to a focus on the retina. Small muscles attached to the lens can make it change shape which allows the eye to focus on near or far objects.
Over time, the lens loses some of its elasticity. This causes the eye to lose some of its ability to focus on near objects. This condition is known as presbyopia and typically presents problems with reading, around 40 years of age.
A cataract is a clouding of the lens and is a common occurrence that comes along with aging. Fortunately, cataracts grow slowly and may not affect your vision for several years.
By age 65, over 90% of people have a cataract. Cataract treatment involves removing the cloudy lens surgically and replacing it with an implantable intraocular lens.
Aqueous Humor
The aqueous humor is a clear, watery fluid located behind the cornea, in the anterior chamber. It helps bring nutrients to the eye tissue.
It is formed behind the lens and flows to the front of the eye to maintain the pressure inside the eye. Problems with the aqueous fluid can lead to issues involving the eye's pressure, such as glaucoma.
Vitreous Humor
The vitreous humor, which lies against the retina, makes up a large part of the eye. It is a jelly-like substance that fills the inside of the eye.
Made mostly of water, the vitreous fluid gives the eye its shape. It is composed of water, collagen, and proteins and contains cells that help to maintain its clarity.
As we age, the vitreous humor becomes less firm. This liquifactive change is what causes us to see floaters, especially when peering at blank walls or the sky.This change sometimes causes it to pull on the retina.
If the force of the pulling becomes strong enough, the vitreous humor may actually separate from the retina. This is called a posterior vitreous detachment, as it normally occurs at the back (posterior) of the eye. If this happens suddenly and with a shower of flashes, it could indicate that it has caused a retinal tear, and it is important to have this evaluated immediately.
Retina
Located on the inside of the eye, the retina is the light-sensitive area located at the back of the eye that the lens focuses images upon, making vision possible. The retina is made up of 10 very thin layers. Within these layers are rods and cones that are used to detect color.
The retina is very fragile. A detached retina occurs when the retina is separated from the other structures of the eye. It typically happens during contact sports or as a result of trauma. A retinal detachment is a serious injury that requires immediate attention by an eye care professional.
Sclera
The sclera of the eye is better known as the "white of the eye." While we can only see the visible portion of the sclera, it actually surrounds the entire eye.
Scleritis is an inflammation of the sclera. It can cause intense eye pain, redness, and loss of vision for some people. It can also be associated with trauma or infection—more than half of scleritis cases are associated with an underlying systemic disease.
What To Prepare First: Basic Art Supplies For Drawing Cute Girl’s Eyes
 |
| Photo: My Modern Met |
1. Sketchbook
A sketchbook is an essential supply for those learning to draw. Whether you plan to take a drawing class or learn on your own, this item should be the first on your list. Sketchbooks can be used for drawing shapes, practicing composition, shading, and other drawing skills. Even if your primary interest is painting, a sketchbook is the perfect place to plan out a painting before working on other materials.
2. Graphite Drawing Pencils
Graphite pencils can be used to draw everything from the simplest of sketches to highly detailed drawings. They can be bought individually, or in sets. Sets are great for beginners because they have an assortment of pencil types for drawing and shading. The average six-pencil set will have a 2H, HB, B, 2B, 4B, and a 6B. These numbers correspond with the hardness of the graphite.
3. Kneaded Eraser
A kneaded eraser is a must-have supply for removing pencil marks. This special type of art eraser won’t damage paper or leave a residue behind. It can be molded into various shapes and used to erase large or small areas.
4. Art Pencil Sharpener
A pencil sharpener will keep your pencils sharp for your drawings. Metal hand-held sharpeners are easy to use and allow you to see the pencil tip as it's being sharpened. This helps prevent over-sharpening and broken pencil tips.
5. Ruler
A ruler is a necessary tool for drawing horizon lines, streets, structures, or anything else with straight lines. Choose a 12 or 18" (30 or 45 cm) ruler made with stainless steel or anodized aluminum. These types of rulers are easy to keep clean.
6. Watercolor or Acrylic Paint Set
Watercolor and acrylic paints are two of the best choices for those learning to paint. They're both water-based, so paint thinners aren't needed for painting or clean-up. Beginners can learn basic painting skills by taking a class, or from books, videos, or online tutorials.
7. Paint Brushes
Once you have paints, you’ll need some brushes. If you visit an art supply store, you’ll find many types to choose from: natural or synthetic bristle, long handle or short handle, and various shapes and sizes.
To keep things simple as you’re learning how to paint, choose a beginner’s brush set for watercolors or acrylics. Sets include an assortment of brushes for different painting techniques.
How To Draw A Cute Girl Eyes Tutorial
Step 1
 |
| Photo: Drawingforall |
So, we start a guide on how to draw cute eyes. Before drawing anything, we need to decide on the location of the object on the sheet of paper. In our case, we can outline the location of the eyes using two intersecting lines. The horizontal line will serve as a guide for the bottom line of the eyes, and the vertical line will indicate symmetry.
Step 2
 |
| Photo: Drawingforall |
In this short but important step, we will draw the upper borders of the eyes. Be especially careful when drawing these lines, as the size of the eyes depends on this action. Avoid pressing too hard on the pencil in this step.
Step 3
 |
| Photo: Drawingforall |
Now let’s draw two more smooth lines that will close the arcs from the previous step. This will form the basic outlines of the eyes. In this step, you need to carefully check the lines that we drew from the first step.
Step 4
 |
| Photo: Drawingforall |
We often say that the shape and position of the pupils shape the character and direction of the gaze. Therefore, in this step, we will draw the pupils that move towards the conditional nose. This will create an intent and cute look.
Step 5
 |
| Photo: Drawingforall |
As you know, the human eye has an auxiliary apparatus, which includes eyebrows, eyelashes, and other anatomical structures. In this step, we will draw in thick fan-shaped tightly spaced eyelashes. Notice how the eyelashes are curved and directed upward and laterally.
Step 6
 |
| Photo: Drawingforall |
This time we have created a really small lesson and we are already approaching the final. We will start this step by deleting construction lines. Then, with strong pressure on the pencil, we will circle the borders of the eyes and eyelashes. At the end of this step, we will paint over the pupil using dense intense shading. Pay attention to the white highlights. This is a very important detail indeed.
Step 7
 |
| Photo: Drawingforall |
Check again all the lines and all the shapes that you drew in this tutorial. Draw the final lines around the upper and lower eyelids. Use short strokes to outline the natural folds of the skin.
How To Draw Cute Girl’s Eyes Anime Style Tutorial
Anime eyes are almost always drawn bigger and wider than real eyes. This is especially so for female characters who often have larger and wider eyes than their male counterparts.
One thing that really sets female anime eyes apart from male are more prominent eyelashes (longer, thicker, and more of them). This is not always the case but it does tend to be so.
Step 1 – Draw the Outer Shape of the Eye
 |
| Photo: Animeoutline.com |
Start the drawing with the outer shape of the eye. In this case the eyelids/eyelashes.
Step 2 – Draw the Shape of the Iris
 |
| Photo: Animeoutline.com |
Draw the iris vertically stretched (compared to a real eye). Basically an oval with the top and bottom hidden by the eyelids.
Step 3 – Draw the Pupil
 |
| Photo: Animeoutline.com |
Inside the iris draw the pupil tracing the shape of the iris but smaller.
Step 4 – Indicate Dark Area at Top of Iris
 |
| Photo: Animeoutline.com |
Make a line towards the upper half of the eye that will indicate the darker area partially created by the shadow and the eyelashes reflecting in the eyes.
You can erase the line overlapping the pupil in the next step. The reason for drawing it all the way though like that is to make sure that both sides match up and that you have a nice and smooth curve.
Step 5 – Draw the Primary Reflection
 |
| Photo: Animeoutline.com |
Draw the main reflection area from the main light source such as an indoor light bulb, a fire, or the sun. You can erase the area of the pupil and shadow that is overlapped by the reflection.
The shape and color of the reflection can depend on the shape and color of the light source. Usually in anime you can simply leave the reflection white and give it a very generalized shape like a circle or an oval.
Step 6 – Draw the Secondary Reflection
 |
| Photo: Animeoutline.com |
This reflection will usually come from the light of the main light source bouncing off of a surface and will be smaller than the primary reflection.
Step 7 – Shade The Different Area of the Eye
 |
| Photo: Animeoutline.com |
Finally you can shade the different areas drawn in the previous step. If drawing on paper simply leave the reflections white.
Shade the eyelids which are also technically part of the eyelashes black. Shade the pupil black as well.
Finally shade the iris grey or any color you want the eyes to have.
Step 8 – Add the Outer Top Eyelid Eyelashes
 |
| Photo: Animeoutline.com |
It should be noted that you could stop at step seven of this tutorial and have a perfectly normal anime eye but since the tutorial focuses on female eyes we will add some eyelashes.
The first place you want to add the eyelashes to is the outer corners of the eye. Generally eyelashes (real eyelashes) sort of fan out around the eyelids so you can draw anime eyelashes in a similar way.
Next add some smaller eyelashes at the inner corner of the eye.
Since the eyelashes are fairly small you can also shade them as you draw them.
There is no need to add any in the middle as these usually tend to point forward and therefore visually sort of just merge into one shape.
Step 9 – Add the Bottom Eyelashes
 |
| Photo: Animeoutline.com |
Finally add some tiny eyelashes at the outer and inner bottom corners of the eye to have a finished drawing of a female anime eye.
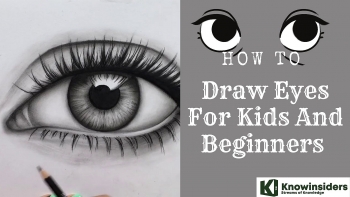 How To Draw Eyes For Kids & Beginners with Simple Steps How To Draw Eyes For Kids & Beginners with Simple Steps Drawing eyes is not easy for most beginners and kids, and if you are looking for a step-by-step guide, you have come to the right ... |
 How To Draw A Rose: Step By Step Guides How To Draw A Rose: Step By Step Guides Rose drawing can be difficult for many people who are beginners, and in the article below, we will guide you through how to draw a ... |
 How To Draw Anime For Beginners: Step-by-Step Guide How To Draw Anime For Beginners: Step-by-Step Guide How to draw anime if you are only a beginner? Read on our article and follow these simple steps. |
 How To Draw A Dog With Easy Steps How To Draw A Dog With Easy Steps Dogs are famously known as "man's best friend." Follow these easy steps to draw a dog. Have fun with your drawing! |